10 Brilliant Ways to Take Screenshot on a Mac
Last updated on May 24th, 2024 at 09:57 am
The Mac has been hailed as one of the best computers you can buy. Not only is it great for everyday tasks, and has a great battery life, but it also has a great display. This makes it a great tool to work on art projects and video editing.
Hence, taking screenshots on the Mac is a very useful feature for such projects. Not only does it make it very easy to share your work, but also because of the great display. The Mac, whichever one you have, is known for its amazing displays. Pictures displayed on it almost always look amazing. Screenshotting a display like that is its reward. Here are 10 great ways that you can take a screenshot on a Mac.
Keyboard Shortcuts
These are built into the operating system itself. Apple has programmed these methods into each Mac Pro, iMac, MacBook, etc. These shortcuts will get you exactly what you need without having to download extra programs. You also won’t have to make extra efforts to learn complicated commands.
Screenshotting the Entire Screen
This is the easiest thing to do. Simply press “Command-Shift-3” and you can take a screencap of the entire screen. This is the most straightforward and simple command which you can most commonly use. It will work in all apps, for all types of projects, and will take just a second.
If you master the keystrokes, you can take screenshots at key moments when a video is playing. It’s also very helpful when you need to edit entire screenshots and take out specific elements for a project
Custom Selecting the Screenshot With Your Cursor
The keyboard shortcut is “Shift-Command-4”. It allows you to turn your cursor into a crosshair. What this allows you to do is select the custom area you want to screenshot. You can drag the mouse over the area and simply let go. After you’ve done that, you can proceed in one of three ways.
a. Press and Release the Space Bar
This turns the crosshair into a little camera icon. This can be moved over an open window which can then be taken a screenshot of. The screenshot which is captured with this method will feature a white border around it. It will also feature a drop shadow.
b. Press and Hold the Space Bar
Press the space bar after you’ve highlighted an area and then hold it down. Then release it after which you can release the mouse button. This locks on the shape and size of the selection area. You can then reposition the area on the screen if you so wish. This is useful in situations where you’ve missed a little of the intended area by a few pixels. You can hold down the space bar to reposition the area and then release the mouse button to screenshot it
c. Hold Down the Shift Key
The same rules apply here. After you’ve dragged the mouse to highlight an area, hold down the shift key. Release it before you release the mouse pad. This locks in the sides of the selection area which have been made with the crosshair. The bottom edge can be moved up or down with the cursor. You can also toggle to the right side of the screenshot border by releasing and re-hitting the shift key. Remember to only release the mouse button once the selection is made.
This shortcut does require a lot of memorization if I’m being honest. It’s not always obvious what you need to do. However, for those that have great memories and need this sort of quick access, it’s theirs for the taking
Keyboard Shortcut from macOS Mojave

This is also a deceptively simple operation. The shortcut is “Shift-Command-5”. This opens a small panel at the bottom of the display which shows screen capture options. There are three in total. They allow you to capture the entire screen, a single window, or a selection. There are also two video recording buttons there which allow you to record the entire screen or a custom selection. To close this window, you can just hit the X in the corner or the Escape key.
This option was introduced in macOS Mojave and provides a lot more control over what you can do. If you’re not as fluent in your Mac keyboard shortcuts, you can use this as a command center of sorts
Further Options
There is also an options button on the right side which allows you to choose where to save the screenshot. It can be on the Desktop, in the Documents folder, the Clipboard or the Mail, etc. There is also a 5-10 second delay which allows you to line up items that can disappear when you engage in the screenshot tool.
There is also little show floating thumbnail option which shows you a preview of the screenshot you’ve just taken. All these little bells and whistles take care of the entire process, making it a breeze. If you want to turn off this floating thumbnail, you can do so as well. Lastly, there is an option to keep the mouse pointer in the screenshot or just get rid of it. Hence, you don’t need to worry about dragging your cursor to the side when you’re taking the shot.
Annotation Tools
If you like the floating thumbnail, then you’ll love that it gives you access to markup tools as well. These will help to annotate your Mac screenshot. Hence, when you’re creating a tutorial or if you want to communicate something specific, you can through this.
Just click on the floating thumbnail to open up Markup View. This will give you access to options that will save the screenshot, share it with other programs, and annotate it, etc. There are options to put in shapes, text, arrows, etc, as well.
This is like the complete Mac shortcut for screenshots. If you’re not that well adjusted with the others, use this as the default. It’ll save a lot of time, and give you access to everything you need.
Capturing Timed Screenshots
Yes, there are ways to time your screenshot on a Mac without downloading a separate application. There better be if you’re paying thousands of dollars for it. There is a built-in app called Grab for this specific function. The app can be found in the Launchpad.
All you need to do is open Grab, go to preferences and select the Mouse cursor you want. Then you can open the Capture menu and choose a screen, a window, or a selection, or a timed screenshot. The final option will give you the ability to time your screenshot to the second.
It usually allows you to start a 10-second countdown. This allows you to shift things around, open up several menus or hover around a button for a tooltip window. You can get all that with a screenshot that you wouldn’t normally get with a keyboard shortcut.
Using the MacBook Pro Touch Bar
The Touch Bar on the MacBook Pro is a thing of beauty. It takes the place of the traditional function keys, hence giving you a lot of room to work with. You can simply tap on the options as they appear without having to remember the functions. It’s even more intuitive than when the functions are printed on with little symbols. In those cases, you can’t see the symbols when you’re working in the dark.
First, open the keyboard preferences and Click: Customize Control Strip. This option is at the bottom of the window. This will show all of the options which are available to use on the Touch Bar. You can click and drag the camera icon to the Touch bar and save changes. This will give you a one-tap shortcut to capture everything on the screen.
As soon as you tap the camera button, the cursor will turn into a crosshair. Hence; you can select any part of the screen. From here on in, the same rules apply as for the previous shortcuts. You can use the shift key or the space bar to customize the screenshot or the floating preview to annotate.
Skitch
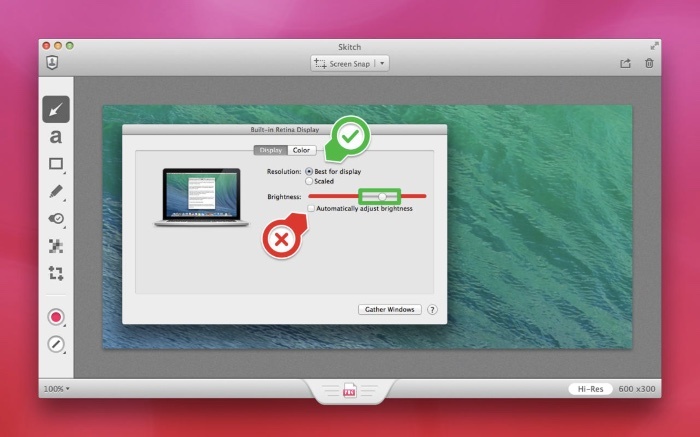
Skitch is one of the best image annotation apps around. As a screenshot app, it has all the features that you will need for a Mac. You can take custom screenshots, window screenshots, etc. However, where it shines is the markup options and the insertion of shapes and text.
SnapNDrag
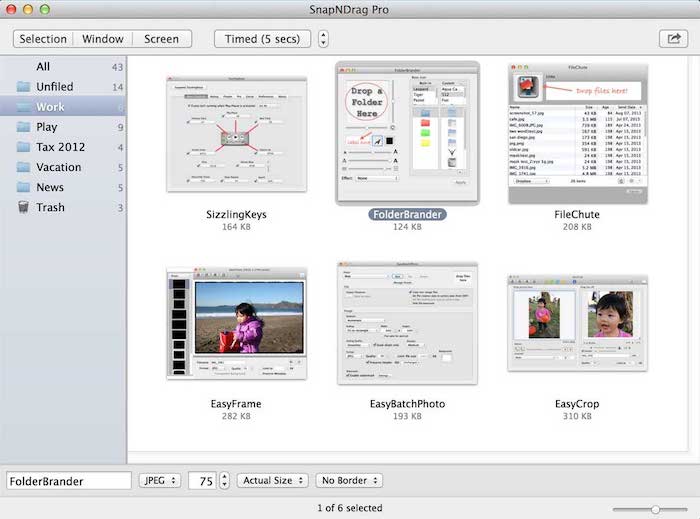
The library in SnapNDrag is the best. It can capture screenshots to the Desktop or other directories. However, its default is the library. This avoids the cluttering up of your folders. Also, you can take multiple versions of the same screenshot and choose the best one to export. You can do this in the image format of your choice and make many different types of screenshots. Timed screenshots and instant screenshots are also available.
Lightshot
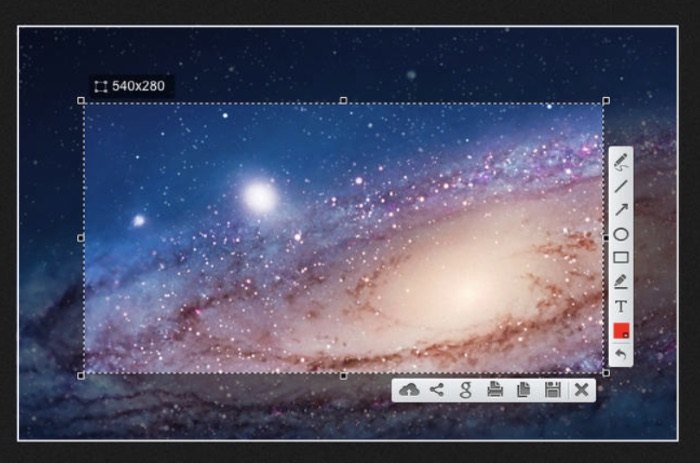
Lightshot is a more limited tool but has great functionality. Users can select their screenshot with a drag tool. They can also use a toolbar to annotate the screenshot and save it to their hard drive or an online utility. This utility, called “prntscr.com,” is public storage space. If you need a utility to create annotated screenshots, this is a great barebones version that won’t trouble you.
Snagit
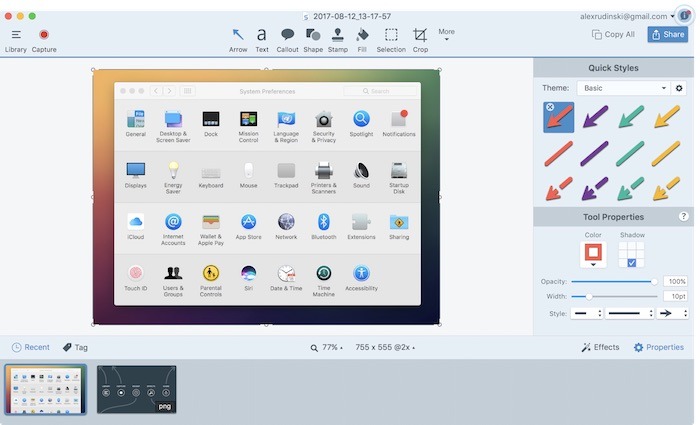
Snagit is a professional screenshot utility that costs $50. Hence, you may not want to download it if you’re happy with the bare bones utilities you have now. However, Snagit delivers for the price. It’s perfect for users that want to create screenshots constantly.
You can get a 15-day free trial to try out all the facilities before committing fully. It includes annotation options, timed screenshots, a full array of tools for customizing screenshots, etc. the kicker is that it also has tools to share images over social media. That’s something that digital artists who have social media accounts will appreciate.
Snapz Pro X
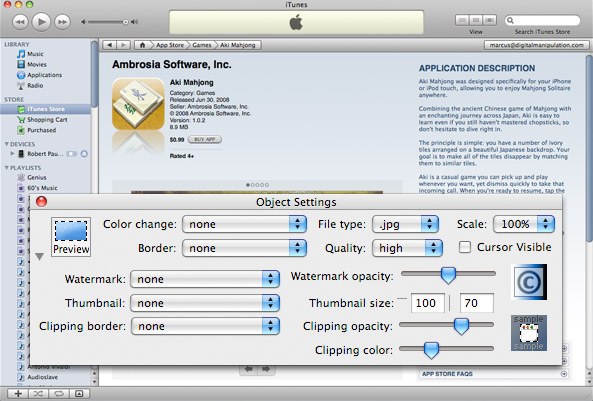
Long-time Mac users may remember this as the default app they used to take a screenshot on a Mac with. Snapz Pro X is the favorite of most old school Mac users and many fondly remember the first version. Now in its tenth iteration, it is considered to be one of the oldest screenshot apps still in operation.
The robust screenshot capability aside, the app can even create video from any part of Mac’s screen. It can capture system output and microphone input for a full-featured video. Hence, it’s a great tool for making video tutorials.
However, you may want to hear the full price before you commit. This bad boy costs $69 for the full license. Hence, if you want to commit to it, think wisely. If you’re making tutorial videos constantly, then it may be worth it. However, the other options will suffice if you’re more of a casual screenshot taker.
Bonus: Capturing a Video on the Mac
There is an option for a screencast tool in the built-in QuickTime app. You can open the app and then go to File>New Screen Recording and then press the record button. You can save the screencast as a video or trim it down as you please. That’s it. Pretty simple, right?
With these great shortcuts and programs available to take a screenshot on a Mac, you’ll never run out of options. You can use them in projects, tutorial videos, and even in presentations. Live chat with us


