How To Change Menu In WordPress
Last updated on April 11th, 2025 at 09:34 am
The fact that you are here, we suppose that you already have a WordPress website running. But, it is not sufficient enough to grab visitors’ attention, let alone convert them to long-time customers, right?
Let’s do a dry run!
- A well-designed WordPress website
- Significant plugins for improved functionality
- Alluring themes to attract users
- SEO strategies optimized
It seems everything is updated. With everything rising high, the bounce rate too is also scaling upwards. So, what’s wrong?
Why is that your website’s bounce rate is so high, even when you have all elements right?
Have you given a thought about the navigation menu? Like, is your website guiding the users perfectly? Or, do you find room for error?
Odds are, your WordPress website lacks a significant menu. This is the reason that even though your website witnesses decent traffic, it fails to retain them or convert them.
But what is this navigation system or a WordPress menu?
WordPress Menus
WordPress menus or specifically the navigation system of your WordPress website is a map that guides the visitors to reach where they desire to. It is the list of items displayed in the most significant manner acting as the staircase to accessing different elements of the website.
Why Do You Need WordPress Menus?
The above suggests that if your website lacks an efficient menu system, users visiting your website wood wander around, only to find nothing and leave the website. In fact, it might also happen that they switch to one of your competitor’s websites, benefitting them. Of course, you wouldn’t want this to happen. What should you do?
You are well aware of the solution. In case, you find creating menus a difficult task, don’t worry we got your back. Walk down the article to uncover the steps to create a WordPress menu.
Before that, let’s see a few things that you need to follow while creating WordPress menus.
Tips for Creating Effective WordPress Menus
- Keep it simple: Menus should make navigation easier for your visitors. Avoid overcomplicating the structure, as it defeats the purpose.
- Avoid clutter: Don’t overload your menu with unnecessary pages or links. Only include the most important ones.
- Prioritize key links: Add links to pages that users are most likely to visit, such as About Us, Contact, and Product pages.
- Include a sitemap: A sitemap not only helps search engines index your site but also assists users in finding pages easily. It reduces the chances of “Page Not Found” errors.
- Place menus in multiple areas: Menus should be easily accessible from different parts of the site. Common placements include the header, sidebar, and footer.
- Add a search bar: Even with a well-structured menu, users might not find what they need. A search bar provides a quick way to locate content.
All good? Let’s move ahead to see how can we create WordPress menus
How to create WordPress menus?
WordPress has an excellent menu manager that gives WordPress admin the ease to create and manage menus. You can also integrate drop-down menus using the drag-and-drop WordPress menu manager
WordPress has a built-in Menu Manager that makes it easy.
- Login to your WordPress Admin Dashboard.
- Go to Appearance → Menus.
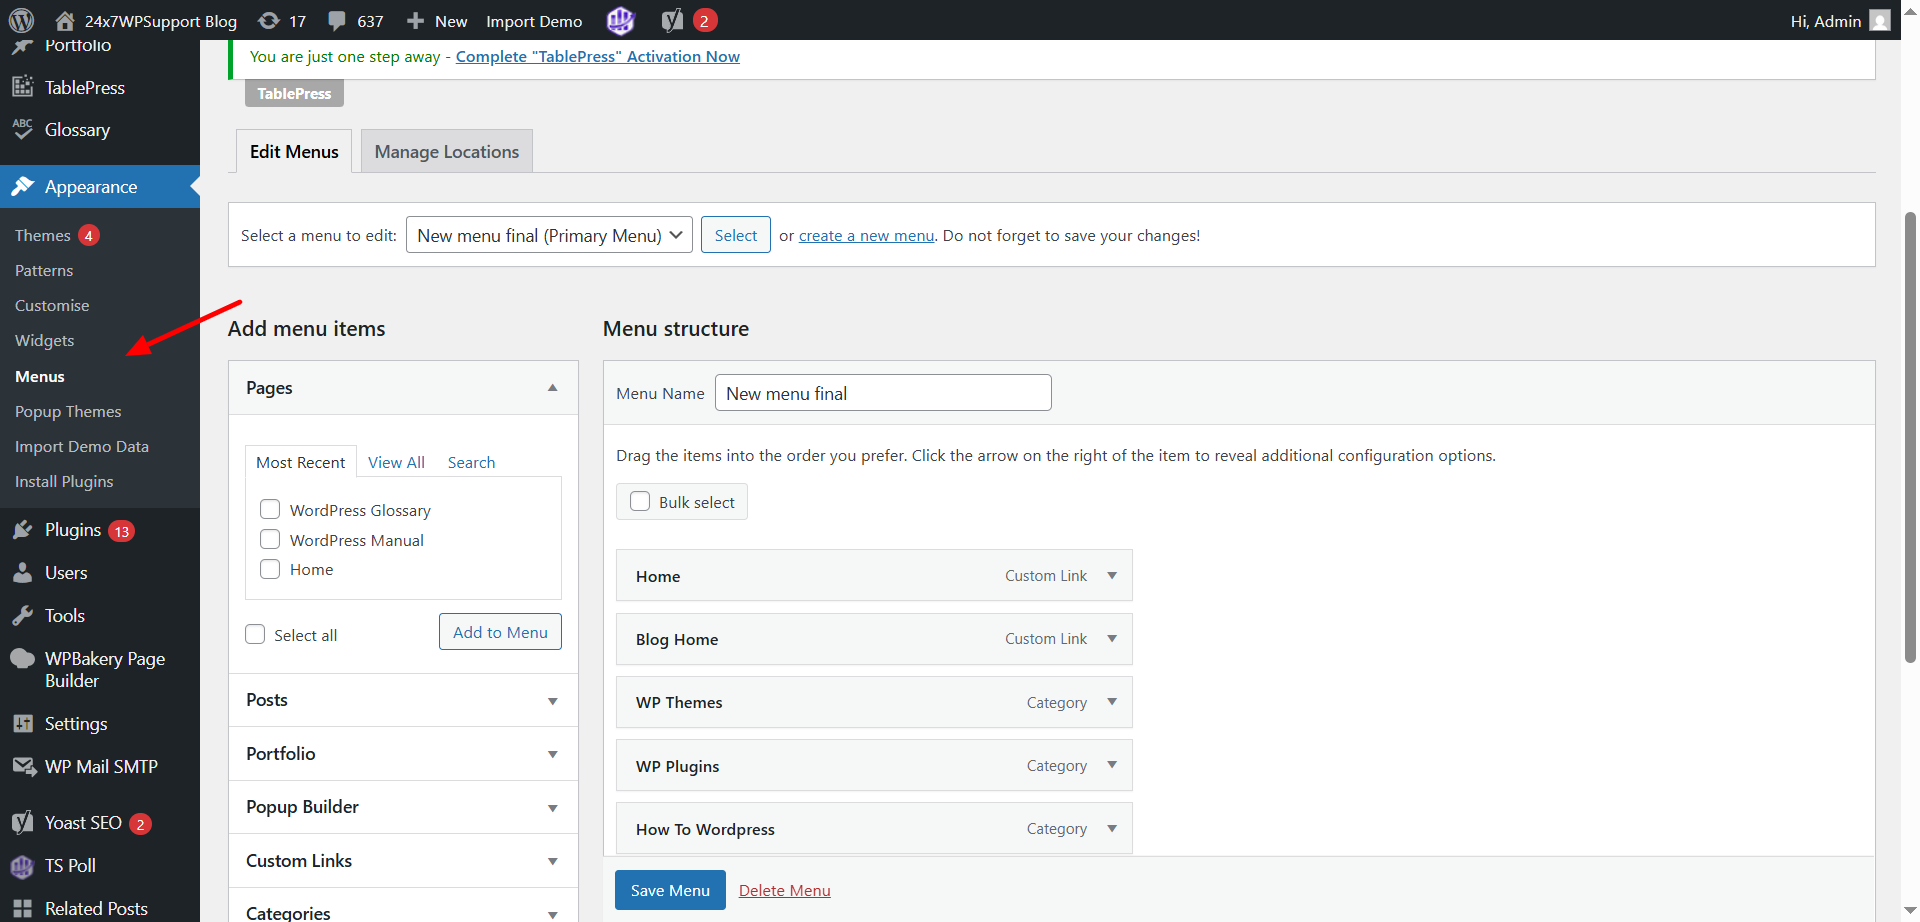
- Click Create a New Menu, give it a name.
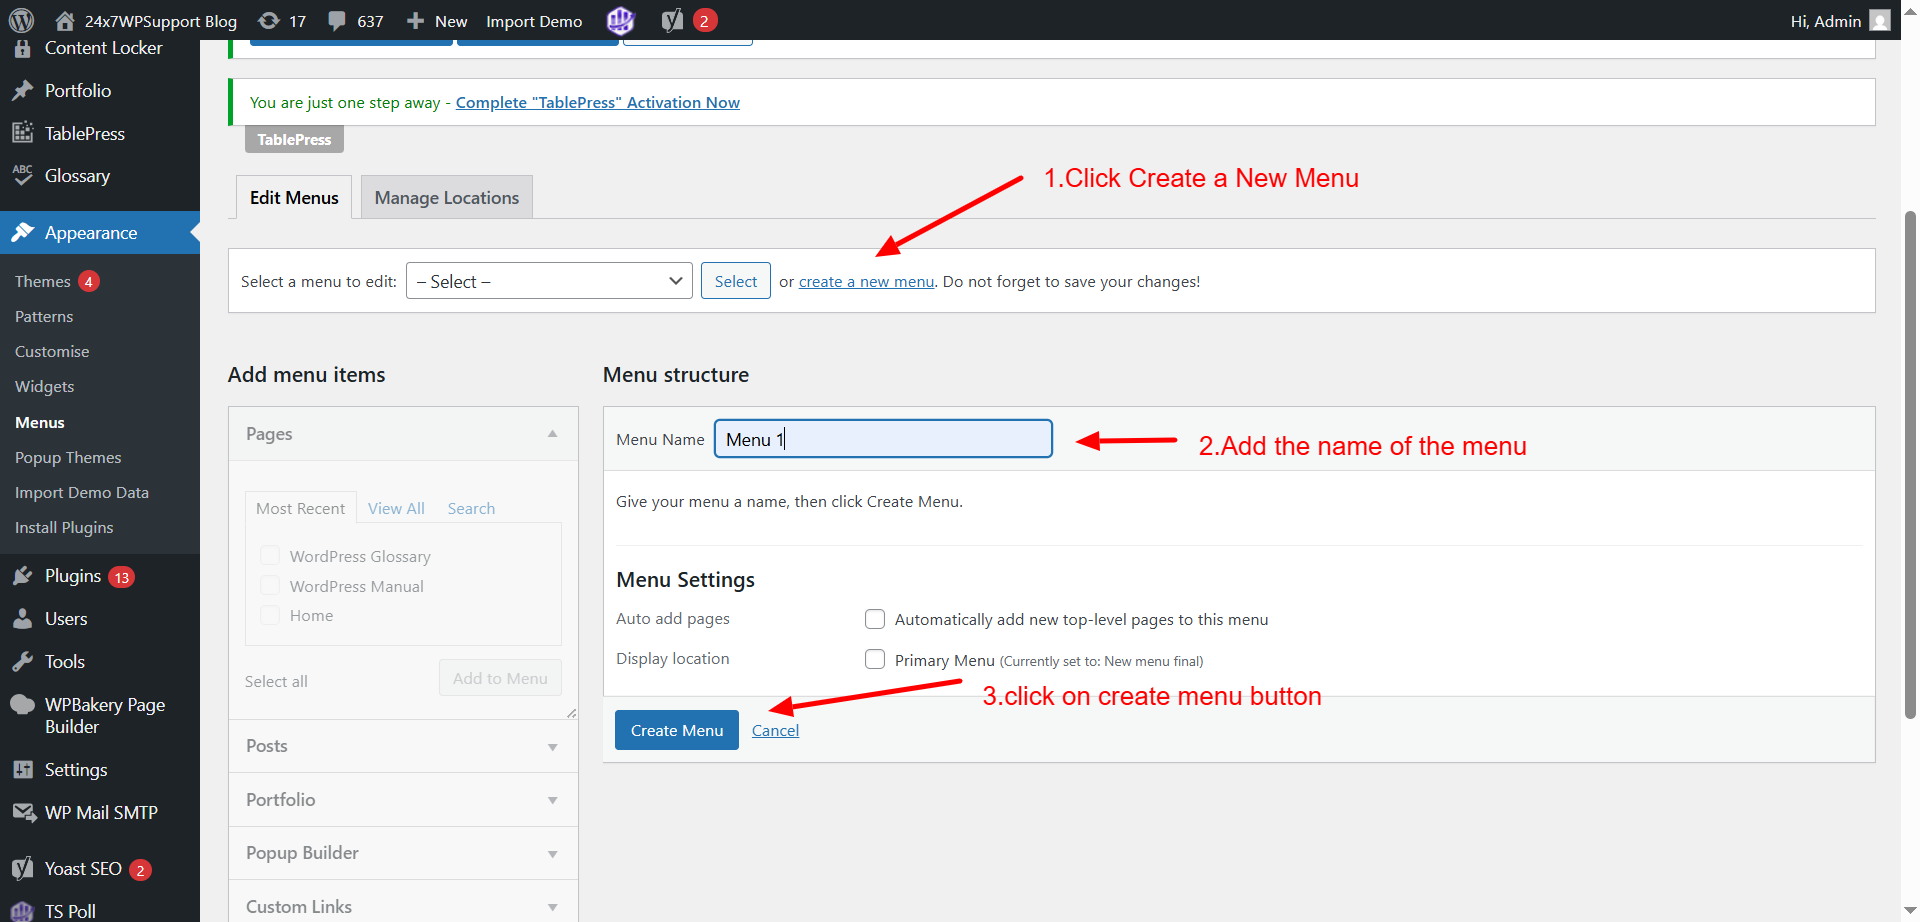
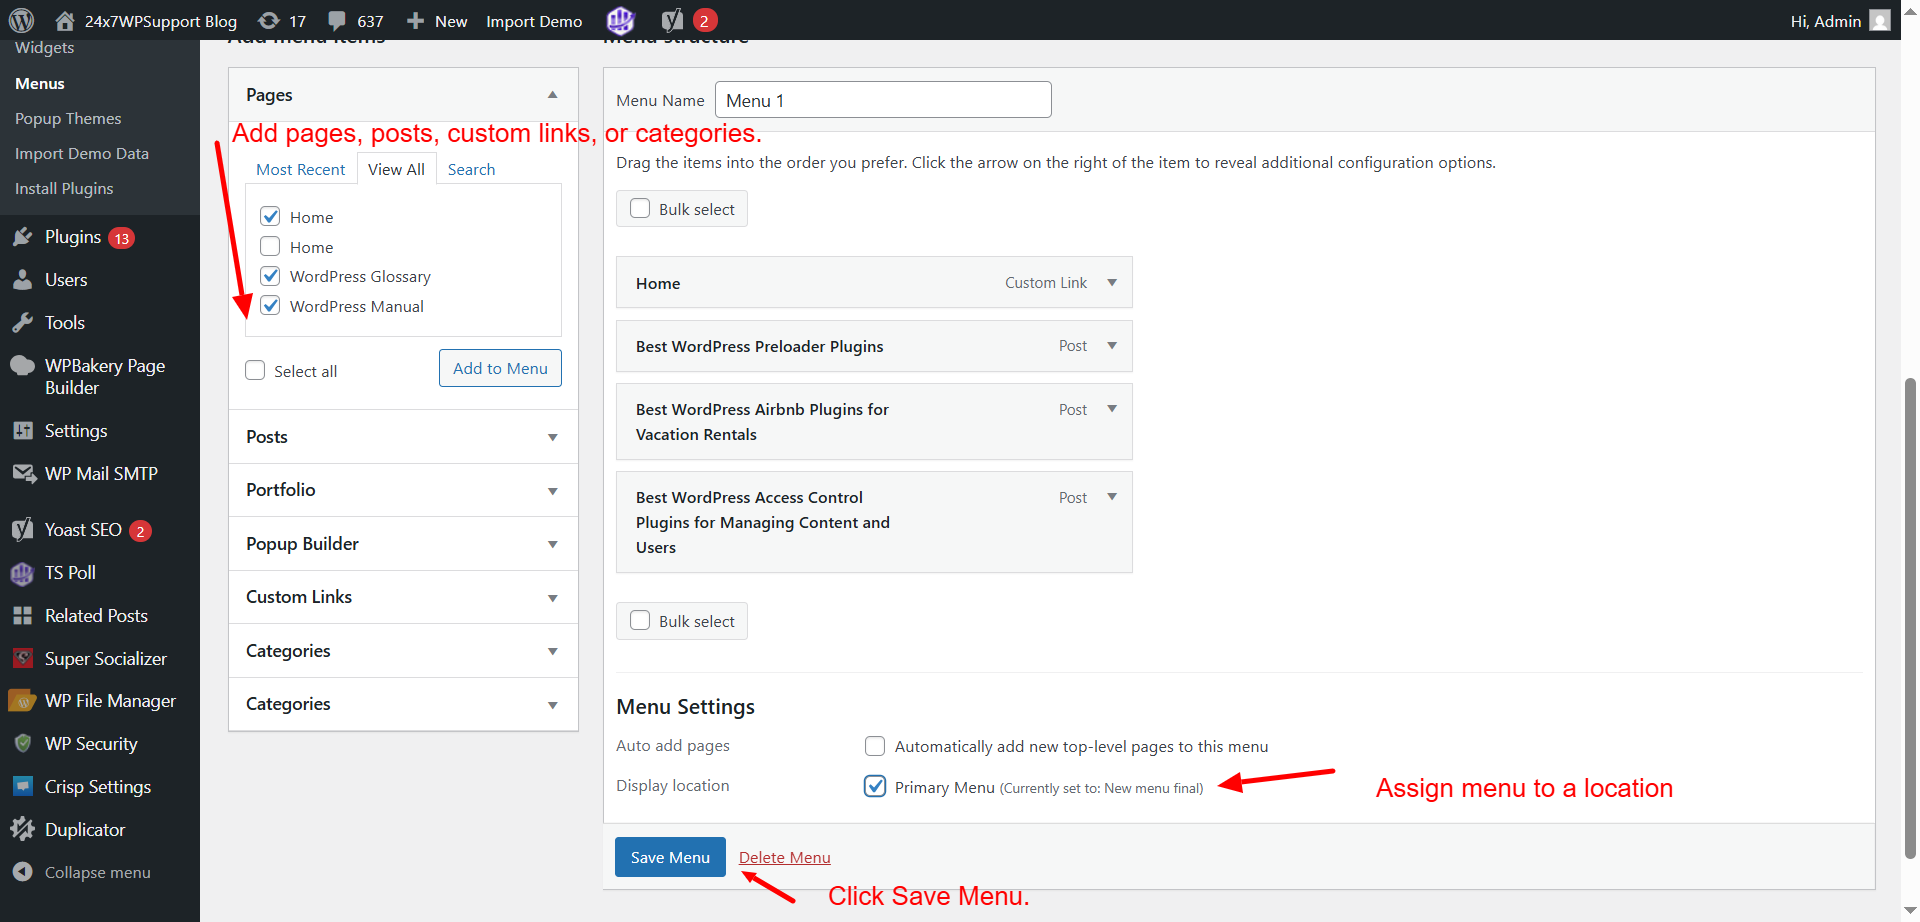
- Add pages, posts, custom links, or categories.
- Drag and drop to reorder items or create sub-menus.
- Assign menu to a location (Primary, Footer, etc.).
- Click Save Menu.
See, it is so simple!
1. Understanding Menus in Different WordPress Themes
WordPress menus work differently based on the theme you’re using.
Classic Themes:
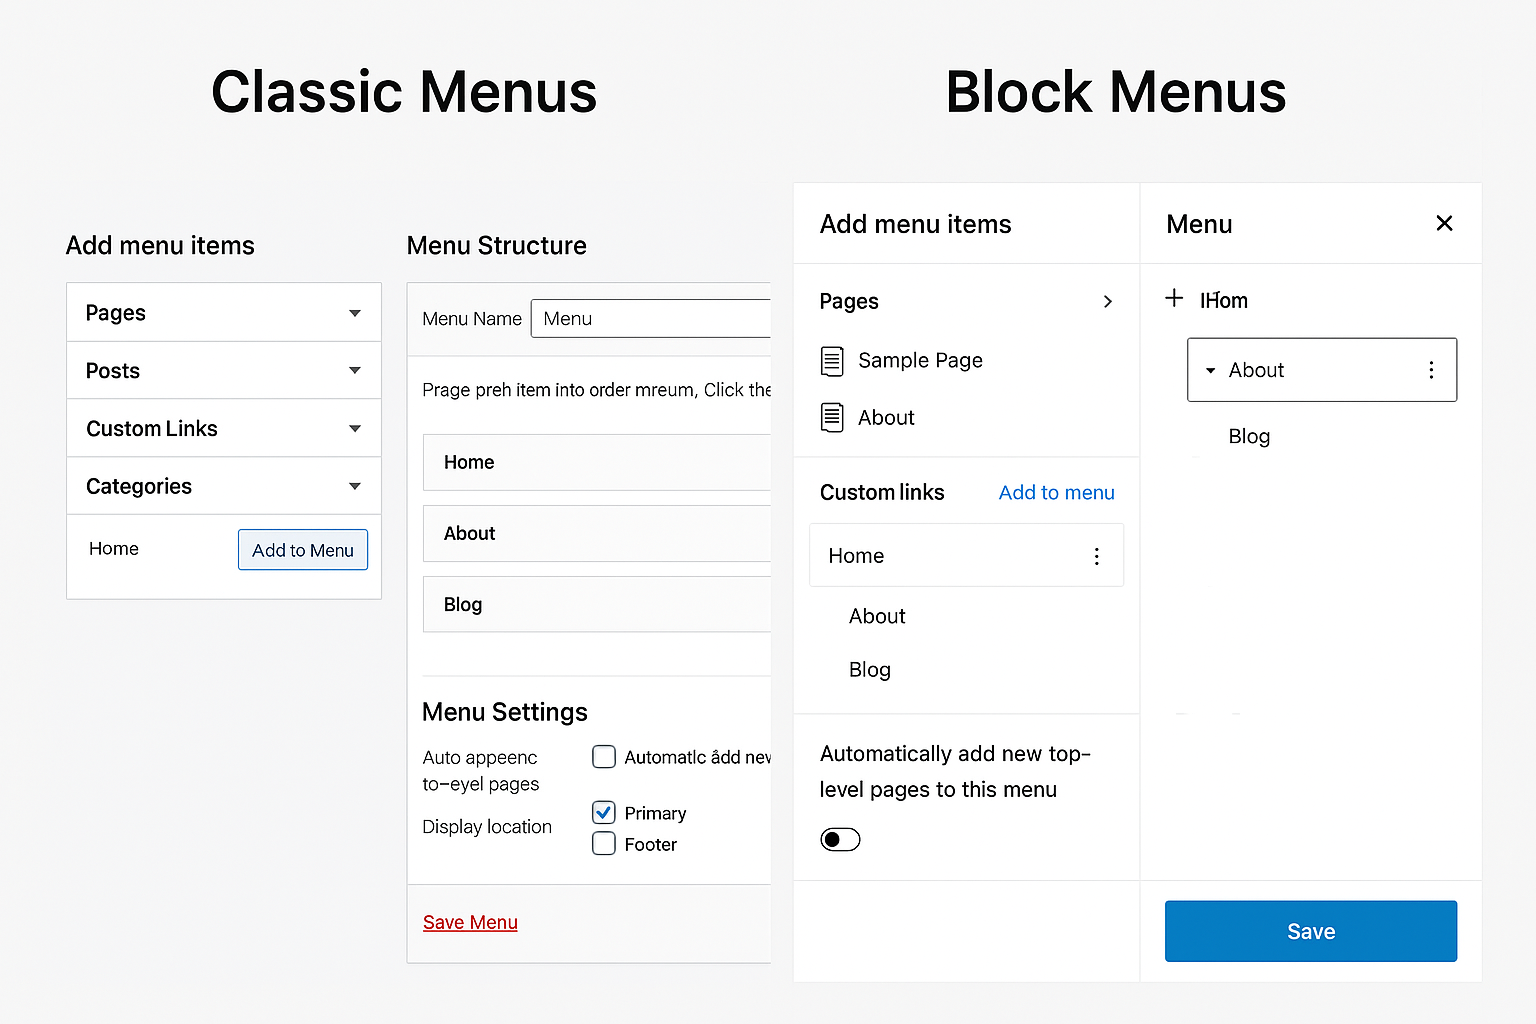
Go to Appearance → Menus in your dashboard. From here, you can add pages, posts, custom links, and blog categories. Assign the menu to different locations like the header, footer, or sidebar.
Block Themes (Full Site Editing):
Navigate to Appearance → Editor → Navigation Block. You’ll manage menus inside the block editor. Menus are part of the overall template layout and not a separate screen. You can easily add or remove links with the block editor tools.
👉 
2. Adding Different Types of Menu Items
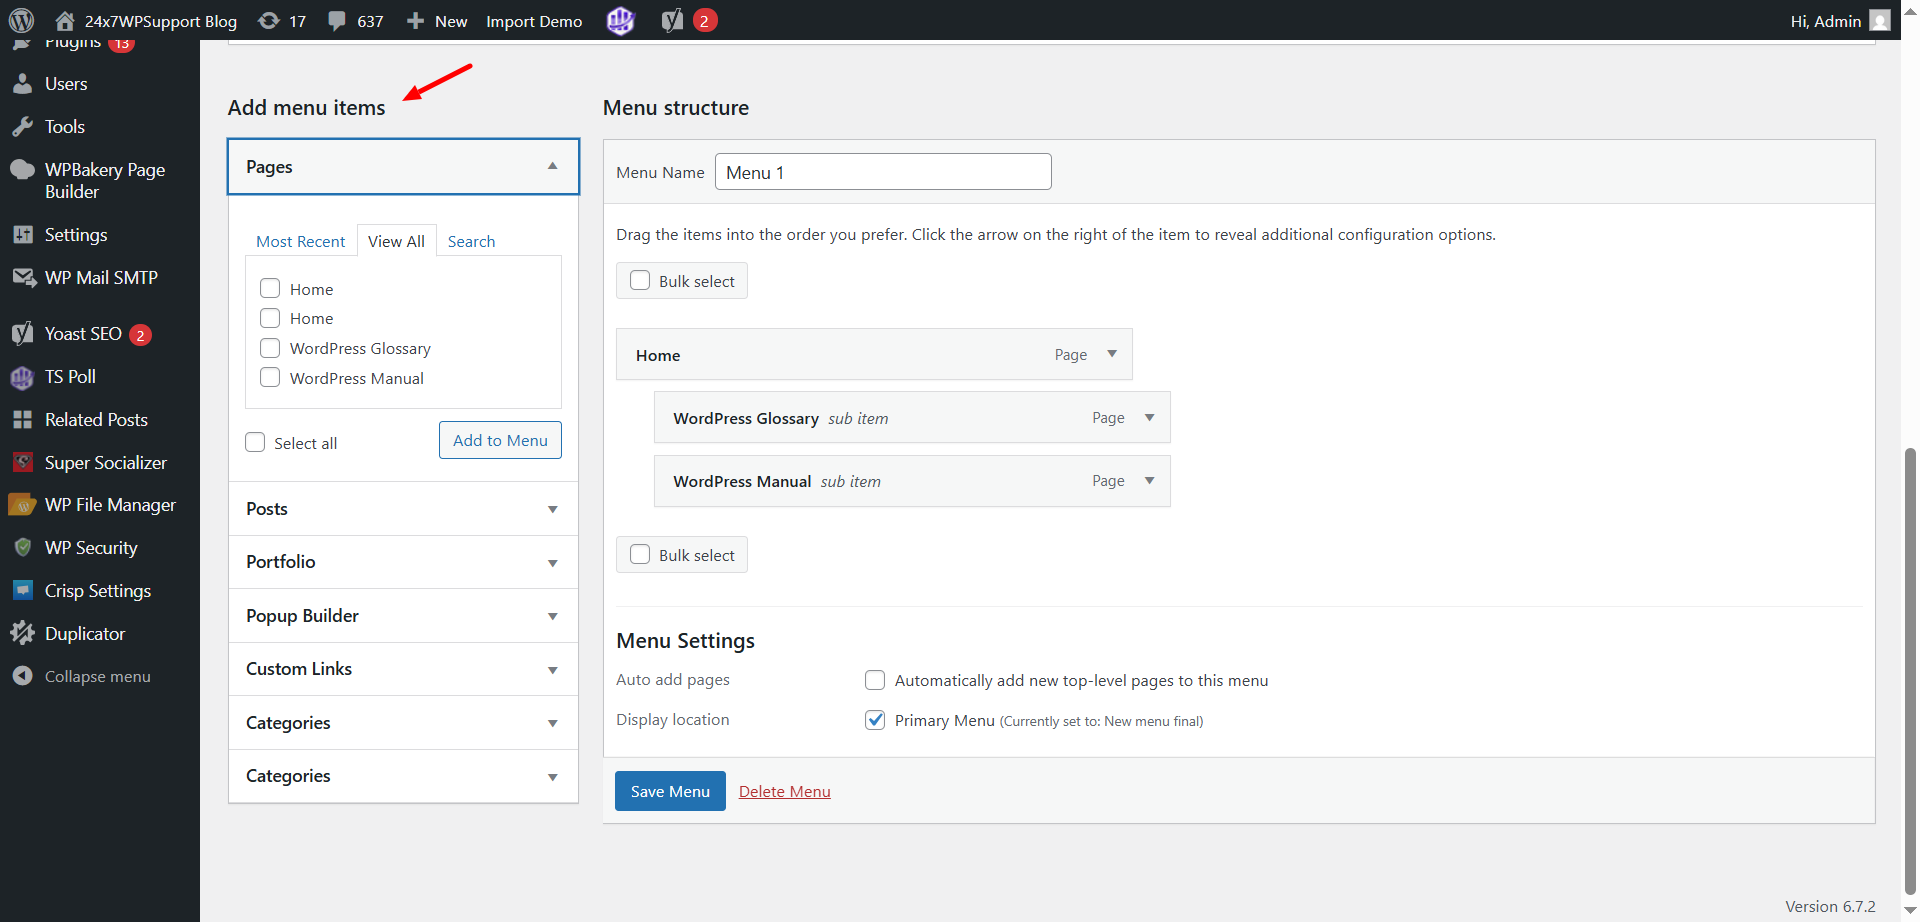
You can add various types of links to your menu. These include:
- Pages like Home, About, and Services
- Custom links to external websites or anchor links on the same page
- Categories or tags for blog post navigation
- WooCommerce pages like Shop, Cart, and Checkout
This allows you to create a flexible menu tailored to your website type.
👉 
3. Creating Dropdown or Mega Menus
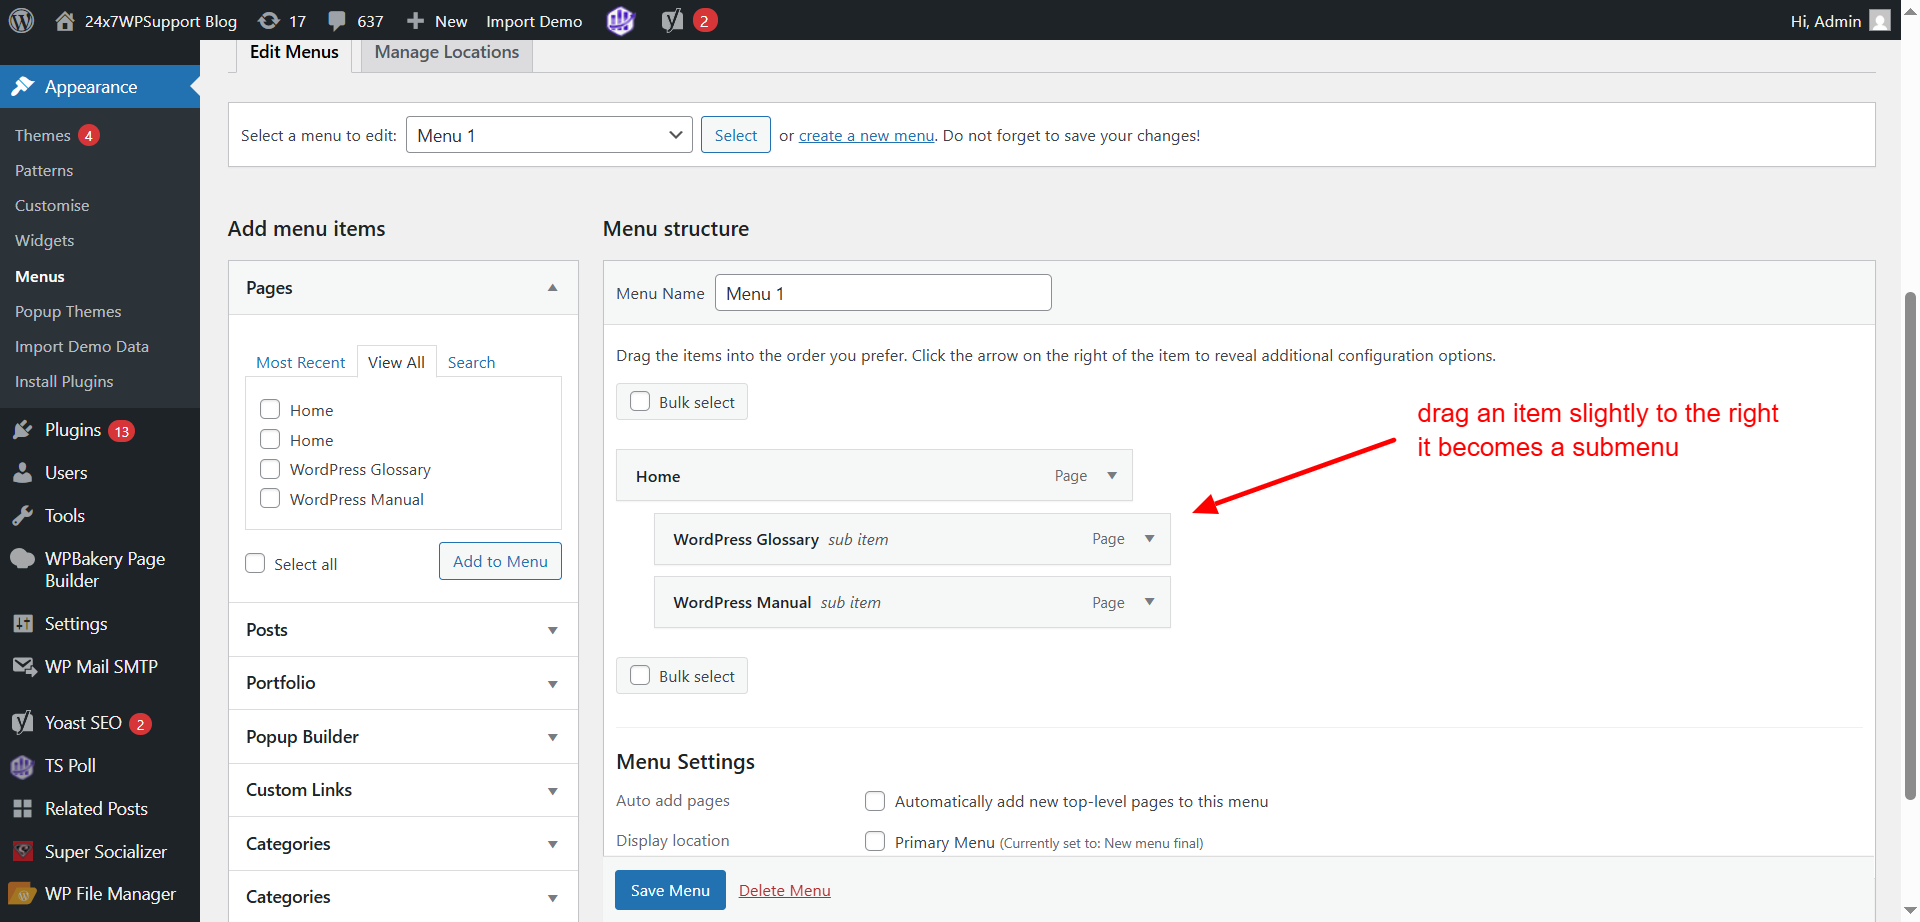
Want to show sub-menus under a parent item? Simply drag an item slightly to the right—it becomes a submenu.
To create advanced Mega Menus, you’ll need a theme that supports it or use a plugin.
Tips to remember:
- Keep dropdowns short and simple
- Avoid more than two levels for better mobile usability
👉 
4. Assigning Menus to Theme Locations
After creating your menu, you need to assign it to the right location. WordPress themes allow you to set display positions like:
- Header
- Footer
- Mobile Menu

Once assigned, click Save and preview to ensure everything looks good.
5. Optimizing Menus for Mobile
Most modern themes are responsive. That means your menus will automatically adapt to smaller screens.
You’ll often see a hamburger icon for mobile menus. Always test this using your browser’s responsive mode or a mobile device to check how the menu works.
6. Using Widgets or Custom Code
If you want to place a menu in your sidebar or footer, use the Navigation Menu widget.
For developers, menus can be added using this PHP code:
<?php wp_nav_menu(array(‘theme_location’ => ‘header-menu’)); ?>
This method is great for adding menus directly into template files.
7. Troubleshooting Common Issues
Running into problems? Here are common fixes:
- Menu not saving? Your server may have a limit on menu items
- Menu not showing? Check if you assigned a display location
- Dropdown not working? There might be a JavaScript or CSS issue
- Changes not visible? Clear your WordPress and browser cache
8. Recommended Plugins for Advanced Menus
To take your menu to the next level, try these plugins:
- Max Mega Menu – Adds animated mega menus
- WP Mega Menu – Drag and drop menu builder
- QuadMenu – Developer-friendly with advanced controls
- Responsive Menu – Best for creating mobile menus
📌 9. Conclusion & Call to Action
If you’re still facing issues with your WordPress menu or want expert help customizing it, contact the 24×7 WP Support team. We’re available 24/7 to support you!
📞 US & Canada: 888-818-9916
📧 Email: info@24x7wpsupport.com
🌐 Visit Us Online


