
How To Import HTML Into WordPress
Last updated on September 29th, 2021 at 10:49 am
When you would have first started with an online website, it was possibly based on HTML. But as days passed and technology evolved, there popped a concept which we call as WordPress.
The onset of WordPress, as a dynamic portal, opens new doors for website owners to migrate from all text webpage to a much more decorated and eye-catching online site. Also, WordPress eliminated the need to create markup, instead leave the task on to the content management system, in this case, WordPress.
This doesn’t mean that HTML web pages have turned obsolete. They do exist but the pace of migration from an HTML page to a WordPress website has been increasing, dramatically. In case, you have been wondering how, let me save you the pain of surfing Google to find how to import an HTML page to a WordPress website.
Before we get into the details of the process, let’s find out who all would ever need to import an HTML page into a WordPress website.
Why Do You Need To Import HTML Page to WordPress?
Though people today are in the habit of creating a website using the CMS platform, there thrives a possibility where you might have an old HTML page and wish to import the pages of the same within the WordPress website.
In such a case, you would need to import them rather than simply adding them within the site. The fact that WordPress undertakes SEO specific URL structure, simply uploading the page would direct users to a 404! Page not found an error.
So, you would need to follow the steps given below and import your HTML page without getting the error.
Who Would Need To Import?
- Users that wish to import content from an HTML page.
- Users that have an old HTML website and seek to upload images, post or videos from the website.
- Users that want to integrate static HTML pages within the WordPress website.
Given that you are either of the above, let’s see how to import an HTML page into a WordPress website.
How to Import HTML Page in A WordPress Website?
The process is simple and all you need to do is download, install and activate the HTML Import 2 plugin. Also, you would need to make some changes. Don’t worry! We will guide you through the process. So, let’s get started.
- To start, you would need to first login to the site.
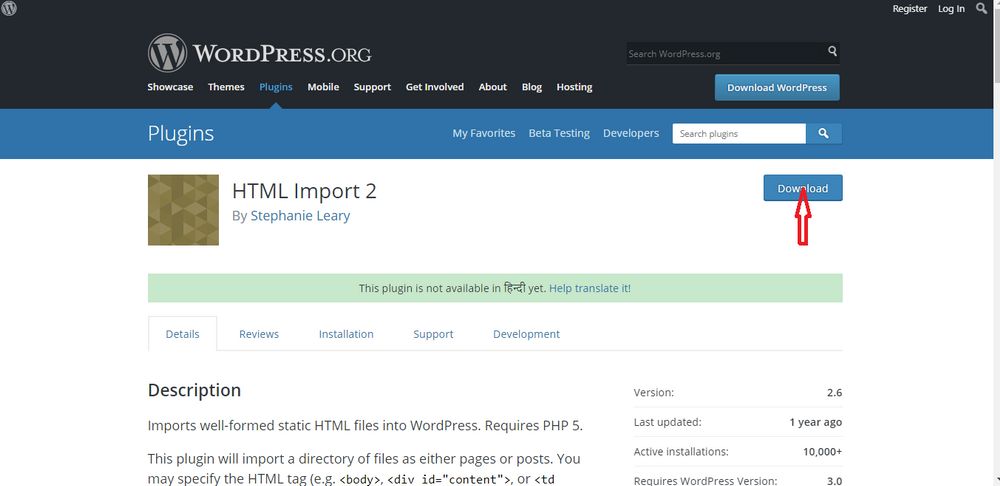
- Now, visit the page: WordPress.org/plugins/import-html-pages/ download HTML-import 2 plugin.
- Click on download to download the plugin
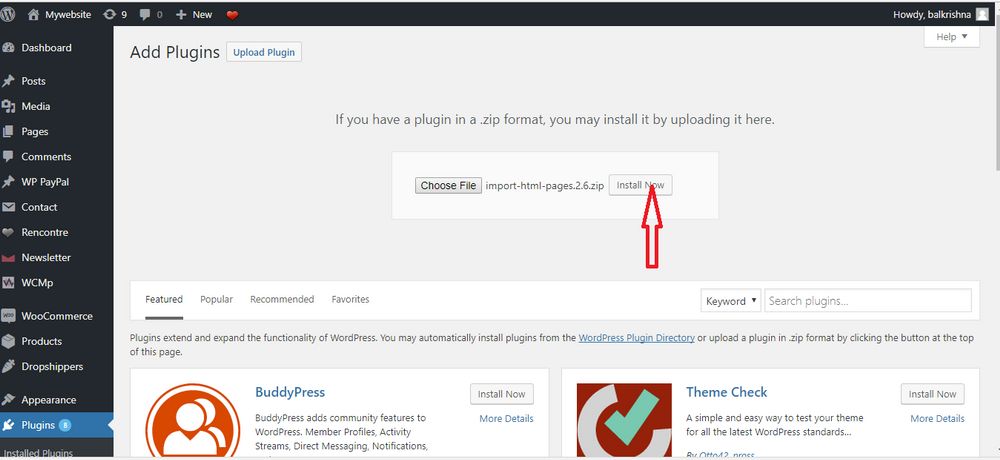
- Next, move to the admin dashboard.
- Here, click on the plugin -> Add New.
- Choose the downloaded file and upload the plugin.
- Click on activate the plugin
- Now, we need to import the files.
- To import the files or posts that you need to import, Go to Settings – > HTML Import
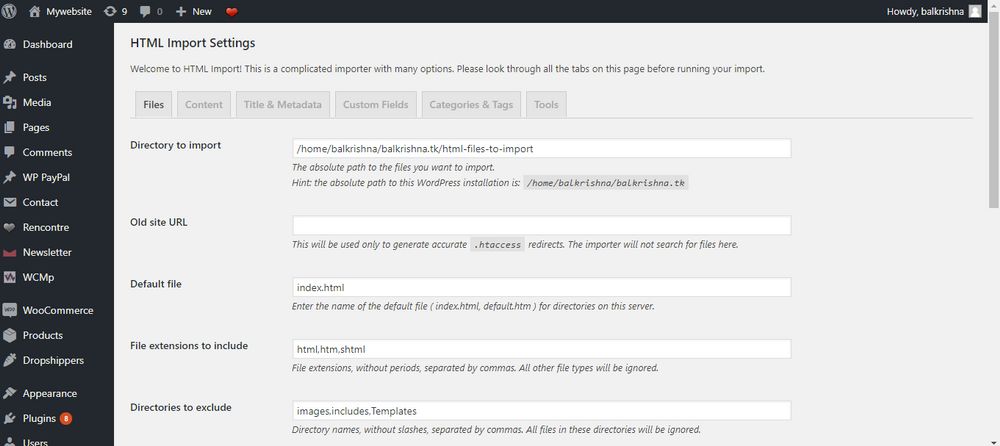
- Configure the screen as follows:
Directory to Import
In this, you need to enter the path of the file where you have copied all your existing files.
Old site URL
In case, you want users to be redirected to the older website, this tab will help you do so. Enter the URL of your old website and leave the rest to WordPress.
Default file
This is the default file for directories located on the old site. Generally, the default file is index.html.
File extensions to include
Here, you need to add the extensions of all those files that you want to import within the WordPress website.
Directories to exclude
For the files or the directories of the older website that you have no intention to embed or import, you can specify them here. WordPress will exclude them.
Preserve file names
Click on this checkbox if you want to have the plugin automatically use file names linked with the new URL. For instances where the title is too long and used by the importer to create the slug, this checkbox seems apt.
Content Settings / Title Settings
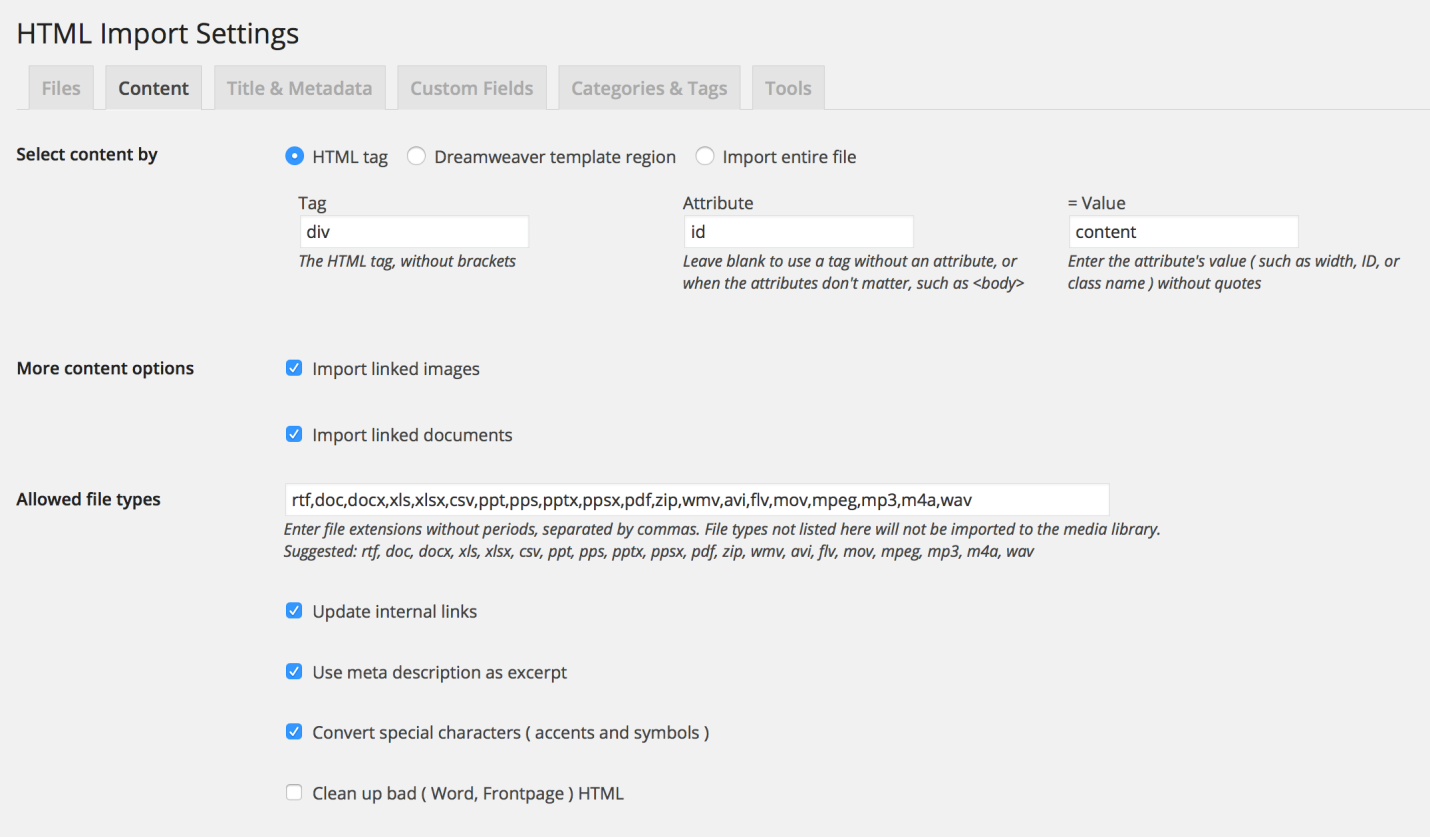
Select content by – You can either select the HTML tag or Dreamweaver
Tag – Here, enter the HTML tag without adding brackets. Example: div
Attribute – In case, you wish to use a tag without actually having the attribute or for instances where the presence of an attribute doesn’t affect, leave this blank. Example: Id
Value – Here, you would need to feed in the value of the attribute (such as the width, ID, or the class name) eliminating quotes Example: content
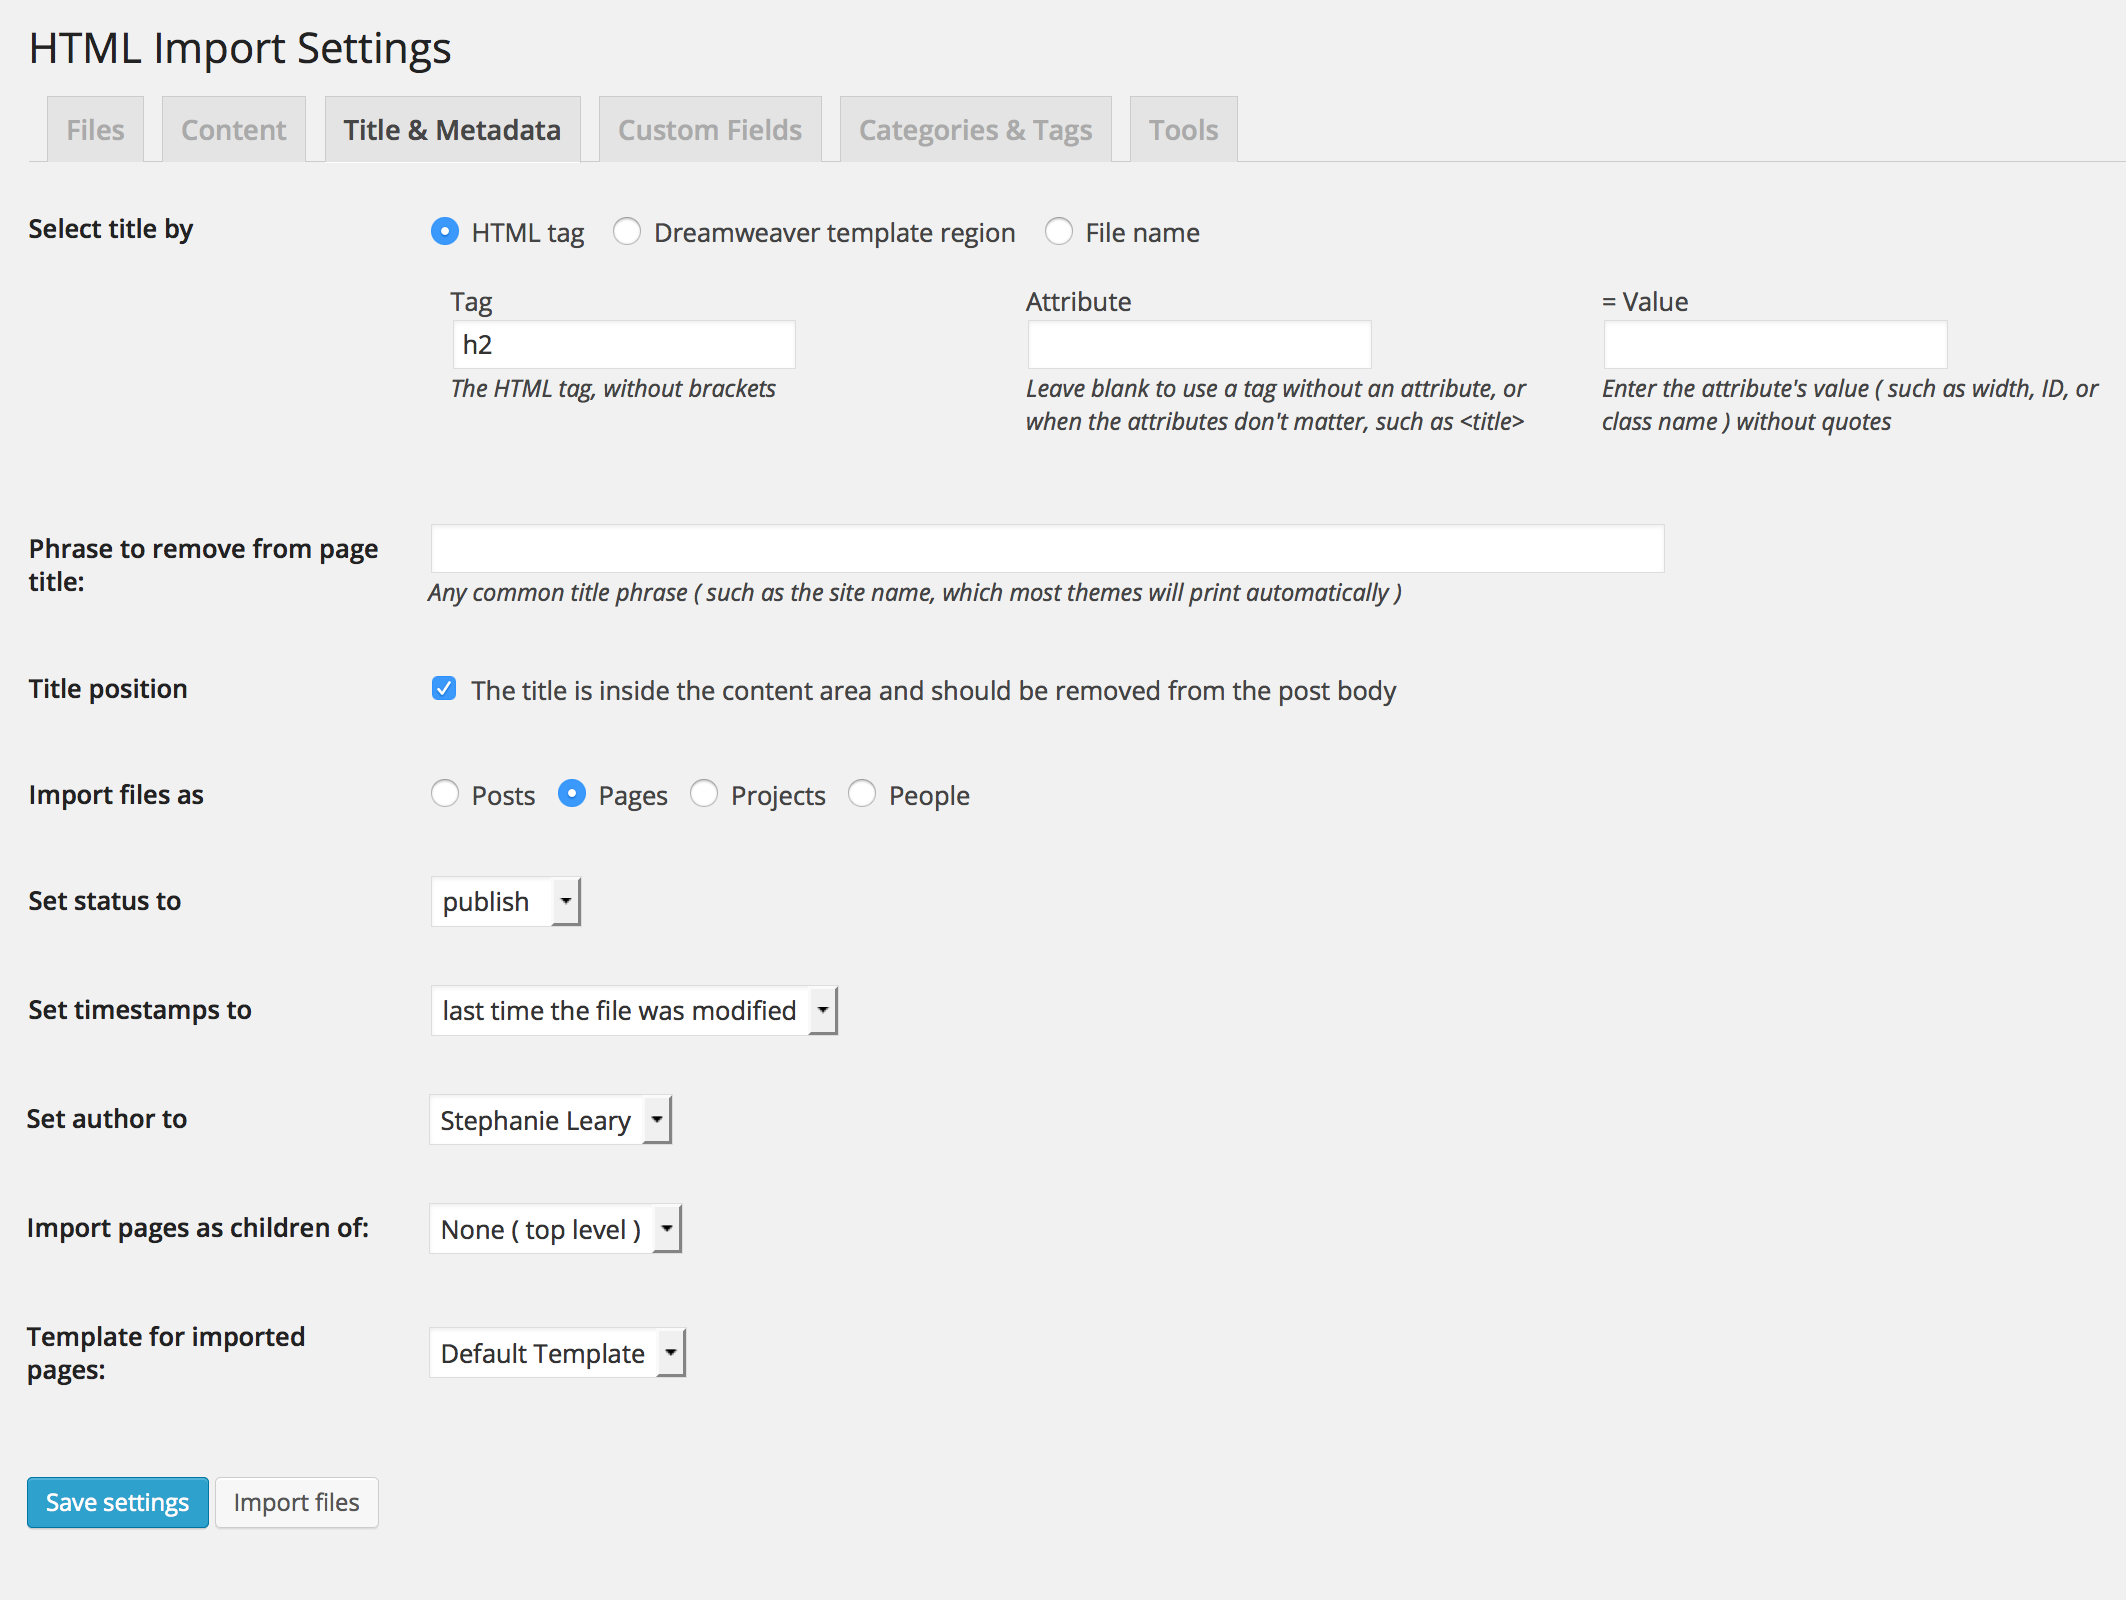
Import files as – Posts, Pages or Products
Set status to – Publish, draft, private or pending
Set timestamps to – time when the file was published last
Set author to – Details of the author. Select the author from WordPress dashboard
Import pages as children of None if there are no child pages.
Template for imported pages: Default page template or the page template that your theme offers.
- After you have finished the above, click on import files and import the files.
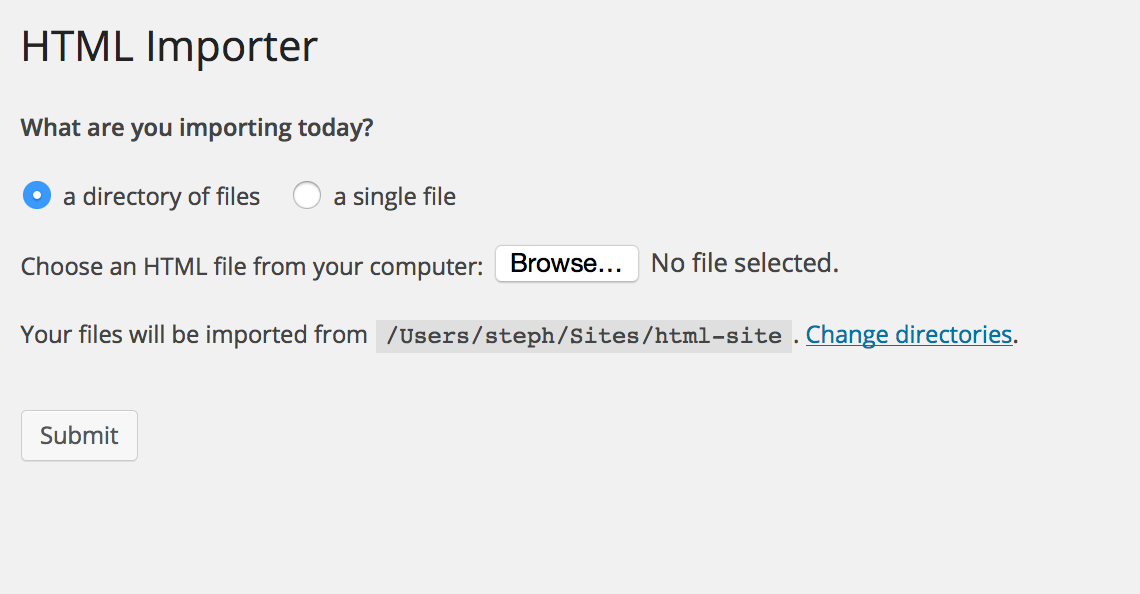
And, we are done!
You can now go ahead and import your HTML pages in a WordPress site.


