How to Activate WordPress Maintenance Mode?
Last updated on August 10th, 2021 at 02:14 pm
We live in a world where content is consumed in the form of text daily. However, bloggers have to keep up with the rapidly changing times and update/maintain their websites. To avoid a bad user experience, it is essential to put up a maintenance page when the site is going through changes.

There are multiple ways to enable WordPress maintenance mode for your website. Bloggers can deploy it by using a WordPress inbuilt function, writing custom code, or use plugins. If you’re wanting to update and upgrade some features of your website and don’t want users to see an intermediate version, you have to enable WordPress maintenance mode.
This article aids you to understand how to enable WordPress maintenance mode and how to keep specified pages available for the user to view.
How to do it?
So now that you’re all caught up on as to why you need to put up a splash page, let’s get working!

Writing Custom Code
By now we’re sure you know that a code is robust, and an easy way of editing and updating your WordPress site if you get the hang of it. So, for people who are comfortable with understanding some basic code, you can copy the following code to your functions.php file.
<code>
// Enable WordPress Maintenance Mode
function wp_maintenance_mode() {
if (!current_user_can(‘edit_themes’) || !is_user_logged_in()) {
wp_die(‘<h1>Under Maintenance</h1><br />We are working on something. Let’s catch up later?’);
}
}
add_action(‘get_header’, ‘wp_maintenance_mode’);
</code>
If you use this code to create a splash page, it can be tweaked and edited using CSS to give a better user experience.
Using a WordPress Plugin
The race of plugins has never ended, and it is not going to end now. Similar to every other problem that WordPress developers face, this one also has a plugin solution. The WP Maintenance Mode plugin can be used for creating and deploying a splash page.
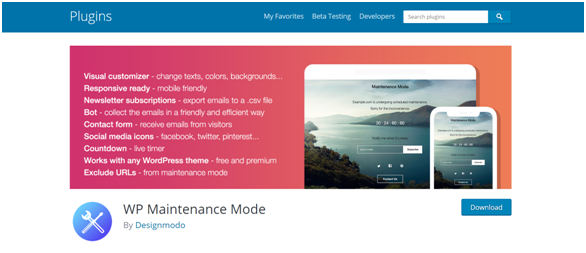
Activate the plugin to your WordPress website by going to the ‘Plugin’ menu available on your WordPress dashboard side panel. The next task is to deploy the plugin to set up a splash page.
To enable maintenance mode, explore the options provided by this plugin by going to the ‘Settings’ tab of your admin side panel.
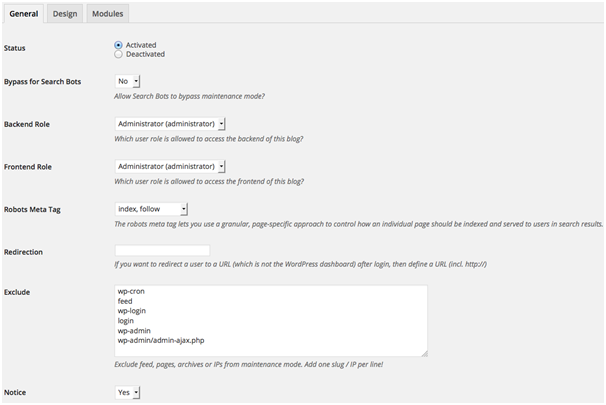
Most of the options are self-explanatory and have descriptions written below them. You can toggle the settings accordingly. However, one of the interesting features to note is the ‘Bypass for Search Bots’ option. If you want search engines to crawl your website even during the maintenance mode, it should be set to ‘Yes.’ If you have a website that owns a large amount of traffic, we suggest you keep it to ‘Yes.’
Want it to look different?
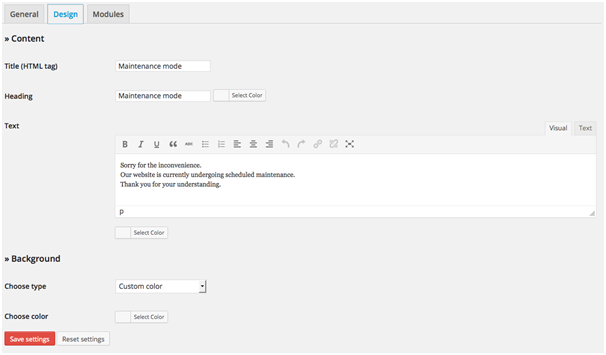
The plugin gives you full access even though the website is in maintenance mode, and you can set access to other personals accordingly. The WordPress plugin also allows you to beautify your splash page by adding backgrounds, headers, text boxes, etc. You can do this under the ‘Design’ tab of the plugin.
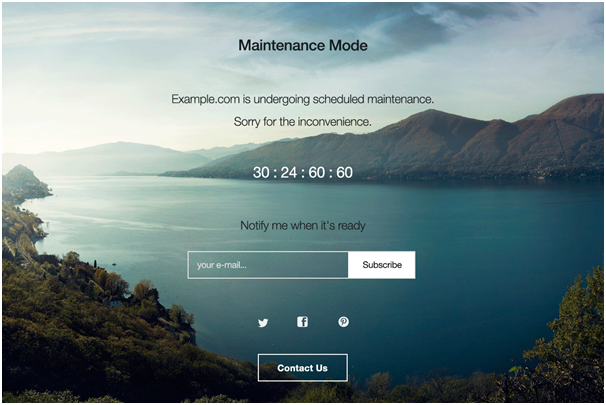
You can set your maintenance page to display a countdown timer and newsletter sign up form, social media icons to link all your handles, etc. on your splash page under the ‘Modules’ tab of the plugin.
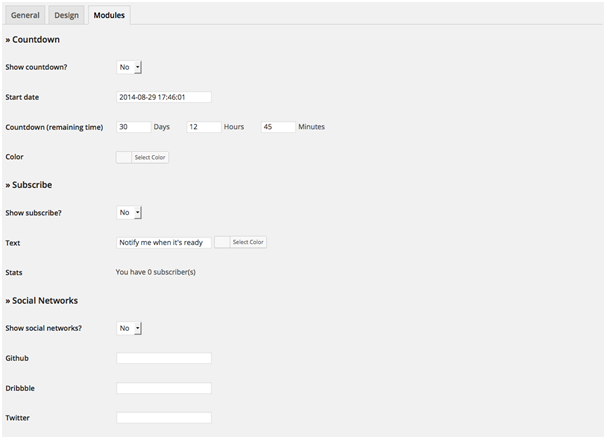
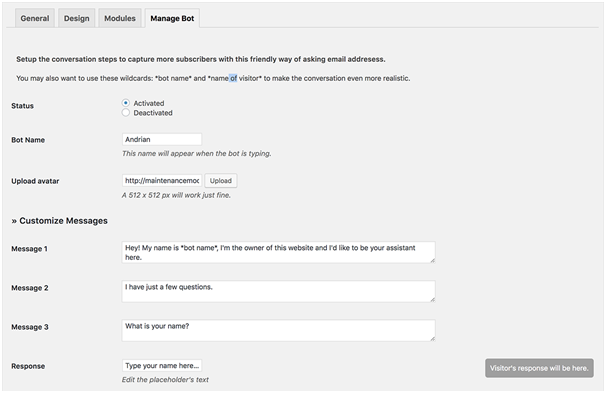
The empty boxes are for you to fill in the links for your social media handles. The plugin will automatically show social media icons on the splash page. In the updated version of this plugin, you can also deploy a bot for the time when you’re WordPress website is in maintenance mode.
Also, remember to be GDPR compliant under the ‘GDPR’ tab of the plugin if you’re collecting emails to notify users during maintenance. You can also enable Google Analytics and add your tracking ID using this plugin. Using all these features, developers are successful in developing attractive splash pages.
Some issues you might face
The plugin solves all your problems but creates a few too. There have been cases before when your website is stuck in maintenance mode. Sometimes, just deactivating the service in the plugin settings menu might not work. This is because the site creates a cache of the most recent state of your website to reduce loading time the next time you view it. Hence, clearing up the cache of your website would solve this issue. You can either use WordPress plugins like W3 Total Cache, WP Super Cache. Clear up the caches, reload, and you’ll have your website function properly.
If you have set your host not to let cache plugins to override it, you can clear caches on your host’s control panel.
Till the next post
Till the next postIt is essential to put up a splash page during maintenance. There are a lot of plugins to help you with that and we’re here to help you deploy them and make the best out of them.
If you’re on the path of building a functional WordPress website, stay tuned for more posts!


