
How To Add Table In WordPress
Last updated on August 11th, 2021 at 06:30 am
When creating posts for the WordPress website, it is important to lay focus on the way you present it. As much as the body of the content stands important, the design needs to be appealing too.
Imagine that you are about to create a comparison between the top WordPress development agencies and you design that content in a way that doesn’t seem good in appearance. Putting up content in a manner that is one line after another hampers the user experience. How about adding tables? Something like adding sidelines and displaying the content that is decorated with a tabular comparison?
This would be better, right?
Definitely, yes and that where we introduce to you the concept of adding tables in WordPress.
Why do you need to add tables?
Adding tables enables WordPress website owners to segregate data in a way that makes it easier for the users to read and get through the information. Whether you want to display statistics or draft a comparison or jot down the feature list, tables are the best way out.
Having said this, we are convinced that adding tables would give your website content a polished and beautiful look. But would you need to code?
WordPress does have an option where developers or coders can manually integrate tables in the site by editing the HTML file. However, if you aren’t much aware of the language, both, HTML or CSS, coding would not be your cup of tea.
So what to do now?
Well, WordPress again has an answer for this. There are several plugins tailored to help owners create and embed tables in WordPress. Hence, if you aren’t comfortable with the coding part, you can seamlessly integrate a plugin and get started.
TablePress – Create Tables on the Go
Eliminating the need to code for the creation of tables, Tablepress is a free to use table creation plugin. It allows website owners to use excel sheets to create and embed customized tables within the WordPress website.
What makes Tablepress an excellent choice for creating tables in WordPress is the fact that it is available for free, doesn’t require any sort of coding. Instead, it has an interface that used drag and drop tools for the creation of tables. Also, there are pretty generated shorts codes that allow you to embed tables in any of the WordPress posts.
What’s more?
You can sort them or filter the table and if needed, export them to excel files.
Fascinating right? Definitely, it is.
Now, without wasting much of your time, let’s move towards the steps you would need to follow in order to create tables in WordPress.
How To Add Tables In WordPress Using Tablepress
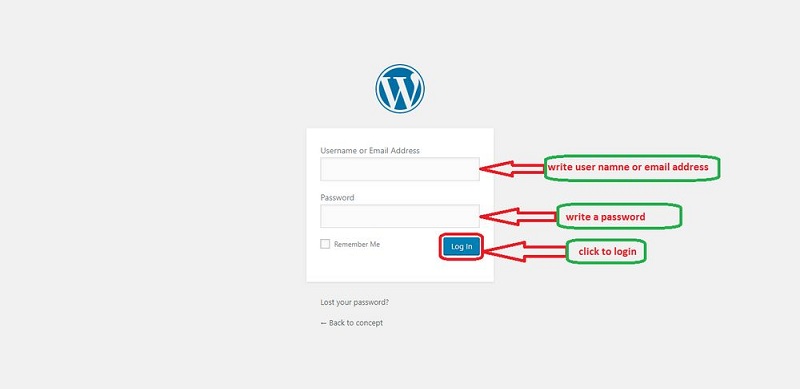
The first thing that you would need to do is log in to the WordPress dashboard.
- Enter the login credentials like the username and password and click on log in.
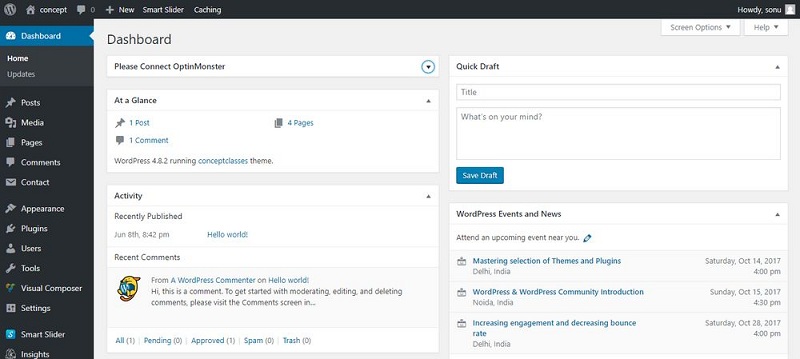
- After you are inside the dashboard, navigate to the left of the screen and at the lower bottom, click on plugins.
- Now, select on add new.
- A new page opens up. Here, enter the keyword table press to search for the plugin.
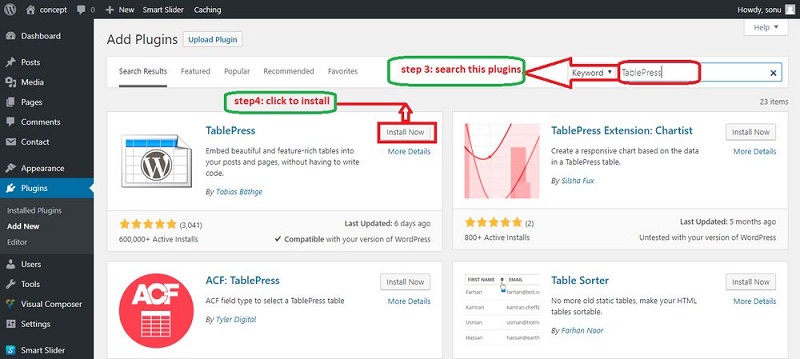
- You will find the plugin appearing at the top.
- Click on install to start the process of installation.
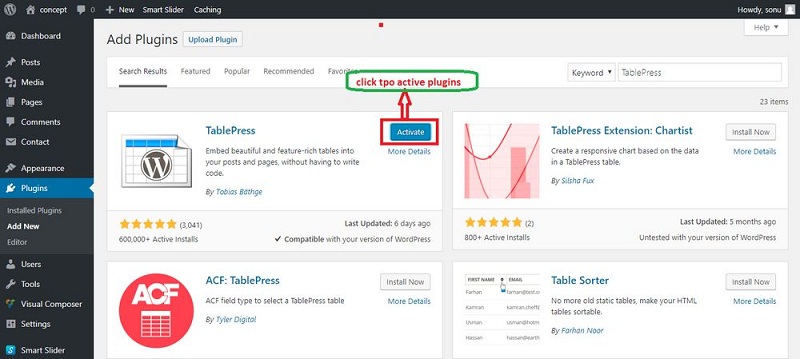
- Next, activate the plugin.
- Once the plugin has been successfully activated, you will find a tab on the left bottom of the dashboard that says table press. Click on it.
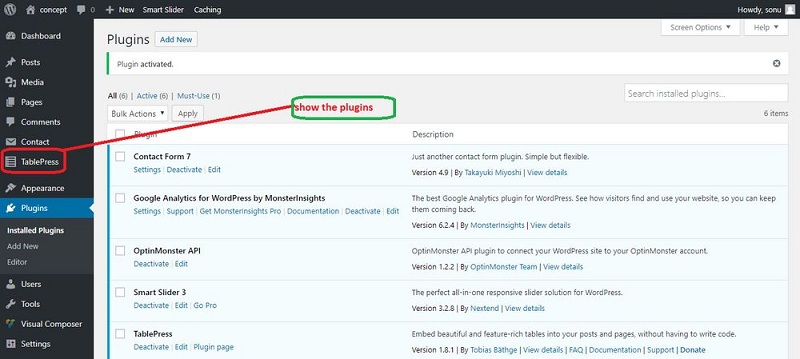
- A new page opens up. Here on the top middle of the page, click on add new to start the process of table creation in WordPress
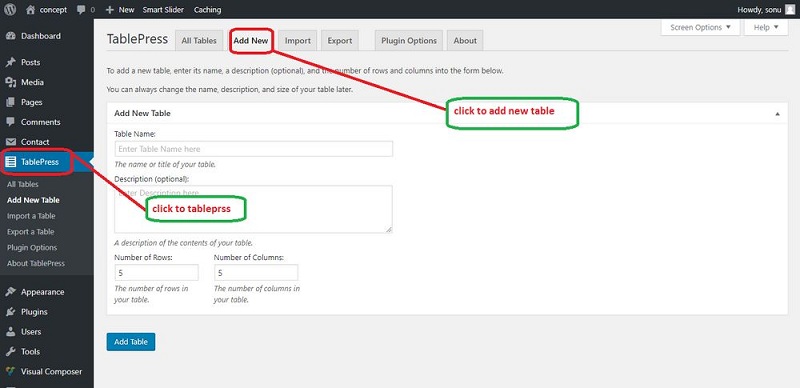
- On the next page, you will find plentiful fields that will ask for information related to the table.
- Start with entering the table id. Next, you would require adding a name to the table.
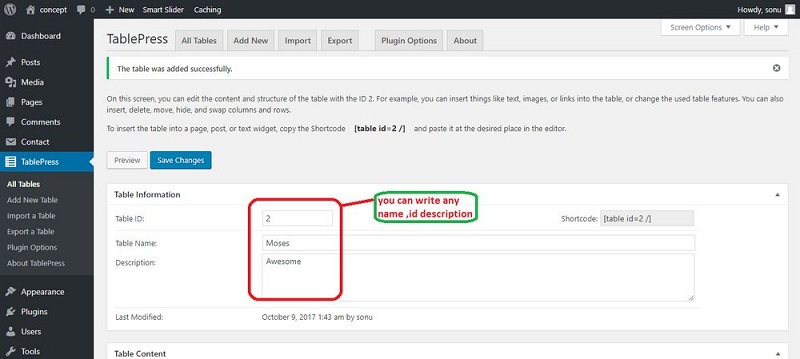
- After you have entered a suitable name, next you need to provide a short description of the table or the content it will have.
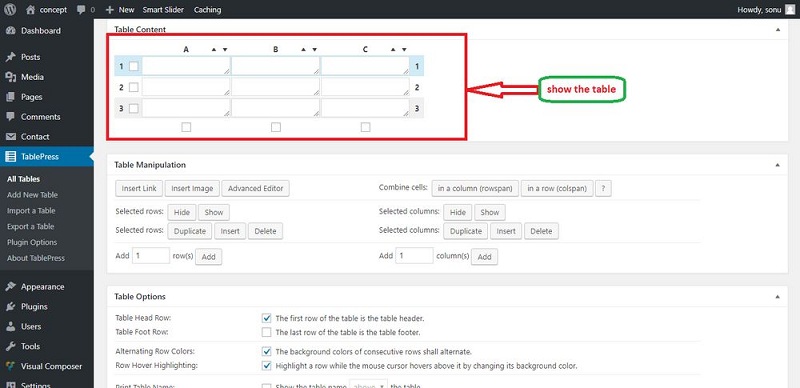
- The next page will ask you to fill in the table with the desired content
- You can specify the total number of rows as well as the columns that would be part of the tables. After that, enter the details into each box.
- Next, you can specify or customize the table by selecting whether you want to hide anything. You can also embed links between them. For instance, any of the information stored in a particular area might have a link to another piece of article or reference.
I am text block. Click edit button to change this text. Lorem ipsum dolor sit amet, consectetur adipiscing elit. Ut elit tellus, luctus nec ullamcorper mattis, pulvinar dapibus leo.
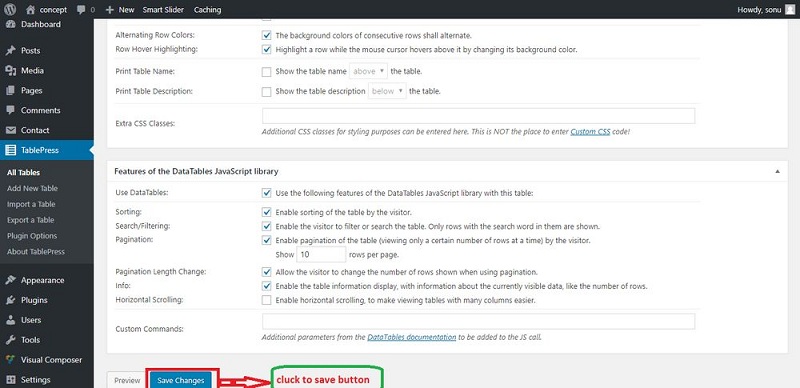
- Next, you can specify the table header. For instance, which row would you prefer as the table header? Whether or not, you wish to hover on the content to highlight them is another option you can set? And so on.
Once, you have gone through each of the choices and skilfully selected the ones that serve your purpose best, you can now move ahead and save the changes. And you are set with tables on the WordPress website.


