How to connect your WooCommerce Store to Google Merchant Center with Google Product Feed?
Have you ever seen advertisements running for your online business on the search result page of Google? A shopping Ad gives more education than text ads typically. It gives information about the details of the products such as pricing. This increases the interaction of the customers. A visual impact plays a significant role in advertising.
Now, we get this question very regularly, “Can we control Google’s ads on WooCommerce business websites? The answer is, “Yes!!”.
For this, you have to register yourself for the Google Merchant Center account. You must give an updated feed of the product. You have to link your Google Merchant Center account to Google Ads.
Let’s delve further to know how you can use your Google Merchant Center to market your business:-
A complete insight into Google Merchant Center
It is a service that allows you to share products online with Google. The users can access your products through Google services. This includes Google Ads, Google Shopping Ads, etc.
With Google Ads, you can target those crowds who are already doing product research. In the sales funnel of e-commerce, a quick Google product search is one of the initial steps that most business take.
You can allure more attention from your audience if your product is visible on the top.
How can you use Google Merchant Center for the promotion of the WooCommerce Store?
You need to use plugins for this. Here, we are using the ELEX WooCommerce Google Shopping plugin.
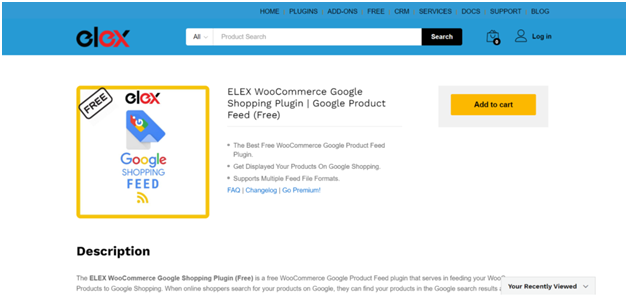
Once you incorporate this plugin, you can add your products to Google shopping easily. You will see the preview of your product’s details. This includes the description, image, title, cost, color, etc. You can easily create the product feed of Google. This can be created in TSV, CSV, or XML and forwarded to Google Merchant Center.
Pros of employing ELEX WooCommerce Google Shopping plugin
1. Through this plugin, you can create feeds of various WooCommerce products. You can do this by mapping attributes and precise product categories.
2. You can increase your sales, create targeted traffic, and attract more shoppers by uploading the product feed.
3. You can generate infinite streams number based on your requirement.
4. You can even schedule the infinite streams at your convenience.
5. You get the privilege to choose the languages that this plugin supports. You get the options for the following languages:-
- German
- Russian
- English
- Spanish
- French
6. You can download, pause, modify, renew, or delete a live feed.
7. You can modify and update your present TSV, CSV, and XML files.
Setting up ELEX WooCommerce Google Shopping plugin
You need to download this plugin from the website of ELEX Extension. When done, head to install & activate.
Go to “WordPress dashboard” and click “Plugins”.
Press “Add New” to connect your WooCommerce Store to Google Merchant Center with Google Product Feed. Hit “Install Now”.
Tap the button, “Activate Plugin”.
Next, go to “Dashboard” and press “Google Shopping Feed”.
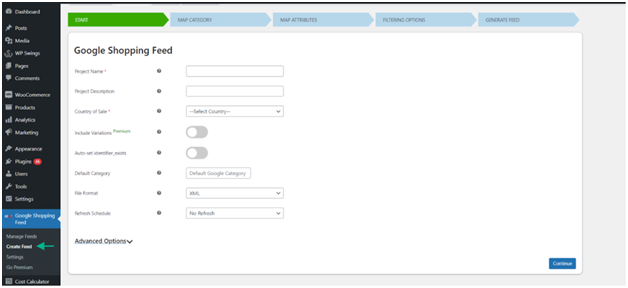
Under the option “Manage Feed”, you will come across a few sub-tabs. They are:-
- Generate Feed
- Start
- Filtering options
- Map Attributes
- Map Categories
Brief introduction about the sub-tabs
- Start
Here, you need to give a project name to the feed. You have to craft the product’s description. This must be related to the specific feed that you are creating. Pick the country where wish to do your business.
You need to enable the option “Include Variation” if you want to implement the changeable goods in the feed of Google. “Auto-Set Identifier”, enable it to connect your WooCommerce Store to Google Merchant Center with Google Product Feed.
Choose the default category of Google based on the product you plan to display on Google Shopping.
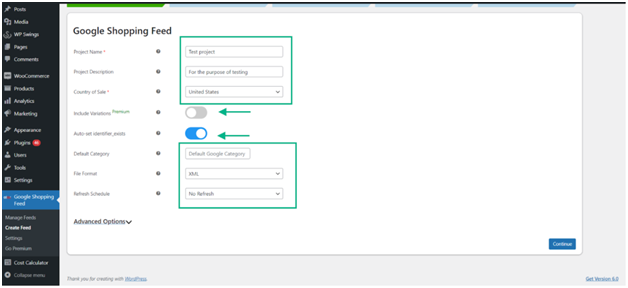
You can program a Refresh Schedule to occur monthly, weekly, or daily. Choose the option “Daily Refresh” and wait. Press “Continue” to connect your WooCommerce Store to Google Merchant Center with Google Product Feed.
- Map Categories
Your WooCommerce categories of products will be mapped to the categories of Google. This will be under the section “Map Category”. You can map and quickly add product categories using accessible Google Product categories.
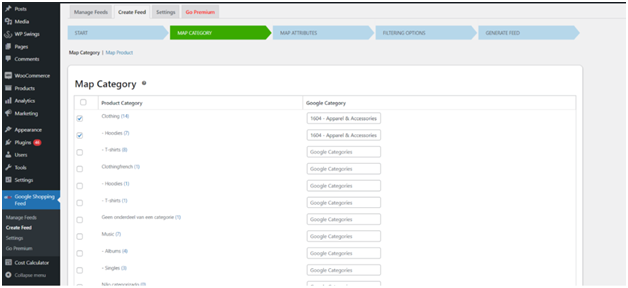
You need to employ the Individual product mapping to list it on Google Shopping. “Map Product”, choose this option from the menu to connect your WooCommerce Store to Google Merchant Center with Google Product Feed.
For listing it on Google Shopping, you can employ the mapping of the product individually. Select “Map Product” from the menu to connect your WooCommerce Store to Google Merchant Center with Google Product Feed.
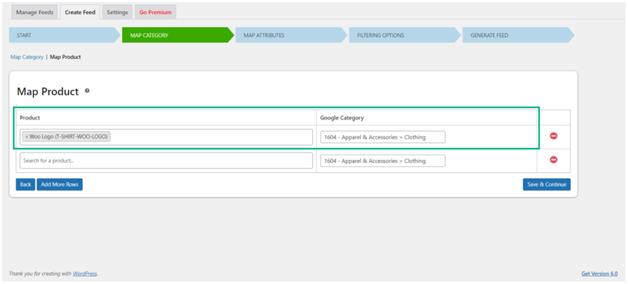
You need to enter the product category’s name in the text box. The Google Categories will map these desired products. The categories will be automatically filled as soon as you begin typing. When done, tap “Save & Continue” to connect your WooCommerce Store to Google Merchant Center with Google Product Feed.
- Map Attributes
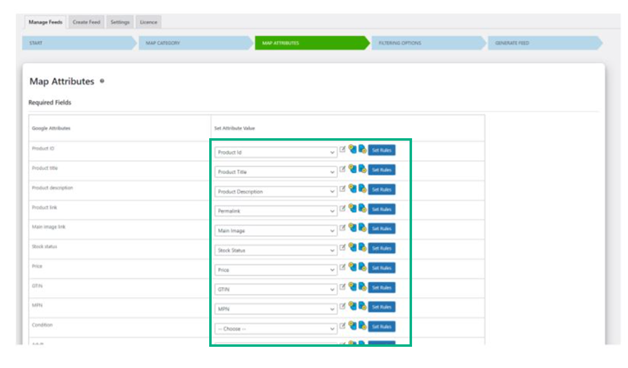
In the section, “Map Attributes”, Google attributes will map and set the values of attributes automatically. These will be double-checked and will be edited if required.
Choose the attribute value from the options of pre-set or enter this on your own.
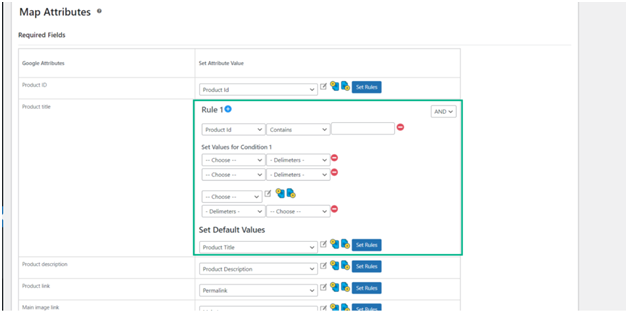
Use the product characteristics customization option to modify the appearance of the product. For example, you can use the option “Prepend” to implement the product title. You can also go for the option of Append to add the brand name to the title of the product.
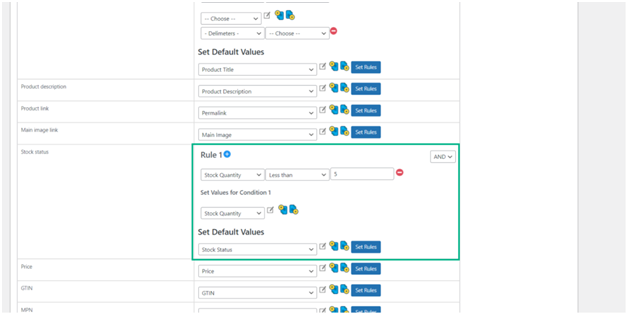
If you are unaware of the product’s stock level, then:-
- You can specify that your Stock level is less than the given minimum amount.
- You need to then give an indication that the stock level is less in the Product Description.
Tap “Continue”.
- Filtering Options
For the option of Google catalog feed-in filtering, you can pick on how products will be filtered.
There are two options for filtering, Sold Quantity or Stock Quantity. Pick whether the particular value is Less, Greater, or Equal to. Similarly, follow a similar procedure for the sold quantity.
Check the box “Featured Products”, if you want a Google catalog feed in the featured goods.
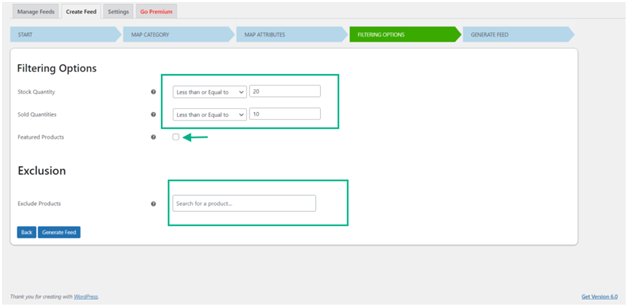
Use the option “Exclusion” to add certain items to the catalog feed. “Generate Feed”, click this button to connect your WooCommerce Store to Google Merchant Center with Google Product Feed.
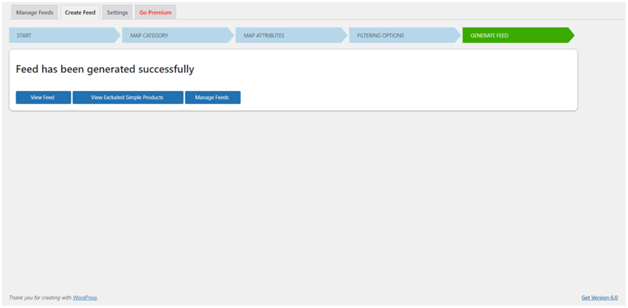
From the menu, choose “View Feed”. Use it to download the TSV file to your system.
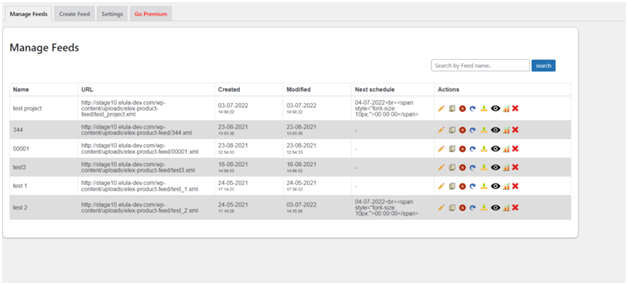
You also get the option to “Manage Feeds”. You can schedule the fetch by using the URL. Here, you will come across the product’s next feed date. Employ the action button to read reports, download, edit, download, refresh, or copy.
Generate a Google Merchant Center account
For generating the new Google Merchant Center account, you can use your Gmail account (existing).
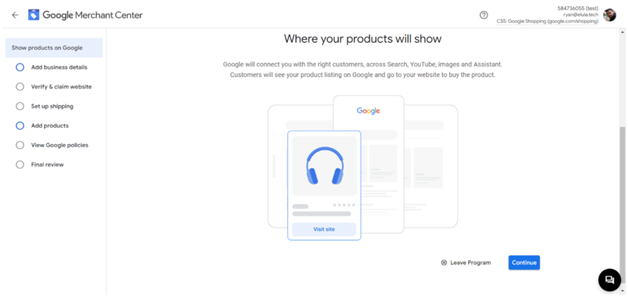
You need to add your business details and set the shipping in order to deliver the products to customers. Next, verify and claim your business site.
For validation, you have to copy the code that is given. Paste this to your website’s HTML. Make sure that you give the address and phone number of your business here.
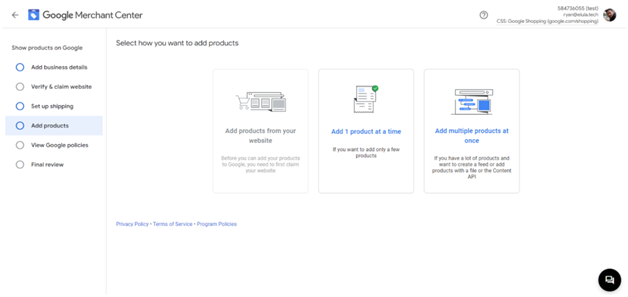
When done, browse to “Add Product Data”. Choose the “Add multiple product at once” option.
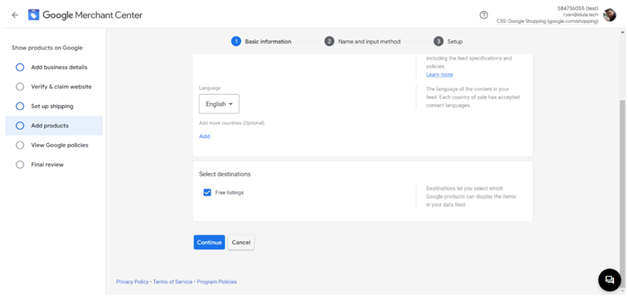
Pick the language of your preference and choose the country where you want to do your sale. Make sure to click the box for a free listing. Tap “Continue”.
Give the name to the primary steam and pick “Upload”. Hit “Continue” to connect your WooCommerce Store to Google Merchant Center with Google Product Feed.

Name the file and you need to upload a new file in this step. Choose the TSV file that you downloaded earlier. Upload it!!
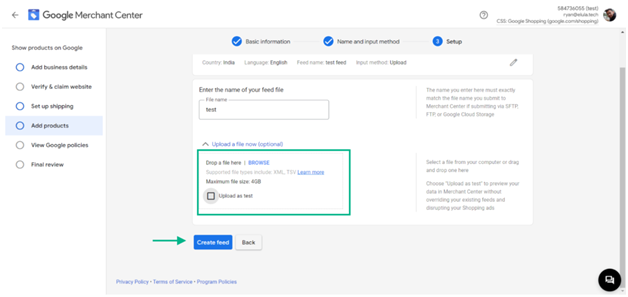
When done, hit the button, “Create Feed”. Once the TSV file is opened, you will see your products uploaded to Google Merchant Center.
It’s done!!


