How To Create A Custom Form In WordPress
Last updated on August 11th, 2021 at 06:37 am
Whether you create a WordPress website for business purposes or to start a blog or an online store, you would always want your users to connect with you and your business. And by connect, it doesn’t mean to straightforward purchase products or engages in your organizational services.
Communicating with your website to inquire about things or to know more about your business is another way and that’s what we say by connecting. So, how are you going to do this? How are you going to give your website users the ease to seamlessly contact you and your business?
Don’t think much! The best and most plausible way to allow customers to engage with your business is by creating a customized contact form. Customers or visitors can effectively feed in their personal details, leave a comment or post a query through such forms.
One question that might arise here is why would you separately need a contact form when you can effectively strike a conversation using emails? Also, creating contact forms might necessitate the need to write codes?
Definitely an excellent question! Let’s see what could be the probable answer!
Why Do You Need A Contact Form?
First thing first! In order to create WordPress contact forms, you won’t need to be a tech expert or be a coding nerd. Instead, WordPress offers extensive tools, the drag and drop types that help WordPress site owners to effectively deploy a contact form on their website.
Coming to emails, there are specifically three different reasons that facilitate on why a contact form is better than the email tabs.
- Spammers have this tendency to look for email addresses on the website. This turns WordPress websites vulnerable to spammy links and unwanted intrusions. However, if you would have placed a contact form on the site, this possibility would have not just reduced but totally eradicated.
- Email addresses are confined to only the information that a user thinks important and in most cases, this is not sufficient. Contact forms can be customized and modified to ask information that is important from the admin point of view.
- Customized contact forms save a lot of time as it can guide the user to perform significant steps and get their queries answered. On the other hand, emails are one-sided and undertake a plethora of time.
Convincing?
Let’s move ahead to see how can we create customized contact forms in WordPress.
How to create a contact form in WordPress?
To start, we need to first login to the WordPress dashboard.
- Enter the credentials to validate and login into the wp-admin dashboard.
- Move to settings, plugins and then click on add new.
- In the search bar, enter the keyword: Plugin Contact Form 7.
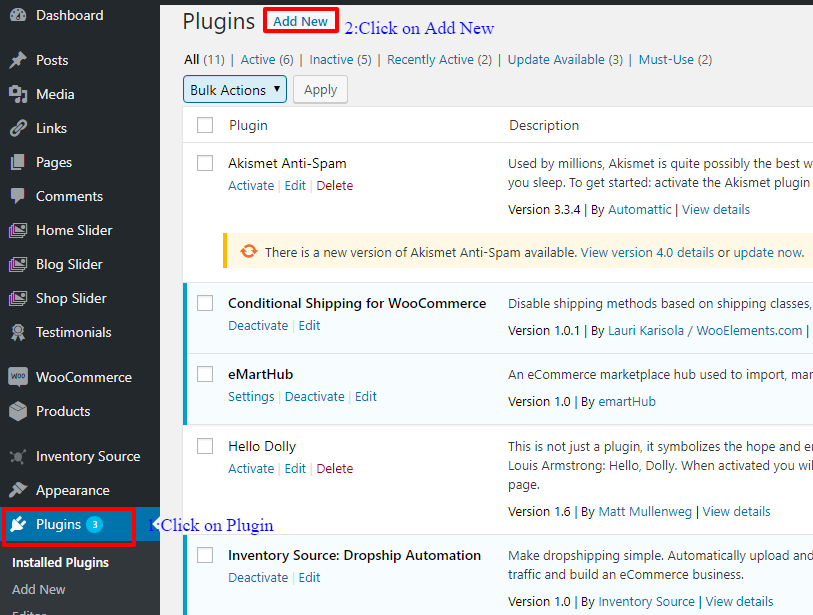
- Click on download now
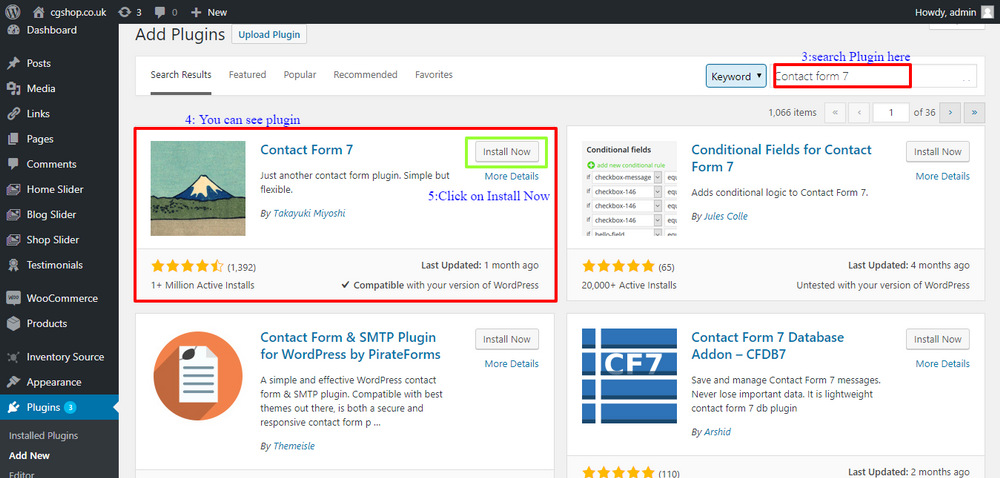
- Once the plugin has been successfully downloaded, click on install and activate.
- After the plugin has been activating, a tab that says: Contact Add, appears on the left column of your Sidebar.
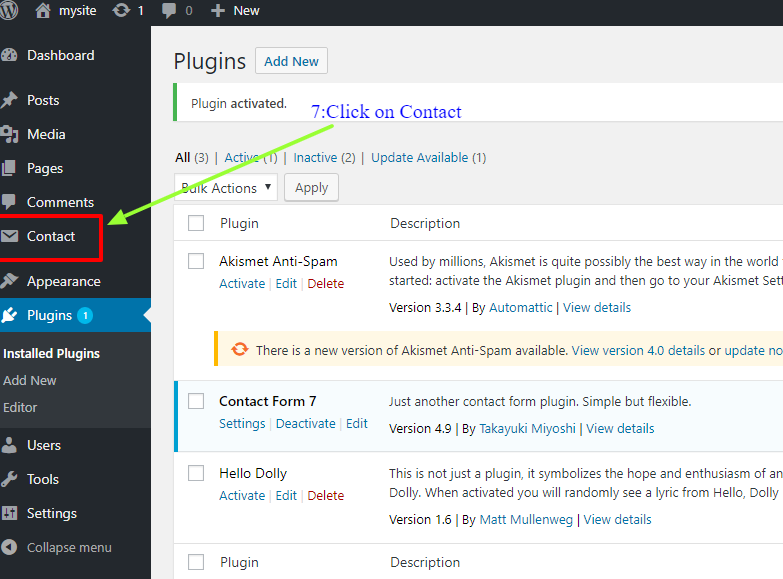
- Now click on contact and then click on edit.

- A new window pops up and there you will see the default fields
- Another option that you see is to add multiple fields.
- Click on the fields that you wish to add in the contact form.
- Once you have selected all of the fields, click on save to add them in form.
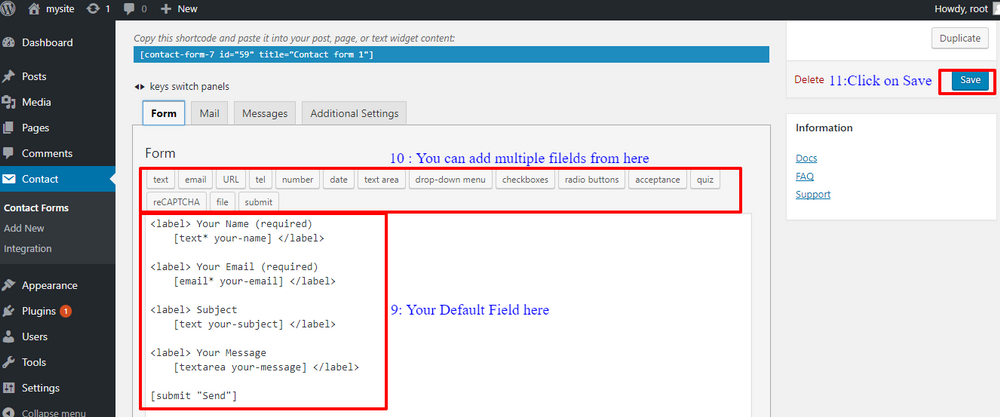
- After this, you will see a shortcode at the end of the page. This is the HTML code of adding items in the contact form. All you need to do is simply code the shortcode for now.
Adding form in the page
- Open the page where you wish to add the form.
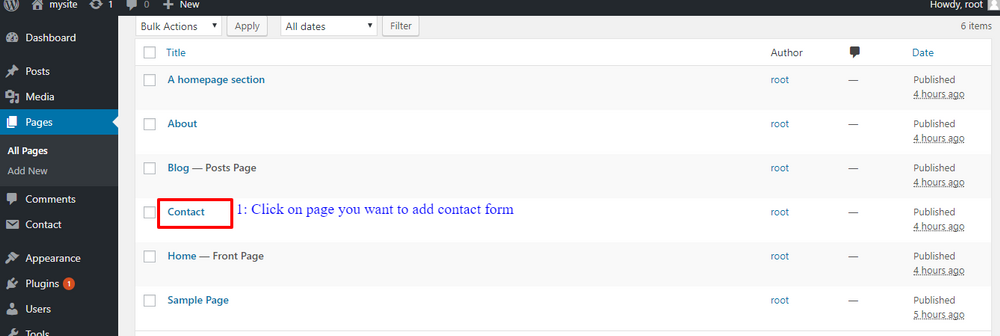
- Paste the shortcode and your job is done.
- Don’t forget to click on the update to save the changes.

You can revisit the website to see whether or not the changes made have been reflected.
Adding Contact Form In The Widget
In case, you want to add the contact form in the widget, follow the below-given steps:
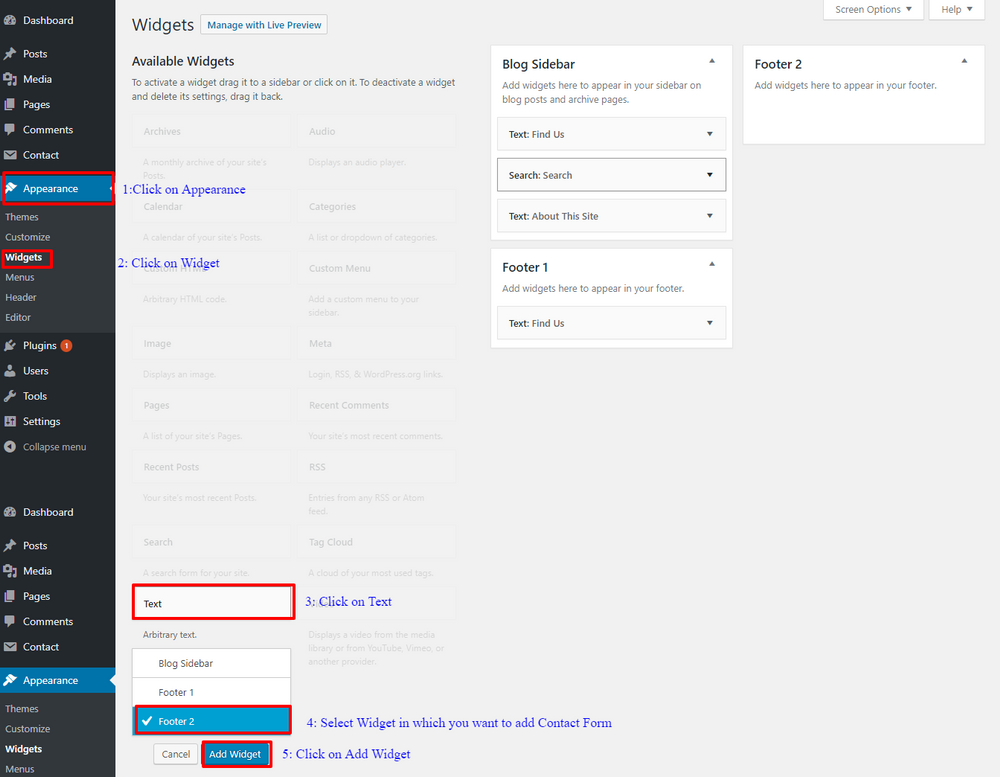
- Click on Menu and then Appearances in the sidebar.
- Now, click on the widget and then click on the text.
- Pick the widget where you wish to add the form.
- Click on add widget and now there appears a Text add option.
- Add the title and once again paste the shortcode.
- Click on save to update the changes.
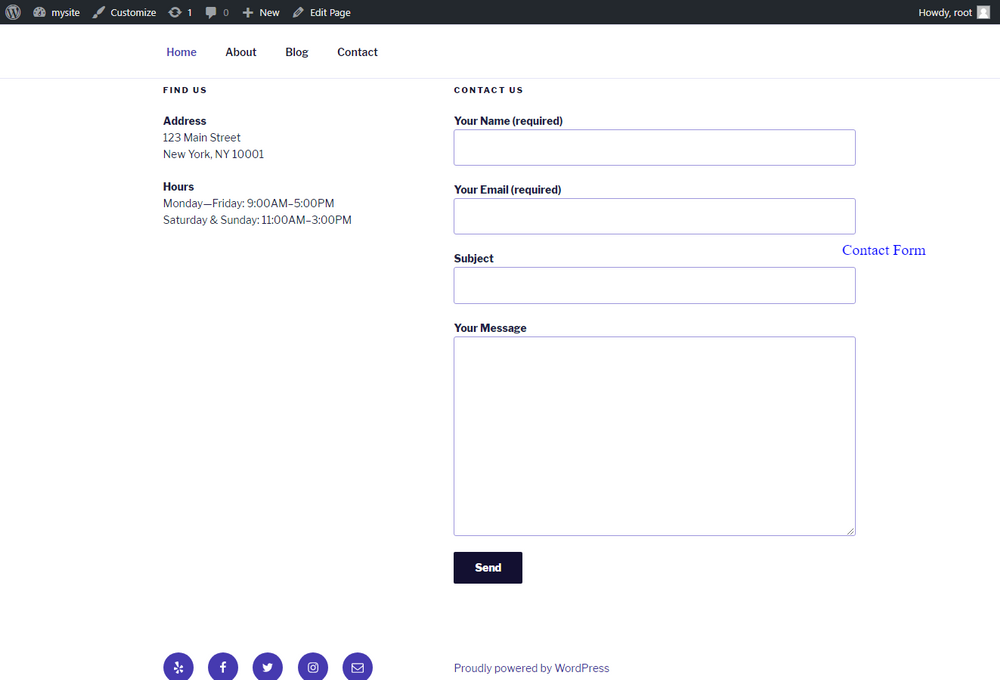
And we are done!


