How To Create Database In WordPress From phpMyAdmin
Last updated on August 10th, 2021 at 02:19 pm
WordPress is one of the most popular content management platforms are used for a variety of purposes. Some use it as a blogging portal where others build official websites, few vlogs through WordPress and rest create online stores using it.
In order to make sure that everything is working fine and smoothly, WordPress needs a database. Apparently, WordPress cannot work without a database. All of the files, folders, posts, and pages are stored in the database. In fact, the login credentials are also stored in the database. So, if you haven’t yet created a database for your WordPress website its time that you took the first step and created a WordPress database.
What is PHPMyAdmin?
Phpmyadmin is the software that allows website users to manage data and run SQL queries to extract and store data. It is by far one of the simplest platforms used for managing data of your WordPress website.
Whether you want to create a database, modify tables, edit rows, delete information or create a backup, the PHPMyAdmin interface gives you the ease to do all in a few clicks. In fact, you need not learn queries. The interface has all added in the form of drag and drop tools, which further makes it easier for the WordPress website owners to manage their WordPress database.
How WordPress uses database?
Database, as the name suggests, is a place that is used for storing and retrieving data. From posts to pages, images, and content, all of the WordPress data is stored within the database. In fact, when you first install WordPress, you will be asked to enter the username, password and database name for the WordPress website.
This database is further uses by WordPress to store all of the installation data while creating tables for the same. So, having one is not just a choice but a necessity.
Without wasting much time, let’s move ahead to see the steps that are needed to create a database using PHPMyAdmin.
How to create a database using PHPMyAdmin?
To start, you would first need to visit the PHPMyAdmin website. You can visit the site: http://localhost/phpmyadmin.
Click on the above to open the PHPMyAdmin portal.
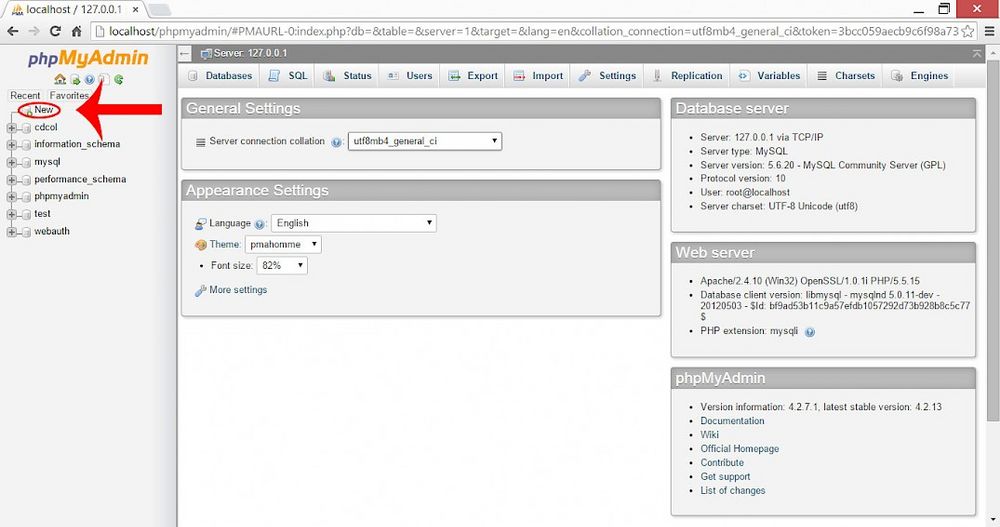
- As the page opens up, navigate to the left of the site and there click on create new.

- A new page opens and here, you need to provide a name for the database.
- Here, we keep the name as wpdatabase.

- After you have added the name, click on create.
- As soon as you do the above, you will receive a notification that says, your database has been successfully created. Also, you will find the same appear under the database section, present to the left of the screen.
Now that you have created the database, you next need to create a new user. This user will be the one who can create, read, update and delete records from the database.
- Click on the name of the database that you have just created.
- Move to the Options pane and then click on Privileges.
- Here, click on add user and then select new.
- A new page opens and here you would need to add details of the user.
- Feed-in a user name of the choice and then under the host section, select localhost. If you keep this place blank or enter ‘%’, then you are bound to experience an error while installing WordPress in your system.
- Next, you would need to create a password for your WordPress website. Make sure that the created password is strong and secured. Also, remember that you would need to use this password to login to the WordPress dashboard. So, keep a copy of the same saved somewhere.
- Move down and then an option appears that says: database for users’ option. This needs to be checked to ‘Grant all privileges on database “wpdatabase”’. If it’s already checked you can move ahead and if not, make sure you do it.
- Now, simply scroll down and click on go.
As you complete the process, you will receive a notification that says:
CREATE USER ‘wpdatabaseuser’@’%’ IDENTIFIED BY ‘***’; GRANT USAGE ON *.* TO ‘wpdatabaseuser’@’%’ IDENTIFIED BY ‘***’ WITH MAX_QUERIES_PER_HOUR 0 MAX_CONNECTIONS_PER_HOUR 0 MAX_UPDATES_PER_HOUR 0 MAX_USER_CONNECTIONS 0; GRANT ALL PRIVILEGES ON `wpdatabase`.* TO ‘wpdatabaseuser’@’%’;
If this doesn’t appear, it means that something went wrong and there was an error while creating the database.
Recheck the steps that you have undertaken to create the database for the WordPress website. In case, the error still persists, it is advised that you delete the database created and start afresh. Make sure that you follow the steps meticulously and do not make a mistake.
Working on WordPress database is pretty easy and doesn’t require you to be a pro. Simply follow the steps given above and you all are set to use the WordPress database.


