How to Display WordPress Posts in Grid Layout
Last updated on September 28th, 2021 at 11:02 am
As we know that there are lots of websites that are created by WordPress editor. The first step to creating any WordPress website user needs to install a WordPress theme in it. Users can select any WordPress theme according to their requirements. But most of the things are not equal to show posts in a grid layout. However, this question has been asked by many readers. Our research team research on this very and bring out a very short and easiest way so that any beginner level WordPress user can also resolve their query. Read this article carefully to know more about how to display WordPress posts in a grid layout?
When do you need a grid layout for WordPress?
If any user going to create a content website then use only to display grid layout. In most WordPress theme grid layout is not present. All WordPress themes represent users to post in a list layout. The major disadvantage of list layout is that if any user posts many posts in a single day then it will take a lot of space. Another reason is that if any user is going to use the custom home page of their own WordPress website then they must require a grid layout.
How to display wordpress posts in a grid layout?
Our research team research on this topic and find out a lot of ways to resolve this query. After that, we are representing the solution of this query in a simple way using just need to follow all the steps which are given below. Users need to follow our own instruction that has been release on how to display wordpress posts in the grid layout.
How to install the post grid WordPress plugin?
The first step for the user is to install post grid wordpress however users need to follow all the steps to learn how to activate and install the post grid WordPress plugin which is given below.
How to install and activate the post grid wordpress plugin?
- First of all, a user needs to login to the wordpress dashboard by using a login ID or username and password after that click on the submit option.
- Now user successfully logged in the wordpress dashboard area. User can see on the left top of the screen a dashboard context menu appear on the screen.
- Now the user must click on the plugin option which is present in the context menu. After that is a context menu appears on the screen. User must click add new plugin option in the sub context menu.
- After clicking on the Add New Plugin option a new screen appears in front of the user. The user can see a search box on the screen. Now the user must enter a keyword i.e. “post grid Plugin”.After entering the user must hit enter and the user can see the plugin appears on the screen.
- Now users click on the install button and after some time plugin will be installed in the wordpress.
- After successfully installation user can see the “Activate” button. Now the user must click on the Activate button. Now The post grid plugin has been activated in the wordpress.Now user can see that the wordpress plugin has been successfully installed and activated in the desired wordpress.
How to set up a post grid wordpress plugin?
- Users can see a context menu that has been appeared on the left side of the screen.
- In that context menu, the user can see an option of the post grid. Now the user must click on that option.
- After that, A sub-context menu appear in front of the user in that user need to click on the new post grid option.
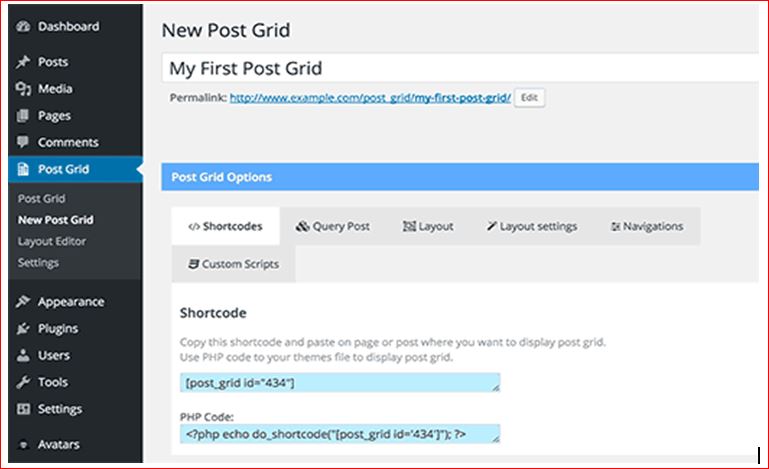
- Now a new screen appears in front of user.that screen contain a lot of section in it. As you can see in the image given below

- Out of all the section users need to click on the query post tab. As you can see in the image given below

- In this “query tab,” the user will be going to guide the Post grid plugin on how to display posts.
- There are a lot of options present in the query tab if the user does not want to select any post type then the plugin will automatically set the post option.
- Now the user moved to the layout tab. In that tab, users need to select the layout of their posts.
- In this layout, options users can select how they are going to display the grid. As you can see in the image given below

- If the user going to select a content layout option then it will display with few cookies such as flat, flat center, flat right and many more.
- There are five skins available in the layout user can choose any one skin for that. All skins having different features. Users can choose according to their requirements.
- Now users click on the layout setting tab option. This setting is going to be a workout on most websites but view the website and not able to fix the grid layout in their themes.
- Then the user can fix that issue by reaching to layout setting tab option. As you can see in the image given below

- Now the user must click on the navigation tab and select the pagination style according to user requirement.
How to add a post grid in the WordPress page?
In this section, we are going to discuss how to add a post grid in the WordPress page. This can be possible by following a few easy steps. read these steps carefully which are given below they are going to help you are adding a post grid in the WordPress page so let’s get started.
- Users can follow all the steps tel reaching to post grid plugin which is given above.
- After that, the new screen appears in front of the user. On that screen, there are a lot of tabs present.
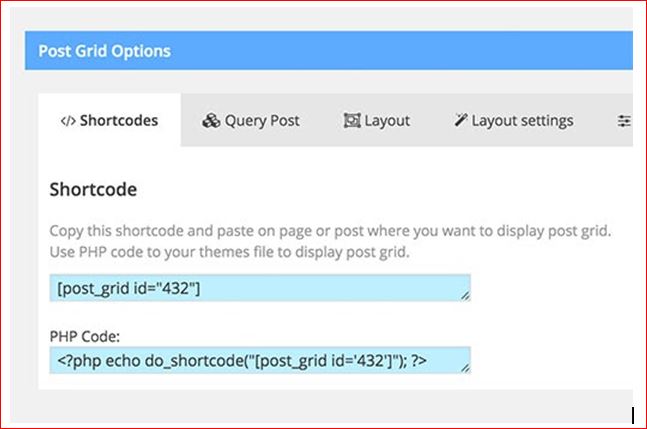
- Now users need to click on the shortcode tap option. When users need to click on the shortcode option.
- Now you can see shortcode on the screen when users need to copy that shortcode which is going to help display the post grid on your wordpress page

- Now the user must paste that shortcode on the page on the blog post where the user needs to display the grid option.
- After that users can click on the publish or update option on the blog post for a wordpress page.
- Show the final result will be given by post grid plugin is given below as you can see in the image.


