How to Install WordPress in self hosted wordpress website ?
Last updated on August 10th, 2021 at 12:45 pm
How to Install WordPress in a Self-Hosted Website?
WordPress, as we all are well aware of, is one of the most popular content management systems. Nearly, 33% of the websites present over the web are powered by WordPress. Given such a huge figure, you might also have the fascinating idea of starting a WordPress website.
Trust me… it is an excellent place to start with. Before you get along the platform and start with your online journey, you would need to have a domain name and a web host for your website.
To everyone’s surprise, there are multiple service providers that give you the ease to host your website. The problem isn’t in finding a host but to get started and launch your WordPress website on one of the hosts. This article is specifically designed to help you install your WordPress account on a self-hosted website.
So, if you have been looking for such a solution, your search comes to an end.
How to Install WordPress on a Self-hosted website?
As mentioned above, there is an array of hosting service providers that help you host your WordPress website. Here, we will walk down the process of installing WordPress on several self-hosted websites.
Irrespective of which of the host you wish to install your WordPress on, the first few steps remain the same.
1. Click open the home page of the host.
2. Click on host log in
3. Enter the login credentials and click enter to log in
How to install wordpress on Bluehost Hosting ?
If you pick Bluehost as your hosting service provider, follow the steps given below to start the process of WordPress installation:
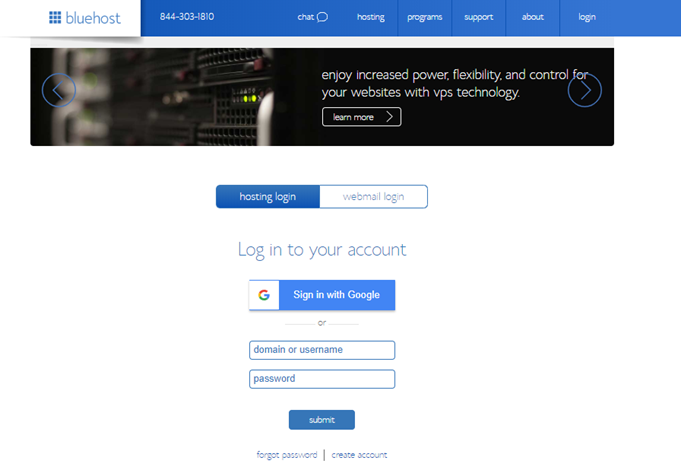
1: After you have logged in, scroll down to the website’s section and there, look for WordPress.
2: Click on it to start the process.

3. Once done, select the preferred domain name.

4. In case, you plan to keep the website URL, one that is linked to the blog, you can enter the same in the folder that appears next to the blog.
5. Bluehost has an option where you can edit the details related to the username, registered email address, and password. Click on advanced settings to set them as desired. Finally, go through the terms and license to finally click on install now.

And you are done.
To log in to the hosting directly,
1. Click open the cPanel account of your host
2. Enter the credentials to log in.
3. You will find a WordPress link at the top, click on it and from the left panel, select the user’s tab
4. Now, under the option of Select WordPress, choose WordPress and then, under the option of WordPress users, click on the one you plan to log in.
How to install wordpress on Godaddy Hosting ?
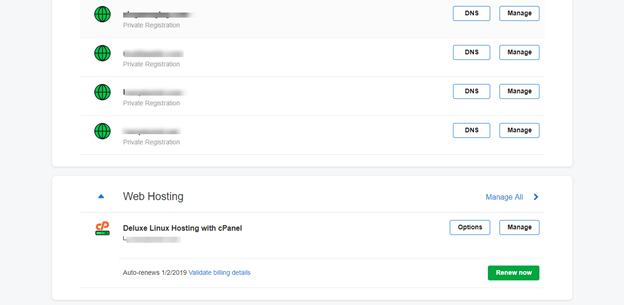
- After you have logged in to the account, move to the section where you find managed WordPress.
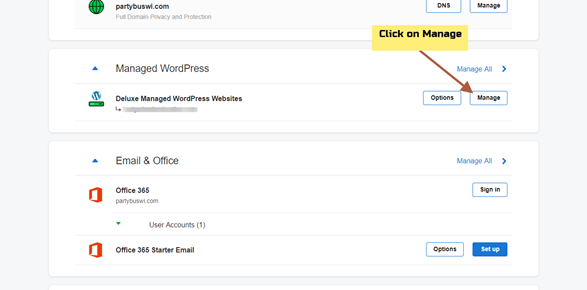
- Under this, click on manage.
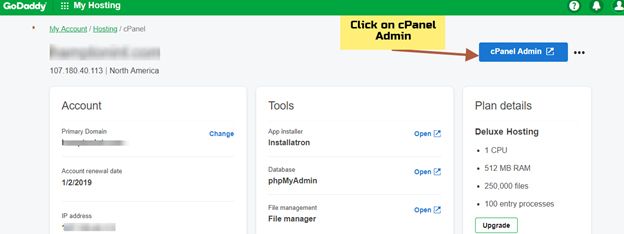
- After this, a new page opens up. Here move to the right side and click on cPanel admin.
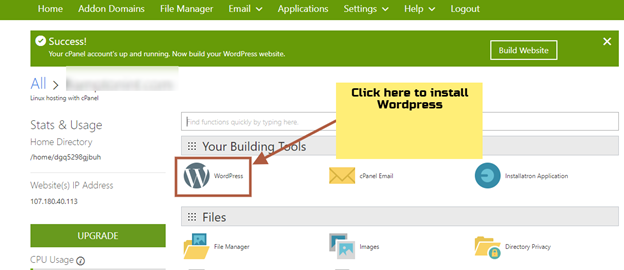
- Next, click on WordPress under the building tool option.
- The next page shows the WordPress page and there you will find Install this application on the top right screen.
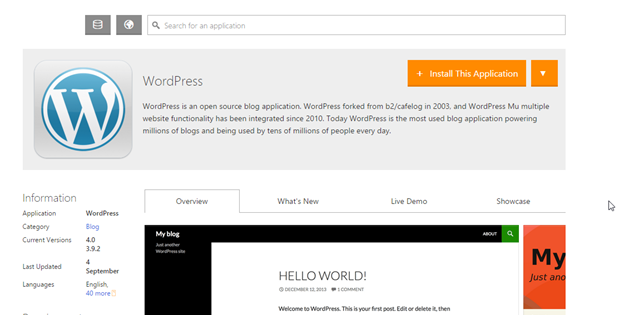
- Click on the tab to start the process of installation.
- Once done, you are now ready to use WordPress on the domain.
3. How to login directly from Godaddy hosting
- Click open the GoDaddy account.
- Click on web hosting and then move to the cPanel.
- Click on manage and then click on cPanel admin.
- Move to the option of building tools and here click on WordPress to get started.
- How to Uninstall wordpress form godaddy
How to install wordpress on Cloudflare Hosting ?
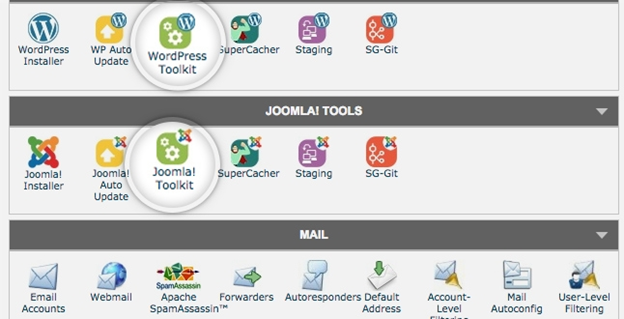
- Start with logging in to the cPanel account.
- Under the WordPress tool option, click on the WordPress toolkit.
- Once done, you will then find a list of things you can do with WordPress.
- Click on add WordPress.
- The next page that opens up will ask you to add the URL of the installation.
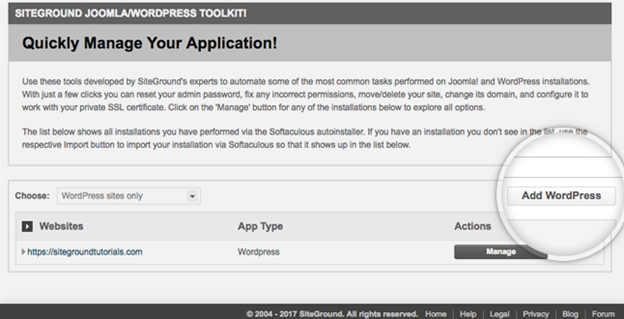
- Enter the URL and click on add URL to complete the process of adding the same.

To Login To The Account Directly
- You can manage your WordPress from the back end of the database.
- http://yourdomain.com/wp-admin is the default address for login.
- To change the password, visit the cPanel and use it to change the same.
How to install WordPress on Inmotionhosting.com
The login process of Inmotionhosting.com is different. To get started:
- Click on the URL of the host and then select on amp login.
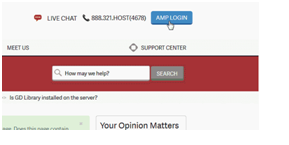
- The login page that opens up will ask you to enter the email address and the password.
- Click on login and then under the name of the account name, click on cPanel.
- Now move to the software section and then click on Softaculous.

- After this, you will find the option of WordPress. Click on it to move further.
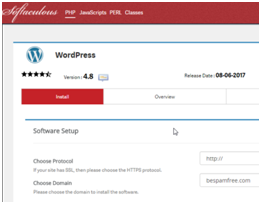
- Enter the basic details of the installation to move ahead with the process.
- Fill in the username, password and email address and then click on save.
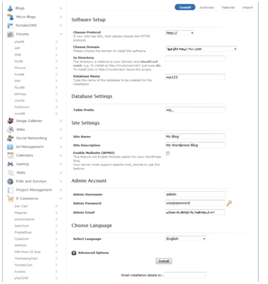
You are now done with the process.
To Log in directly
- Login to the hosting account and then move to cPanel.
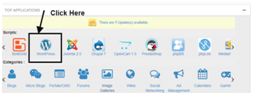
- Finally, click on the WordPress icon to log in to your account.
How to install WordPress on Siteground Hosting
- Start with logging in to the cPanel of the account.

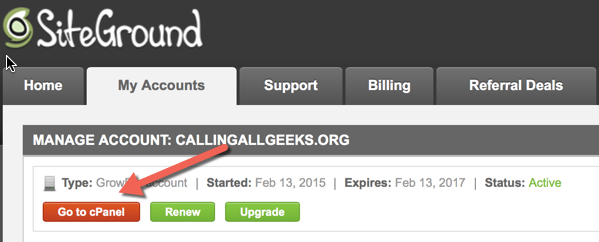
- Since you are here for the first time, you will see a popup that says Start a new account.
- Click on this pop-up and then select WordPress.
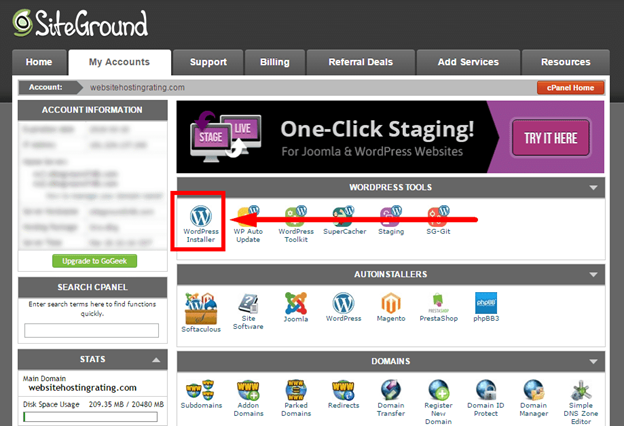
- A new page that opens up will ask you to enter basic information related to the installation process. Enter the username, email id, and password.
- Once done, click on confirm.
- In case, you plan to add enhancement within the site, you can select them on the next page. If not, click on the complete setup.
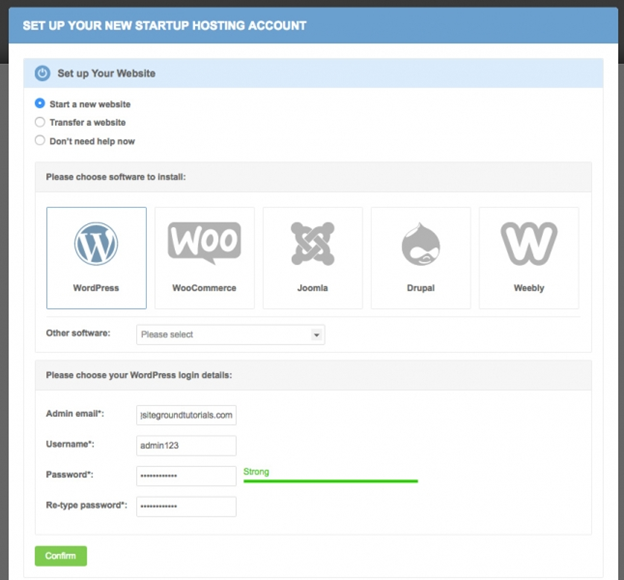
- And with this, we are done with the process. You can now visit your site to see if everything is working fine.
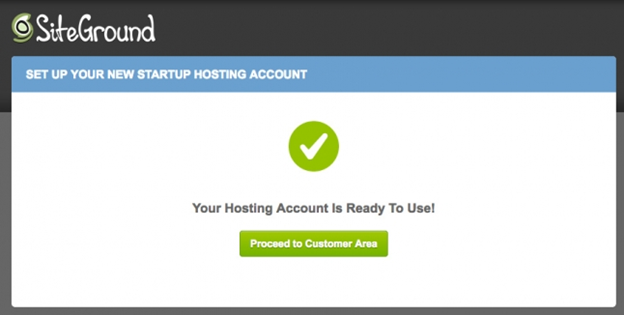
To log in directly
- Log in to the account of the host.
- Move to the menu of my account and here select the admin panel.
- You can now log in to get started.
How to install WordPress on Hostgator
Using Quickinstall on a Shared Server
To get started, follow the steps given below:
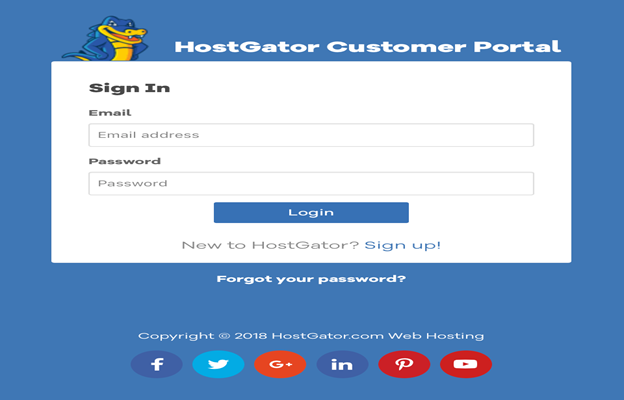
- Start with logging in to your HostGator account. You can log in to the cPanel of the account.
- Scroll down the page to move to the software section and there under the icons, click on QuickInstall.
- Once you are there, click on the option that says: One-Click Installs.
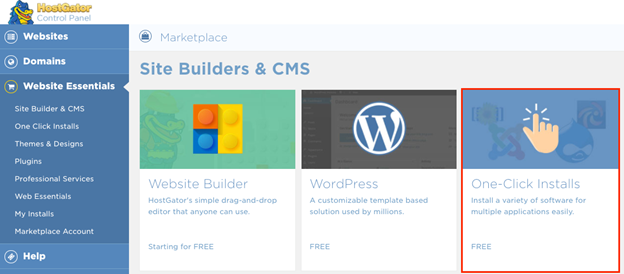
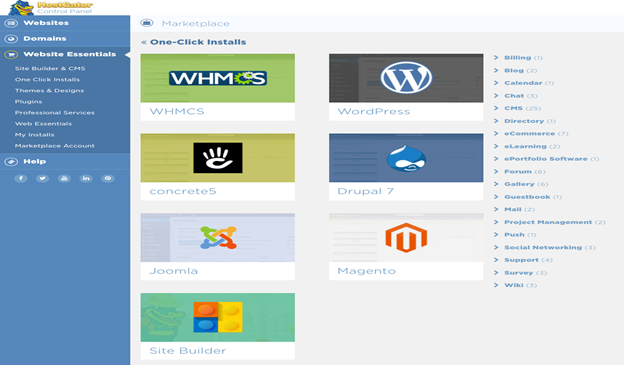
A new page would open up. Since we are about to install WordPress, click on the WordPress icon to get started with the installation process.
- Next, click on the drop-down menu to select the domain for which you would install your WordPress website. In addition to the above, select one or more subdirectories in case you want the websites to use them for loading.

What we mean to say here is that in case you plan to keep your WordPress website URL is example.com/site and avoid the default website as example.com, you would need to specify the subdirectory as asked in the pointer above.
- After you have selected the domain name, the next page would open a form that you would need to fill. You can consider it to be the installation form of WordPress.

- Blog Title: Here you are expected to enter a unique name for your website. This is the name that will show up in the header section and is what we refer to as the website name. Avoid keeping a name that already exists.
- Admin Username: This is the name that you will use to log in to the WordPress account under the alias: username.
- First name: These details aren’t showing up on the website and are basically as a record.
- Last name: Again, your last name is part of the record kept by the website.
- Admin Email: Here, you are expected to feed in the email address that would be the medium of communication with the host. All of the information such as the admin password would be sent to this particular email. Make sure the email that you enter is a working one.
- Agree to the Terms and Conditions and click on install.
- A bar will display the completion of the installation process.
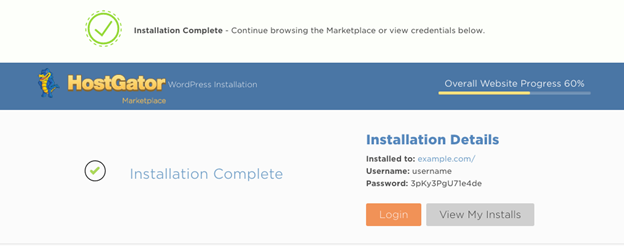
After you are done with the above, you can now move ahead to log in to your WordPress website (use the credentials that you would have received in the registered mail) and see if everything is fine.
How to install WordPress on Google Cloud Hosting?
Installing WordPress on Google Cloud hosting is a bit different than the ones we have mentioned above. Considering that you have no account, you would need to visit Google Cloud Console and sign up. Once done, use your credentials to login and follow the steps given below:
- Click on ‘Create Project’ under ‘Project’ menu, present in the top-left part of the console.
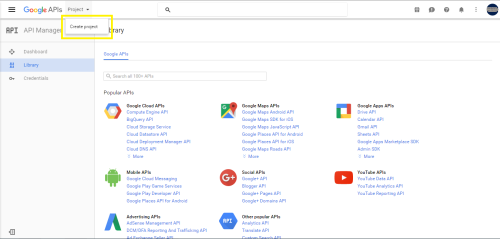
- The next page will seek a plethora of details for you to enter:
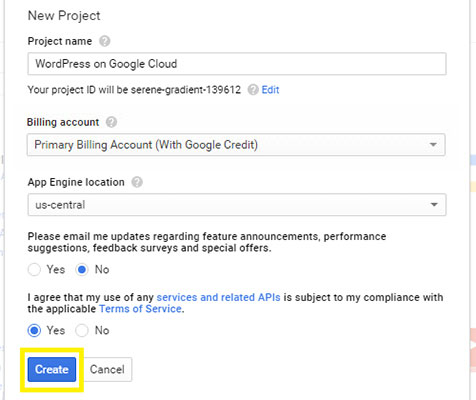
- Project Name: Enter the name of the project. To avoid errors, stick to a basic name, for example, WordPress, or My Cloud WP Site, or anything similar.
- Billing account: Choose your account for billing.
- App Engine location: Here, you can select the location where you wish to host the application.
- Select the radio button as yes to activate the option where you are entitled to receive updates through email on the registered id.
- Terms & Conditions: Make sure you have a quick read at the agreement before you proceed with the installation process. Once done, you can now click on yes.
- After you have entered all of the details, move ahead to click yes.
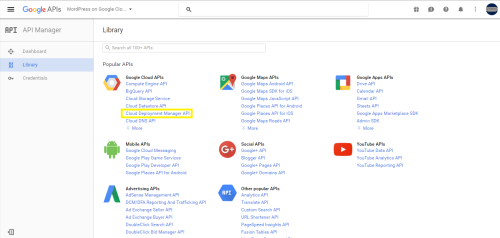
- Now, navigate to Library > Google Cloud APIs > Cloud Deployment Manager API.
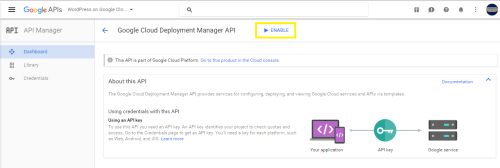
- After this, hit the link for ‘start with prebuilt solution’ to proceed further.
- The next step consists of moving down to the console and selecting CMS > WordPress.
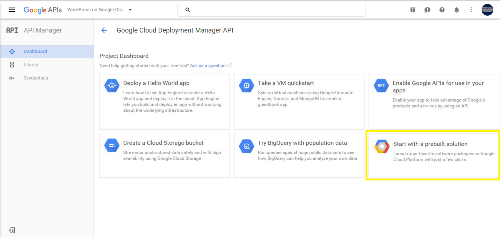
- There you will see a launch button under the compute engine option. Click on it.
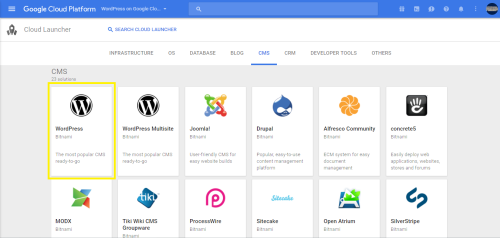
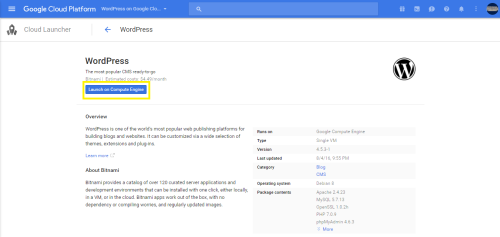
Once you’ve successfully created a Google console project and clicked on WordPress under CMS section, follow these steps for installing WordPress –
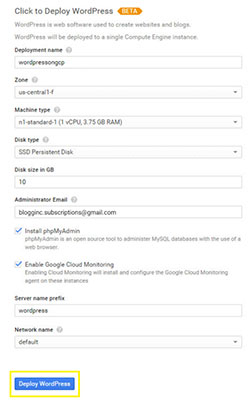
- After you have launched WordPress, click on the ‘deploy’ button to initiate the installation.
- Once again, we have a form that you need to fill to move ahead with the installation process.
- Deployment name: Type a name for the deployment process.
- Select the location here.
- Machine type: As per the power estimate that your website would consume, you need to select the type of machine. Under normal conditions, the n1-standard-1 machine type is the best fit.
- Disk type: Based on your preference, you now need to select the type of the disk.
- Disk size (in Giga Bytes): Here, you will have to choose a specific size of disk for the installation process. By default, the size is allocated to 10GB.
- Administrator Email: Type in a valid email for further communications.
- Install phpMyAdmin: Check this option to automate the process of database creation. As it appears, phpMyAdmin is an important platform for WordPress.
- Enable Google Cloud Monitoring: To make sure you receive regular reports of the functioning of the website, check this option.
- Server name prefix: By default, the prefix would be WordPress. You can either keep its default value or modify it.
- Network name: Finally, keep the default value of the n/w name.
- Recheck the details and finally click on deploy to start the process of installation.
- After this is done, the deployment screen opens up and here you will find all of the important information as the username, password, etc. Keep a copy of the details to use them again in the future.
Well, the process doesn’t end and there is one more thing that you need to do. Generally, websites route https traffic but with Google console, the case is different. So to make sure that all of the traffic is passed through HTTP or https, you need to enable them. To do so, follow the steps given below:
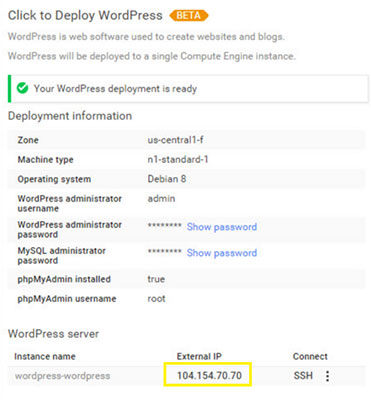
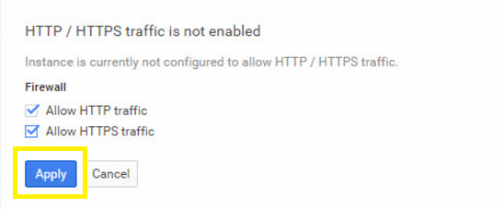
- In ‘WordPress server section’, select ‘external IP Address’ and enable ‘Allow HTTP traffic’ & ‘Allow HTTPS Traffic’ using the checkboxes in the new pop-up. In the end, click on apply now button.
And finally, we are done with the installation process. You can now visit the site.
To log in directly
Surprisingly, Google Cloud doesn’t have any such option and you would need to log in using your WordPress website URL.
How to install WordPress on Domain.com?
Unlike others that we mentioned above, the domain doesn’t provide support for the direct installation of WordPress and to move ahead with this provider, you would need to manually install the WordPress website.
How to install WordPress on Dreamhost
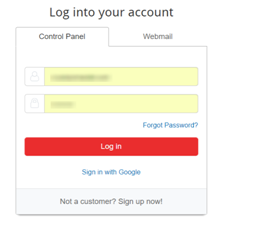
- Start with logging in to the cPanel of the account.
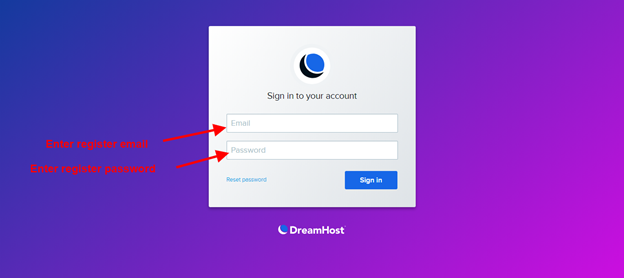
- The page that opens will have a WordPress option on the left side.
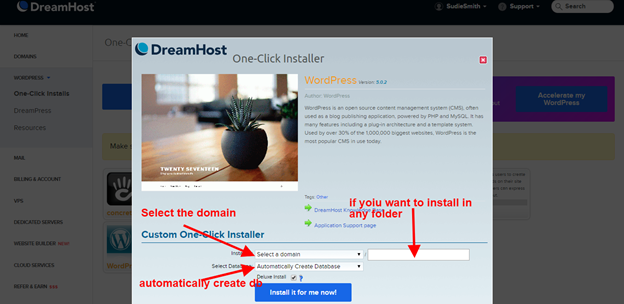
- Now, click on the same and then move to the option of a one-click install.
- Here, you will see multiple choices available.
- Click on WordPress to configure the same.
- First, you would need to add the domain where the installation needs to take place.
- To skip the tiresome process of creating a database, you can select an automatic create database.
- Once done, you are now ready to start the installation process. Click on install now to do the above.
Note: Dreamhost doesn’t have the option of logging indirectly.
How to install WordPress on Greengeeks.com
- Locating the WordPress, you need to get started with logging into the hosting account.
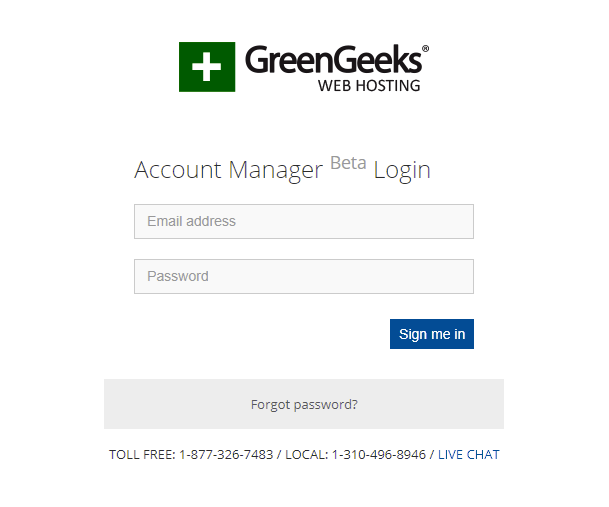
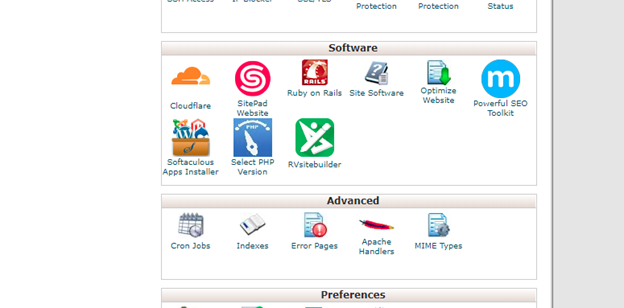
- Move down the page to find the login button of cPanel.
- You can now click on it to launch the Softaculous App Installer.
- Once you click on the icon, you will find the option of WordPress in the next page.
- Select the WordPress icon and add the necessary details.
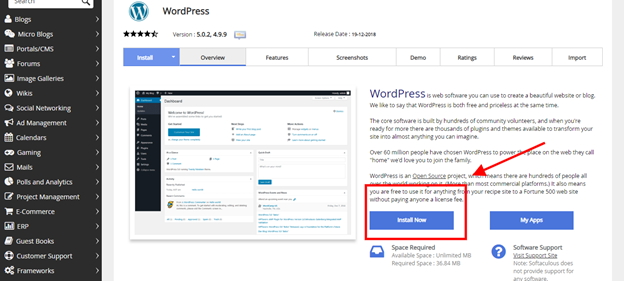
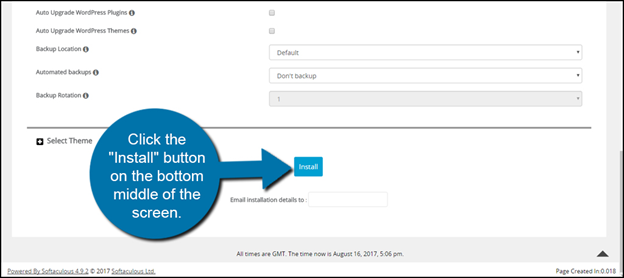
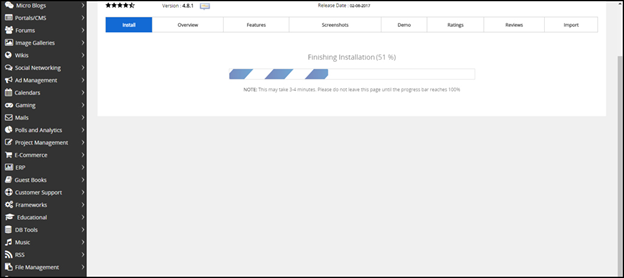
- Once done, you are now ready to start the process. Click on install now and you are done.
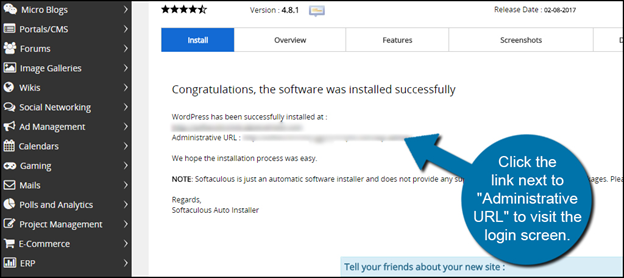
To log in directly
- The direct login process as rendered by greengeeks is pretty easy.
- When you have successfully completed the process of installation, below you will find an icon that says, the admin.
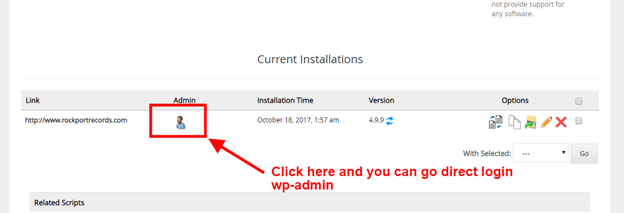
- Once you click here, you will be directed to the login area.
How to install WordPress on Ipage.com
- Following a similar process, log in to the hosting account of the host service provider.
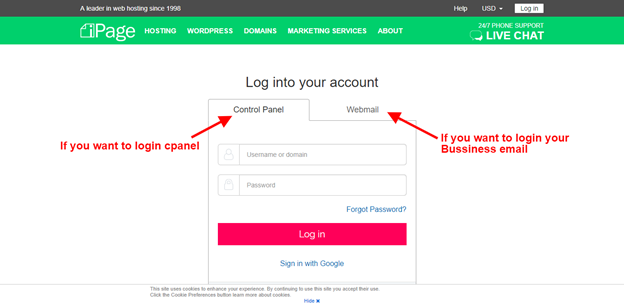
- Navigate across the page to find the Scripting and Add on section. Here, you will see the option of Install Central Link. Click on it to install the same.
- After you are done with the above, the new page will have several options. Move to the blog section and click on WordPress.
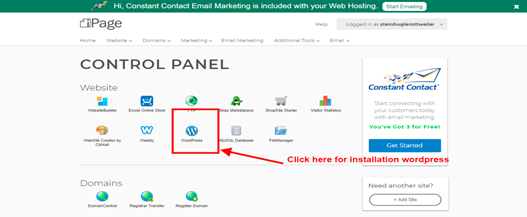
- Move down the page to find the install now option.
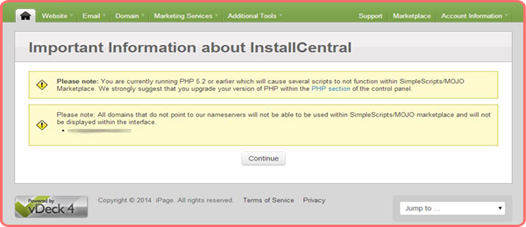
- In case, a warning pops up on the screen, don’t get scared. Simply click on continue and move ahead with the installation process.
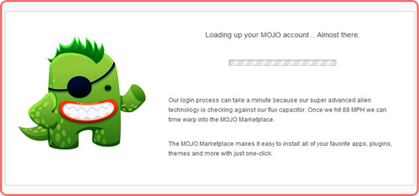
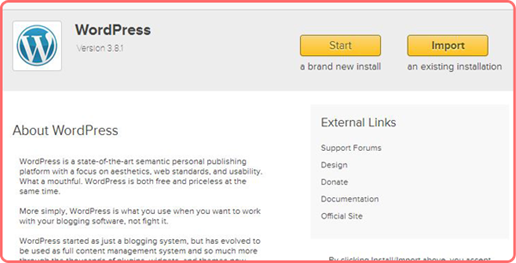
- You will encounter a different page here, namely mojomarketplace.com. Click on start to install WordPress.
- In case there already exists an installation file, you can import the same using the import link.
- The next page will ask you to enter the domain name. Type in the name and click on the check domain to verify whether the domain is functional or not.
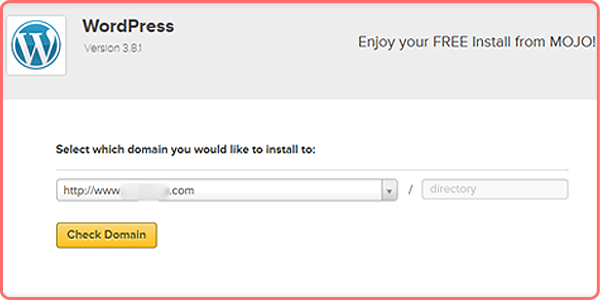
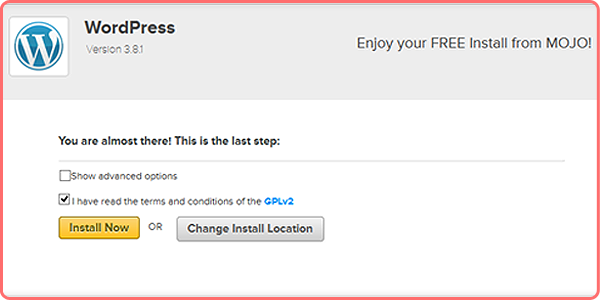
- Check the terms and conditions and finally, click on install now to complete the installation process.
To Log In Directly
- Once you have installed WordPress, you will find the icon of WordPress.
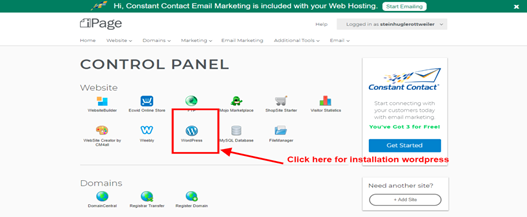
- Click on it to log in to the account.
How to install WordPress on justhost.com
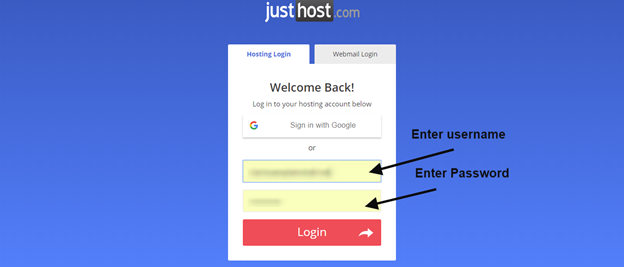
- Log in to the cPanel of the justhost account. Enter the credentials and validate the same to log in.
- Navigate across the page and move to the website section. Here, you will find several options
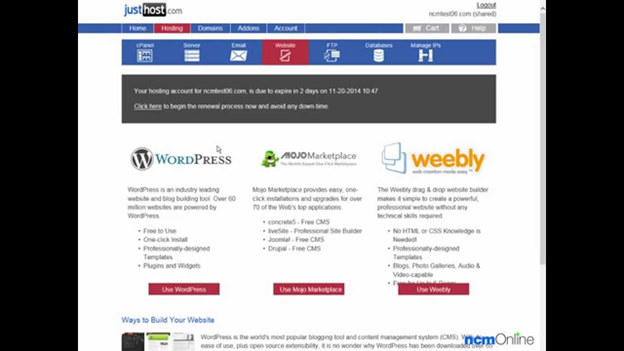
- Scroll left and right to find WordPress.
- There you will find two options, install and import.

- In case, you have an installed file in your local directory, click on import to add the same.
- If not, click on install options to move ahead with the process.

- The next page that opens up will ask you to enter the domain name on which you wish to install the WordPress website.
- Enter the domain name and then click on the check domain to find whether or not the entered domain is functional.
- In case, you want to edit the URL of the website, you can edit the same. In the option that is just next to the domain name, you can enter the blog name that you wish to add to your website URL.
- Further, move to the advanced setting option to make changes in the email address, user name, and password of the WordPress website.
- Scan the terms and conditions to make sure nothing goes wrong
- Once done, you can now click on install now to start the process.

To Log In Directly
- Oops, you cannot log in to the WordPress website directly from the justhost account.
How to install WordPress on Networksolutions.com
- To locate WordPress on the networksolution hosting service provider, start with logging into their account.
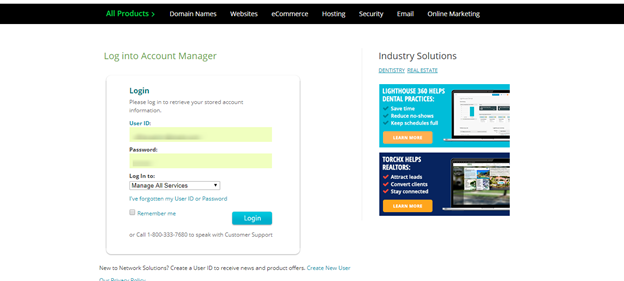
- Here, click on my products and services option.
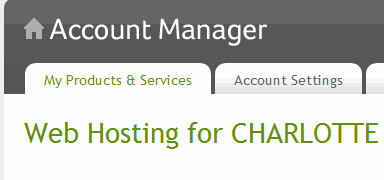
- After this, scroll down the page and locate the Account manager.

- Once you are inside the account manager page, you would now need to find the tab that says My Hosting Packages.
- After this, move ahead and click on the option of hosting tools.

- After you have done the above, you will be on the hosting page. More down the page and select the section that says Open Source.
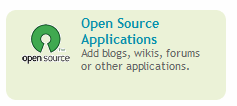
- Here, click on add new to start the configuration process of WordPress.
- Enter the domain name of the website and enter the subdomain to attach it to the URL of the website.
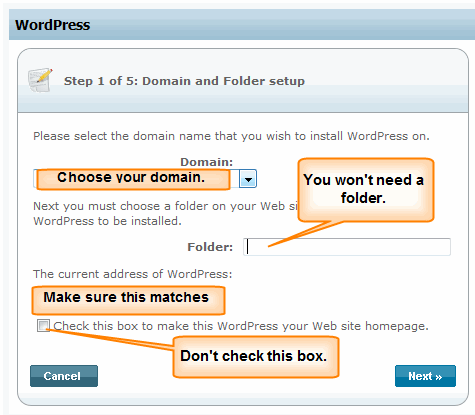
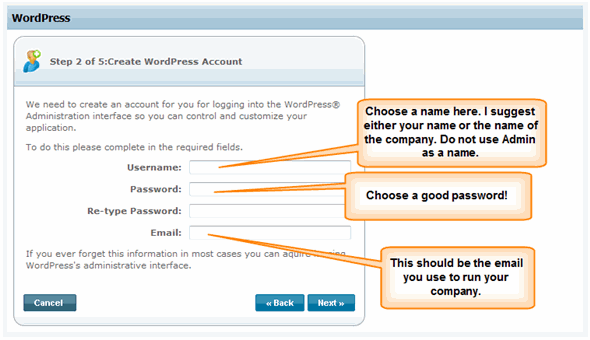
- Under the advanced setting option, enter the email address, the user name, and password. These are apparently the login credentials of the WordPress account.
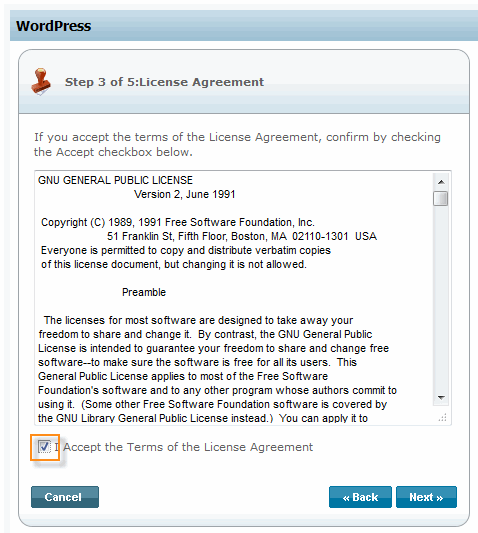
- Make sure you run down the license agreement and click on next to move to the next step
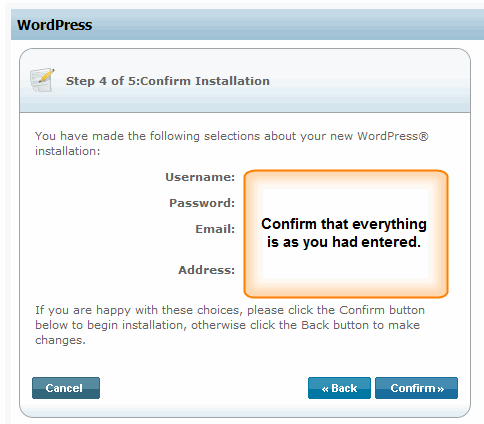
- Click on confirm to start the installation.
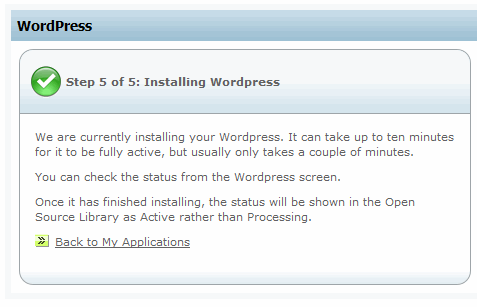
You are now all set to use WordPress.
For Direct Login
- Once you are done with installing WordPress on the networksolutions.com, move down to click on Open Source Application.
- The page that opens will have several options.
- Move to the left side of the screen. Click on login to enter your WordPress website
Note: You can also reset the password of your account. Click on the reset password link, just below the login option.
How to install WordPress on Yahoo Hosting
- To install WordPress on Yahoo hosting, log in to the Yahoo account.

- Under the navigation tab, click on create and update.
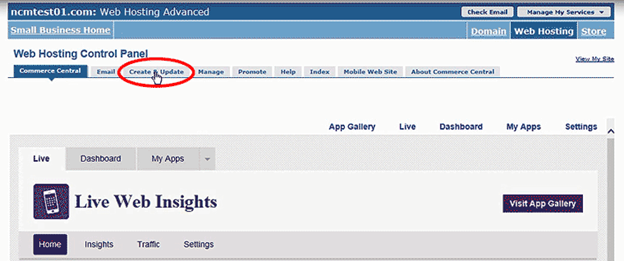
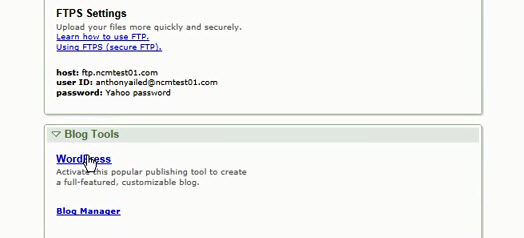
- Once done, move down the page and under the Blog Tool option, click on WordPress.
- Installing on Yahoo is again different than the others stated above. Starting with, you would need to fill up a form for the installation.
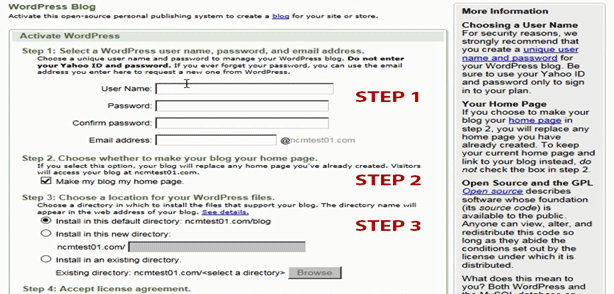
- The form that opens up will ask you to enter the following information:
-
- Step 1: Enter the username of the account. This you will need to log in to the account. Further, add a password (make sure the password is a decent combination of letters and alphabets), and then enter a valid email address for future communication with the host.
- Step 2: In case you want your blog page to be the home page, and install the WordPress website on the same, click on Make my blog my home page.
- Step 3: Here you would need to select the directory that will have all of the installation files and folders. Remember, Yahoo doesn’t allow you to install the same on the root directory. You can either create a directory or use an existing one here.
- Step 4: Agree to the terms and conditions and then click on activate.
- Now you will be directed to the hosting page.
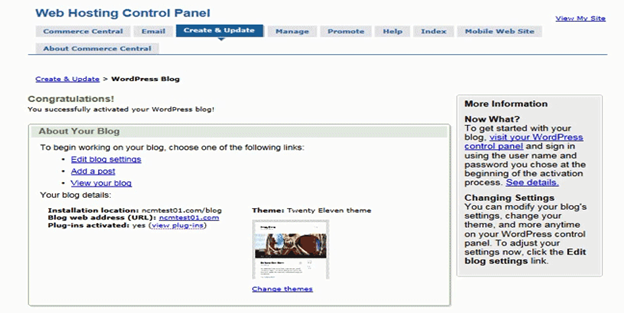
- You can now click on Edit Blog Settings to gain access to the dashboard of WordPress
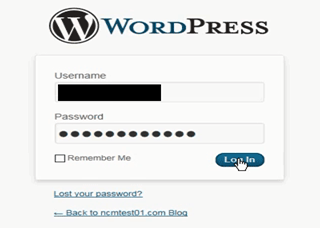
- Alternatively, you can click on add a new blog or edit a blog to enter the WordPress website.
To Log In Directly
- Here again, Yahoo hosting doesn’t have this option of logging into the WordPress website and you are void to use the default URL to do the same.


