How to Install WordPress on Mac
Last updated on February 13th, 2020 at 02:37 pm
Are you planning to start a WordPress blog? Do you think it’s better to try WordPress on Mac before investing in it?
Preferably, you are on the right side. Trying WordPress on a computer before actually using it, gives you a fair idea of what it is and how can you benefit from the same.
In case, you don’t have much idea as to how to install WordPress on Mac, this article will help you out.
Here, we make use of the MAMP server to install WordPress on Mac. MAMP stands for:
- Mac OS X,
- Apache,
- MySQL, and
- PHP.
Why do you need to install WordPress on Mac?
Many times it so happens that you want to change or modify your website but doing the same on the live website isn’t advised. That’s when we suggest installing WordPress on Mac, testing the modifications made and if you are satisfied, you can then deploy the same to the main website.
Wondering what happens when you install WordPress on Mac? Well, there is no rocket science in understanding this.
When you install WordPress on Mac, all you do is create the local version of the WordPress website which you can use for testing changes and modifications. It could be anything from adding a theme or updating a plugin. Having a local version of the WordPress website gives you the ease to testify the layout of the WordPress website without actually embedding it on your WordPress website.
Convinced on why would you need a local version of the WordPress website?
How to install WordPress on Mac?
First things first: you would first need to install MAMP on Mac! To do so, follow the given below process:
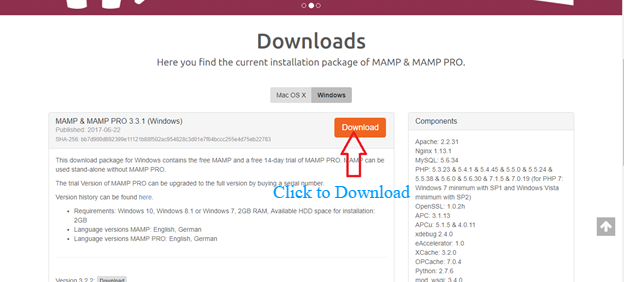
- Visit the MAMP website
- Click on the download link to start the process.

- Once the download is complete, click open the file and then drag the image file of the same in the application folder.
- Now follow the instructions that appear on the screen and complete the step
- Another thing you can do is simply launch the MAMP from the Application menu.
Be mindful when you are installing MAMP as it has a paid version too. So based on whether you wish to continue with the free version or the paid one, install the software.
Note: Before you Kickstart the process there are a few things that you need to change. This will improve the experience of MAMP.
- Launch the preferences menu
- Click on the ports tab to switch
- Now enter the value as port 80 for Apache and then click on the button that says OK. This makes it easier for you to own access to the local website. There is however one drawback. Meaning that every time you open the MAMP server, you would need to enter the login credentials of the computer.
- Another thing to do is to set the value for the document root folder. This is a place that you will use to store all of your created websites. Default settings places the website under the /Applications/MAMP/htdocs/ folder. However, you can customize it and change it to one that is easily accessible.
- Next, in the preferences dialog box, you would need to click on the Web Server tab.
- Select the folder, one where you wish to save the website.
- Give the folder a name and your job is done.
We are now ready to install WordPress on Mac!
Set up of Mac
Installing WordPress on Mac
To start with, you would first need to download WordPress on your Mac. To do so, visit the website WordPress.org.
- Visit WordPress.org
- Download WordPress from there.
- Once you have downloaded the WordPress website, you next need to unzip the file.
- Copy the WordPress folder and then paste it within the root folder of MAMP. (Name of the folder can be anything of your choice)
Prior to moving in with the process of installation, WordPress requires a database to store all of the websites. Hence, we will first create one.
- Click on the button of Open Web Start Page. You will find this in the MAMP application window.
- Once you click, you will now see a new window.
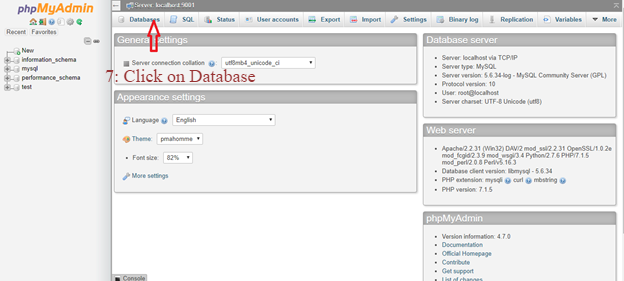
- Here, click on Tools and then on phpMyAdmin as seen at the top menu bar.

Once the phpMyAdmin portal opens up, you would need to click on create a database and then select: create a new database.

Give the database a name of your choice and then click on save.
Once you are through, we are now ready to install WordPress on Mac.
- Click open http://localhost/mysite.
- Select the language that you wish to continue.
- Click on ok. The next screen will ask you to enter database information. You already have one, so you can skip this.
- Use username as host and for database use localhost.
- Now click enter.
- Click on Run to install.
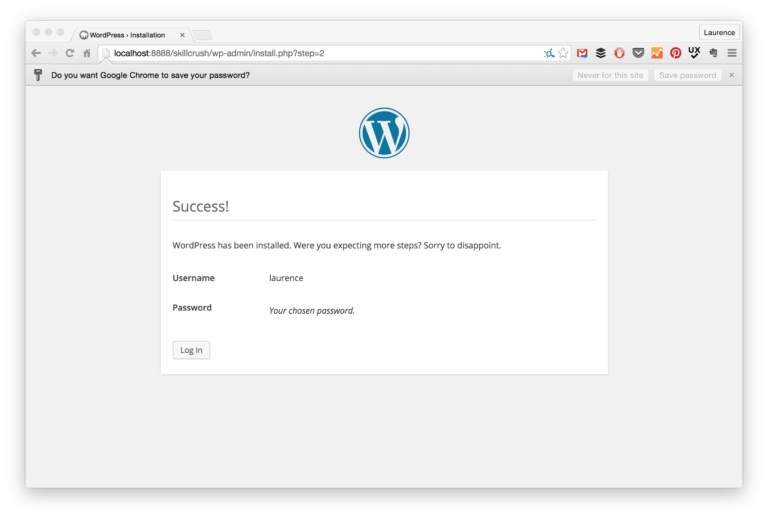
- Once you are done, you can now enter the website information and click on submit.

You have now installed WordPress on Mac. So, log in to check your website and leverage all the advantages of WP. Chat Now


