How To Make WordPress Site Private
Last updated on September 8th, 2020 at 12:47 pm
Hosting a WordPress site online, you would want to share your thoughts, ideas, actions, and views on a topic or maybe you are about to run an online business. Irrespective of why have you created an online website, you would always want it to share with your acquaintances and also, make it visible to the outside world and grab user attention, right?
Well, this might be the case the majority of the time but not always. Many a time, it so happens that you don’t want to share your website content with the outside world or restrict access to only a handful amount of individuals. One more instance where you might feel the need to hide a page or a website from the world is when your site is under construction. In either case, you need to turn your website private and hide it from the global world.
If you relate to the above and are looking for ways to turn your website access restricted, this article would be of great help. We have exquisitely articulated the steps you would need to incorporate to turn a public hosted website, private. But before delving deeper, let’s have a look at why do you need to password-protect your website.
Why or When Should You Turn Your Website Private?
There are thousands of reasons as to why a WordPress website owner resorts to turning the visibility of a WordPress site private. In case you aren’t sure about when and why let’s have.
- You have few images, videos related to family events, weddings, baby pics and all other private photos that you wish to share with your near and dear ones, at remote and distant places. Sharing such huge data files would not be efficient and incur errors. The best you can do here is to create a WordPress website and then make it private, restricting access to only the specified users. This way you can not only share huge files but also maintain the privacy of it.
- In case, you have a habit of writing a diary or a journal and you have migrated to an online website to write and record the same, you wouldn’t want to share it with others, at least without your consent. In such a scenario, converting the website visibility to private would shield your data from the outside world.
- For teams that are part of a project and connected remotely, connecting through emails and calls isn’t much efficient. Creating an online website and uploading content would streamline their communication and unify all of their data. Don’t forget to turn the website, private.
- Websites that are solely designed for a particular community or a classroom need not be accessed by the outside world. As a matter of fact, the conversations are private and confined to the students only. Hence, a private blog would help you share and communicate all.
- Lastly, an online website that was functional a few days earlier is now under construction or maintenance and you don’t want your customers to visit the website and redirected to a page 404 error. Of course, it increases the bounce rate. What’s best here? Switch to a private mode until the website is ready to be launched. Once done, you can easily switch back to the public mode and go online.
We hope that by now, you would have gained a fair idea of the need for a private blog along with the situations where you would require one. Moving ahead, let’s see how you can turn your fully-functional website private.
Turning Your WordPress Site Private
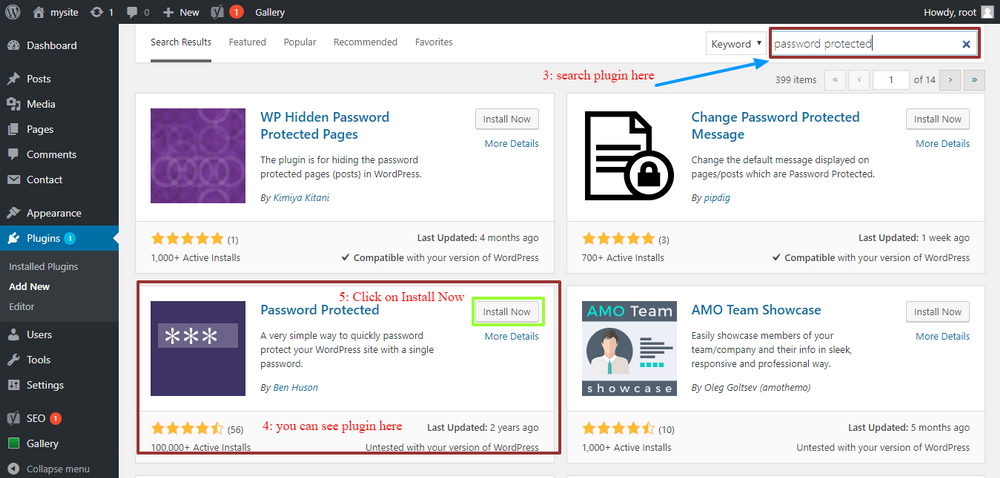
To start with the process of turning the WordPress site private, you would need to download the password-protect plugin and install it on the WordPress website. To do so, follow the given below steps:
- Click-open the admin page of the WordPress website. Here, feed in the required username and password to login to the site.
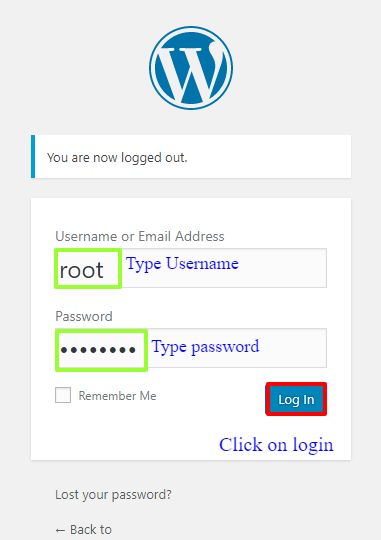
- As soon as you are logged in to the system, a window of WordPress dashboard appears right in front of the screen.
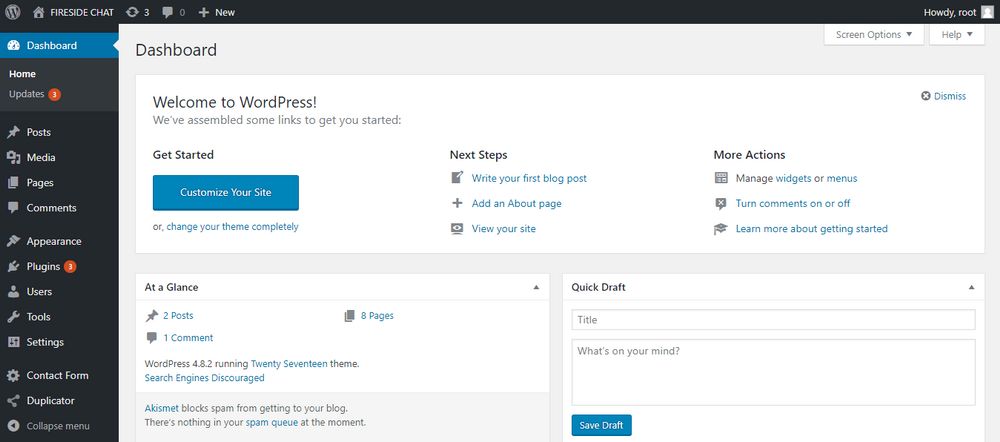
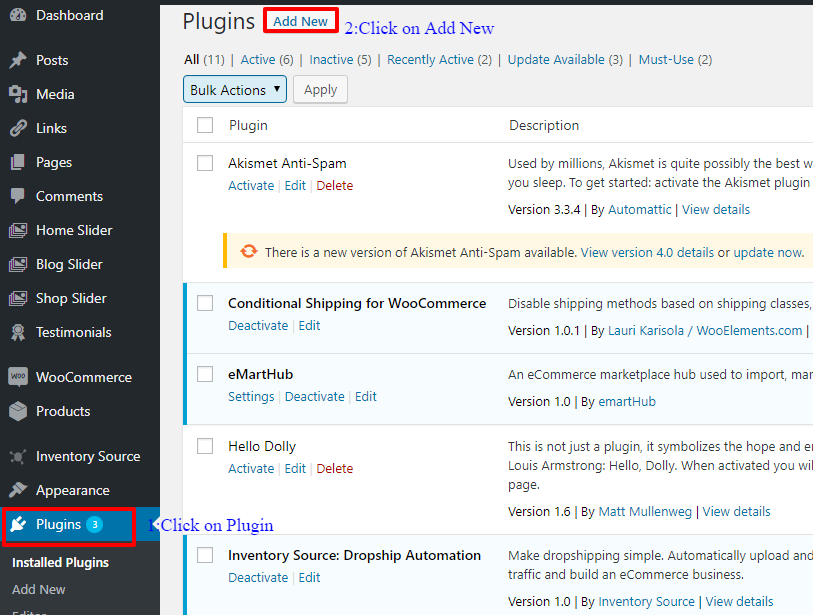
- Hover around the left side of the screen, move to the sidebar and click on Plugin.
- Here, click on Add New.
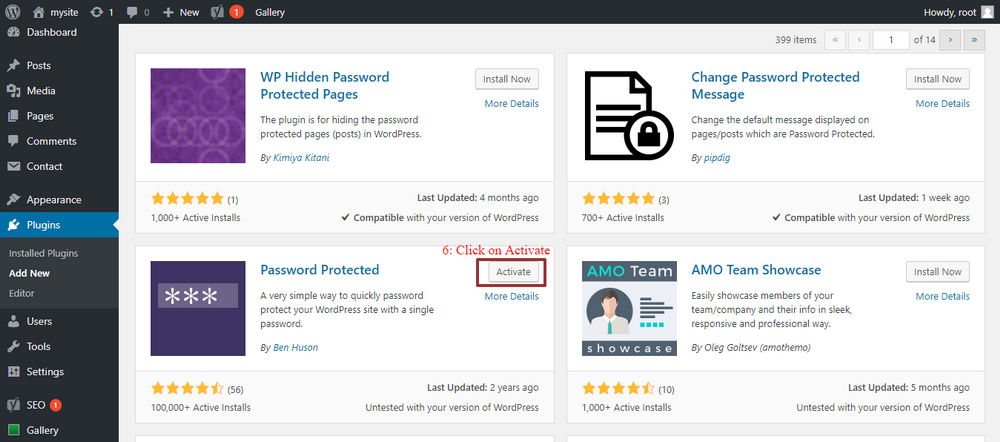
- Here, click on install now.
- Once done, next click on activate.
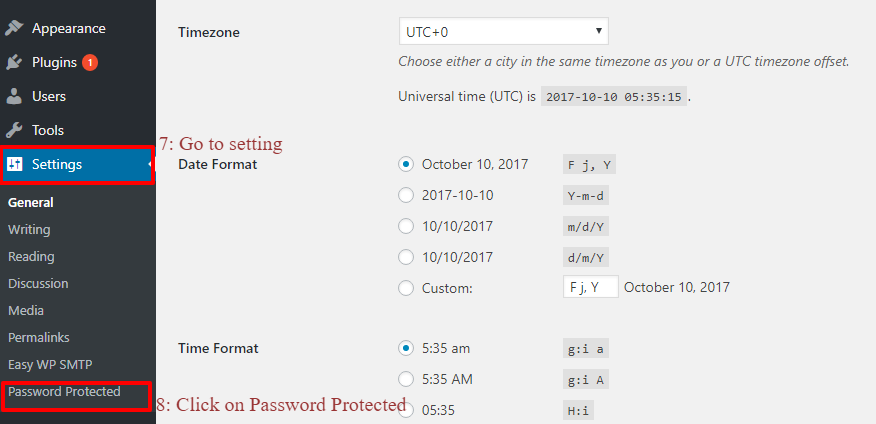
- After you have activated the Password Protected plugin, move around to see settings. Click on settings. A menu appears and there you will see Password Protected.
- The status of the password-protected option is not enabled. All you need to do is click on the checkbox, to enable the same.
- Next, you will see an option that says – Protected Permissions. Based on who is allowed to access the site, you can clock on –
○ Allow logged in users
○ RSS feeds
○ Allow administrators - Now, in the next field, you need to add a password that will be used to access the private website.
- You would need to type the password twice. Once to confirm the typed password. After you are done, you can now save the settings. Make sure that the created password is a mix and match of alphabets, numerals, etc and strong enough to be cracked.
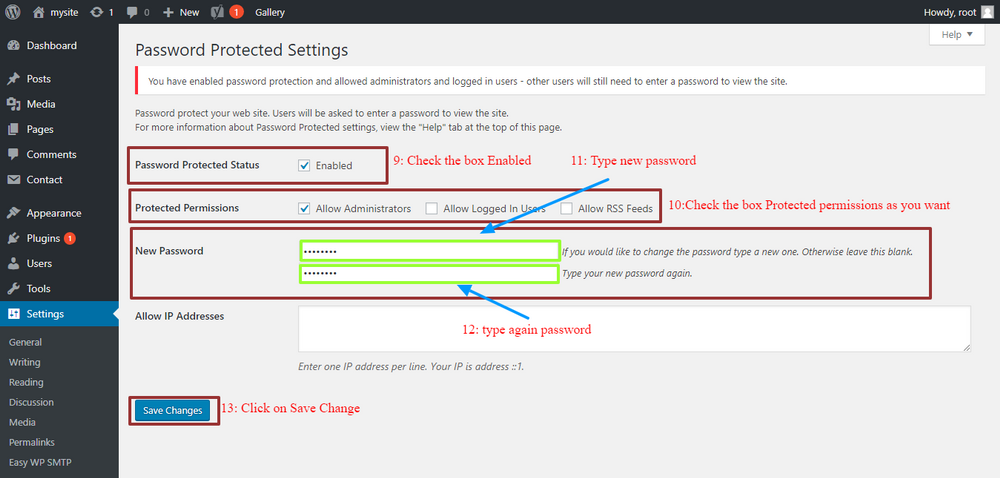
- Save changes to move forward.
- Just one last step, before we are done with creating a private WordPress website.
-
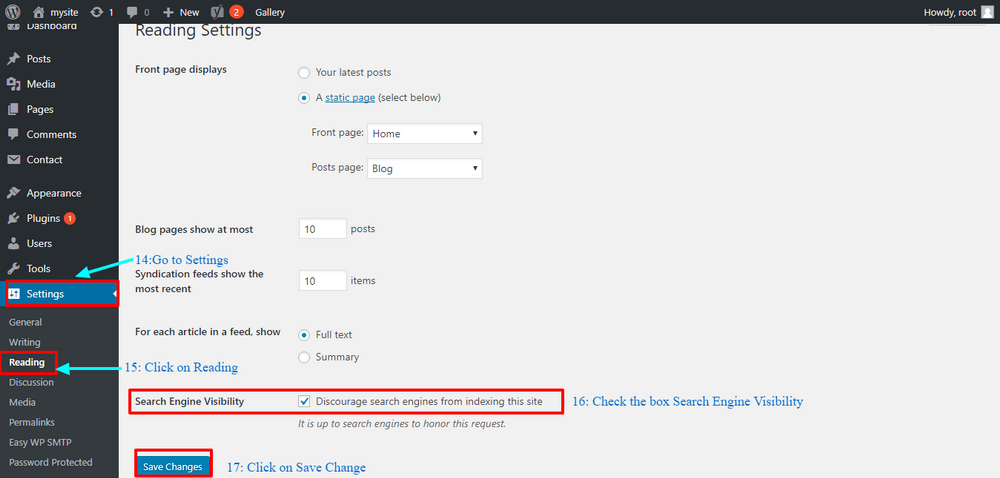
- Click on settings
- Hover around and click on reading.
- There is a checkbox that says visible in search engine. Discourage this to prevent your WordPress website from being visible on the search engine
- Click on save to feed changes.
And you are done!
Next time, if anyone tries to access your WordPress website, he/she will be prompted with a text box where they would ask to enter the password to access the website. Failing the above, no one can access your website. Though the process is long, it is simple and allows you to create private WordPress websites easily.


