How to Manage and Delete Transients in WordPress
Last updated on August 11th, 2021 at 08:05 am
WordPress and theme developers mostly use transients that are going to have them store timely information into the database and another benefit for that is it upgrades the speed of the WordPress website. There are a lot of queries assembled or gotten by our readers. They are facing difficulty to manage and delete transients in WordPress. Let’s take an example that if a user is going to change Twitter and a popular post by deleting all caches at that time the user is helpless and does not do anything. So in this article, we are going to show how to manage and delete transients in WordPress without going into the database. Read this article carefully grabbing the most important information.
What are transients?
The basic mean of transients is that they can keep complete data of any WordPress website with an expiration time. This can only be possible if any developer allows a transient API. For example, if a user wants to retract social media count on a post in a floating social bar plugin then this can be possible with the help of transients API. However, if the user is not going to do this thing with the help of transient API then a user needs to connect their social network account with each page and that will cause slow down your site significantly.
What is the reason behind that we have to manage our delete transient?
This can only be visible in some few cases for example if your WordPress website is connected with Facebook and your website is not going perfectly and the counter shows zero accounts. Then use a need to wait for 30 minutes and clear out the complete transient after that user will get an accurate count. Another reason for that is to check whether the plugin is working incorrectly manner or not.
How to manage transients in WordPress?
To manage transient in WordPress users need to install and activate the WordPress plugin. The user needs to install and activate the transient manager WordPress plugin. After that user needs to set up a transients plugin in the WordPress website. This is not a difficult task user need to follow all the steps which are given below after that user can easily achieve their task.
How to install and activate the Transients Manager WordPress plugin?
- First of all, a user needs to login to the WordPress dashboard by using a login ID or username and password after that click on the submit option.
- Now user successfully logged in the WordPress dashboard area.
- Now the user must click on the plugin option which is present in the context menu. After that is a context menu appears on the screen. User must click add new plugin option in the sub context menu.
- After clicking on the Add New Plugin option a new screen appears in front of the user. The user can see a search box on the screen. Now the user must enter a keyword i.e. “Transients Manager plugin”. After entering the user must hit enter and the user can see the plugin appears on the screen.
- Now users click on the install button and after some time plugin will be installed in WordPress.
- After successfully installing, users can see the “Activate” button. Now the user must click on the Activate button. Now The post grid plugin has been activated in WordPress.
Now users can see that the WordPress plugin has been successfully installed and activated in the desired WordPress.
How to set up a Transients Manager post plugin in WordPress?
Users need to follow all the steps carefully to completely set up the transient manager plugin in WordPress which is given below.
- A user can see the context menu which is present on the left side and it contains a lot of options.
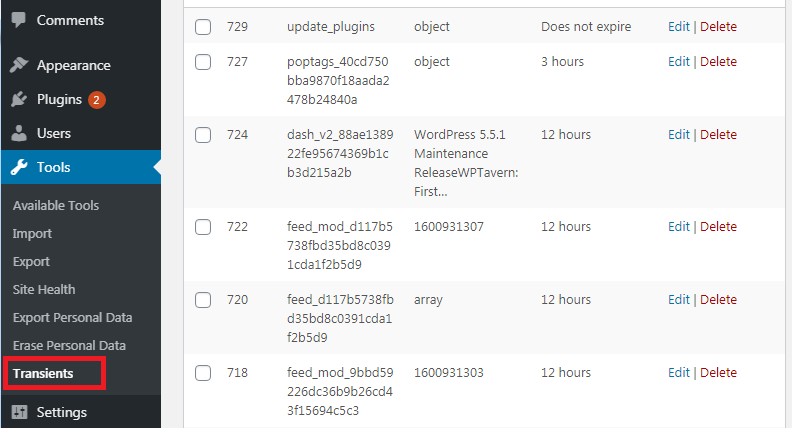
- Users need to click on the tools option which is present in the context menu.
- After that, a context menu appears in front of the user that needs to click on the transients option.
- A new screen appears in front of the user. Users can see and image given below.

- User can see a complete list which is present in front of the user.
- User can go for bulk action such as
- Delete expired transients
- Delete all transients with an expiry date
- Delete all transients
- The choice is up to the user that the user will go for bulk action or go for individual selection.
This is the most widely used and trustable WordPress plugin by the developer. The main reason behind that it makes the developer can easily identify any transient because they are mentioned with their name. After the names action user will see the type of transient list. The transient list contains an object, array, number, or alphabetical string.


