How to set up Shipstation Woocommerce Integration?
e-Commerce experience and consumer expectations are major concerns when it comes to shipping. Hence, businesses are trying every alternative to bring the best in the market.
There are numerous businesses that are enjoying the benefit of online shopping. While there are others who are struggling hard to meet their additional fulfillments.
WooCommerce is the industry leader that assists in setting up online stores. Since its evolution, it is used as an efficient e-Commerce store builder.
Table of Content:
- 1.1 Shipstation
- 1.2 Requirement for Shipstation
- 1.3 Connection requirements for Shipstation
- 1.4 Main features for Shipstation
2. WooCommerce
3. How to do Shipstation integration in WooCommerce?
A brief introduction to:-
1.1 – Shipstation:
Shipping is an essential component in the process of order fulfillment. Shipstation is convenient shipping software. This easy-to-use software is the best rescue that can assist you to save resources and time. And further allows to effectively ship.
This web-based software can streamline order shipping and processing. It will process the orders from prominent shopping carts and marketplaces. Shipstation also helps online sellers to save money and time by giving great shipping.
It is best for all business sizes. Shipstation can assist you to meet all your shipping requirements. Hence, the Shipstation Woocommerce integration is beneficial.
1.2 – Requirement for Shipstation:
It is the paid and best shipping plugin. This plugin can access your WooCommerce database to export, import, and transfer orders. Hence, you must clarify the order import and connection requirements to use this plugin.
1.3 – Connection requirements for Shipstation
- You need a verified URL WordPress domain controller
- Authentication key for WooCommerce
- WooCommerce active account
- Installed Shipstation in the WooCommerce dashboard
1.4 Main features for Shipstation
Below mentioned are some essential features for Shipstation:-
1. Management of Robust Order
The features of order management for the Shipstation connect will allow you to save less time for minor tasks. Hence, you can spend more time on the other important aspects that need special attention.
2. Automation
You can reduce human error and automate the repetitive tasks for Shipstation connect. And can get rid of all manual data entry. But for this, you need to use the customizable shipping presets of Shipstation.
3. Mobile friendly
You can also visit the app of Shipstation to access the details of the order and track data. One can access it via smartphone or tablet in real-time.
WooCommerce
It is the best source to add features such as Checkout, Add to Cart, and Product Analytics. Because of its magnificent support, WordPress is used for e-Commerce development.
It can assist any business to develop end-to-end and responsive solutions for eCommerce businesses.
Since its evolution, the process of web development has been simplified.
2.1 – Main features of WooCommerce
Below mentioned are some main features of WooCommerce:-
1. Customizable themes
It is quite challenging to make changes to a custom site that is live. But with WooCommerce, you can make desired changes in features and launch your site.
2. Security
For data security, you need the support of the best WooCommerce development company. Their team will closely work with the security specialist.
How to do Shipstation integration in WooCommerce?
To do Shipstation WooCommerce integration, you need to download and add plugins. This you need to add to the dashboard of WordPress.
Step 1: Download the plugin of Shipstation
Log in/ Sign up to the homepage of Shipstation. Download the integration plugin of Shipstation. This you will see under the section of download.
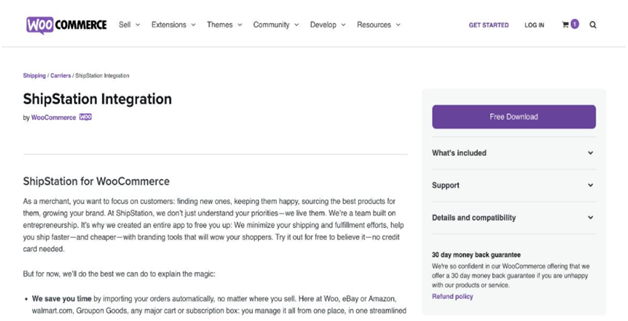
- For ShipStation WooCommerce integration, go back to the dashboard of WooCommerce and sign in to the administers portal.
- Navigate the Plugins tab onto the dashboard of WordPress. Navigate and click the option “ Add new”.
- Find the button “Upload” to upload the Shipstation plugin. Choose the zip file from your computer. Tap “Install Now”.
- Wait for a few moments for the Salesforce connection. Next, choose “Activate Plugin”.
Step 2: Set up the shipping setting of WooCommerce
After the installation of ShipStation, you must adjust the default settings. For ShipStation WooCommerce integration, you need to check the dashboard of WooCommerce. Choose “Settings”.
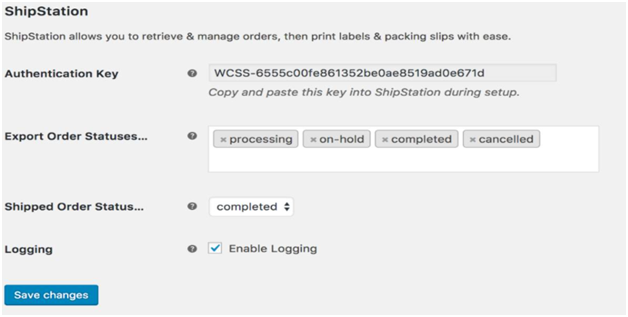
Under the section “Integration”, Choose “ShipStation”. You will see the setup page of ShipStation.
But you must be clear of some components, they are:-
Authentication Key
The first thing that you will come across on the setup page. You cannot alter it because it is created automatically. Term it as a unique key. This will assist you to link Shipstation to the online store.
Export the statutes of the orders
You need to select the WooCommerce order and statuses that you need to send to ShipStation. Make sure to send those orders that are paid. This includes completed, processing, or canceled/ On-Hold orders.
Status of shipped Orders
You must update the order status after you ship the product/ order for ShipStation WooCommerce integration. Go for completion because it implies no action is required or the order is finished.
Logging
Choose “Enable Login” if you are having any trouble. It is best for debugging issues. You can find the logs under “WooCommerce”.
Select “System Status” and tap the button “Logs”. Pick the relevant log files of the ShipStation for ShipStation WooCommerce integration. This can be chosen from the logs menu.
Select “System Status” and tap the button “Logs”. Pick the relevant log files of the ShipStation for ShipStation WooCommerce integration. It will be chosen from the logs menu.
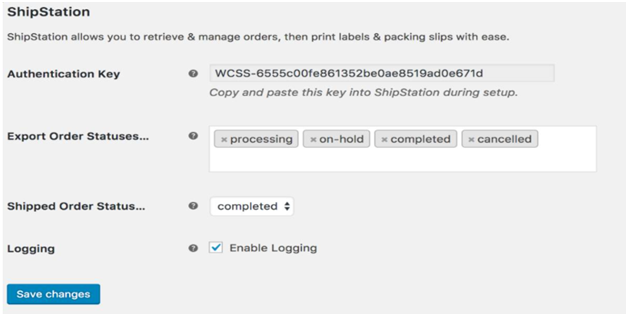
After you customize the setup page, tap the option “Save changes”.
Step 3: Connecting WooCommerce with Shipstation
After you set up the plugin, you must link the store to your ShipStation account. Choose “Account Settings” and tap the option “Selling Channels”. Navigate further and choose the tab “Store Setup”.
You will see the window with notifications “New Connection”. Complete the Store URL and “Authentication key”. This is your WooCommerce page from Step 2.
Check all the details carefully and choose the option, “Test Connection”. Wait for some moments for the verification of the Shipstation connection. If it is a successful test, choose the button “Connect”.
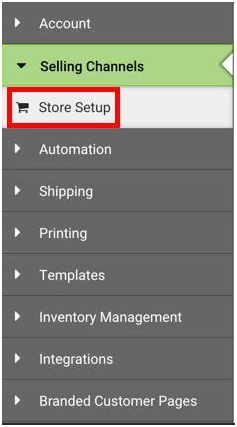
Tap the button “Connect a Store or Marketplace” and choose the option “WooCommerce”.

Step 4: Customization of the shipped orders
Once your ShipStation WooCommerce integration is successful, customize Shipped orders. Enable the option “Notify Marketplace?”.
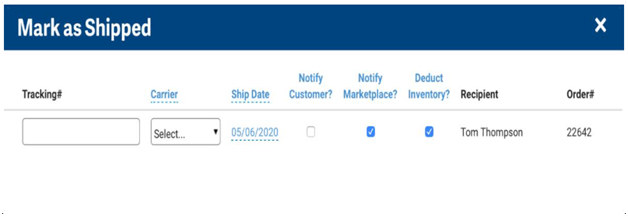
It is essential because Shipstation will notify the store instantly. This will in turn cause the WooCommece to do the following process:-
- It will add the remark of the customers with all the important details regarding carrier and tracking.
- The order status will be updated here. It will be revised as “Shipped Orders”.
Step 5: Export and Import the field data from ShipStation
Here the imports and exports of the field data take place. You will have three custom fields and this you can submit in the ShipStation section of orders. In Custom Section 1, the used Coupon codes are stored.
This option turns on by default. Field numbers 2 and 3 will get modified by snippet. This (snippet) will specify the metadata name for exports.

Some amazing features that make ShipStation Integration the best choice:-
- Offer custom views
- Customize the order for the process of fulfillment.
- Report data
- Management of order
- Integration
- Handle multiple carrier
Final Conclusion
ShipStation is an amazing option for shipping. It is beneficial for both large-scale and small-scale sectors. It has a simple admin interface. This return can help to compare the rates of shipping. Further, you can integrate with the various systems of e-Commerce.

