Top 5 WordPress Auctions Plugins Installation & Set Up
Last updated on September 11th, 2023 at 09:48 am
WP Auction Plugin
WP Auctions plugin shows your auctions in an attractive AJAX powered popup for optimum user experience.
Popular Features:
- Assign WordPress auction plugin to your Post/Page
- Upload an extra image
- Added Shipping price
- Custom contact field. Request phone numbers, addresses etc.
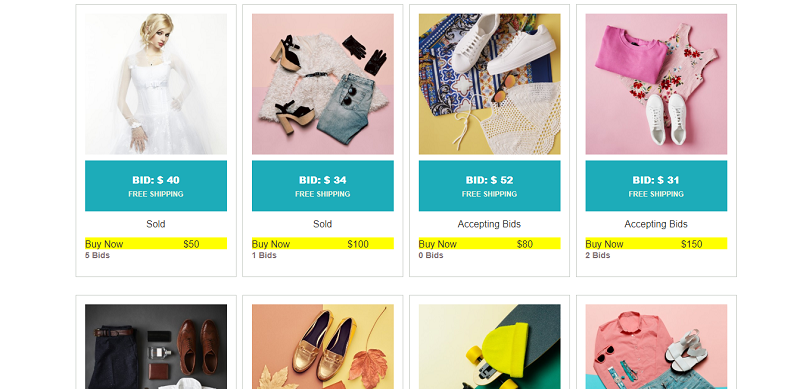
- Show auctions in a List or Graphic format.
- Allow only registered users to bid.
Auction Plugin Installation
Please search this on google and download this plugin or you can directly add this plugin on your website.
Now show your plugin
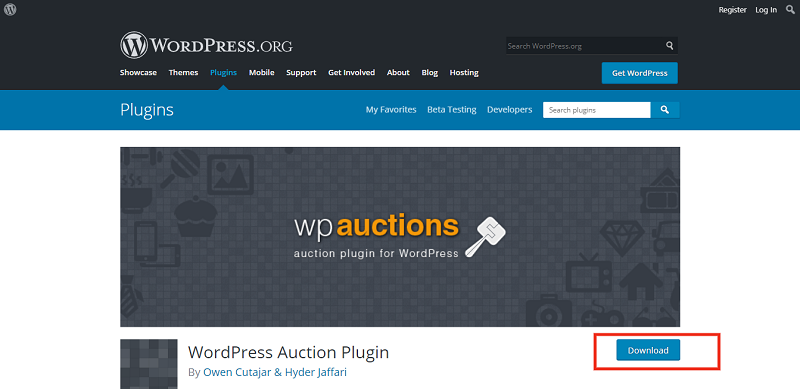
You need to open the first selected link and you can download it from the website.
- Then login into your website.
- Visit to the Plugins page and there click on Add New.
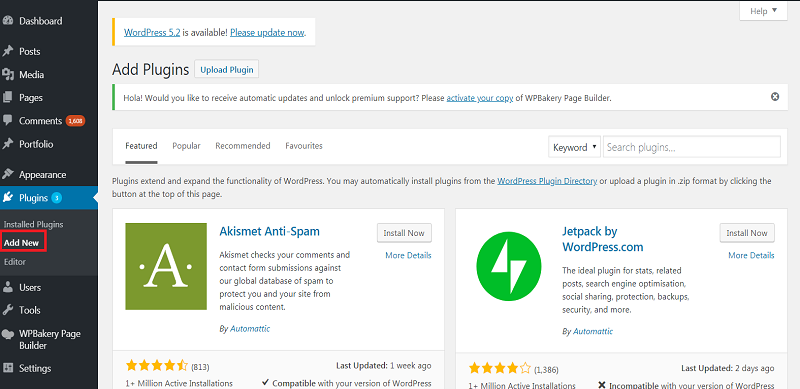
- Choose Upload Plugin to display the Plugin upload field.
- Open Choose File from local file directory.
- Choose the Plugin zip archive to upload and install.
- Click Install Now to install the WordPress Plugin.
- The installation screen will list the installation as successful or note any problems during the install.
- If it’s done successfully then click Activate Plugin to activate it, or Return to Plugin Installer for new installation.
How You Can Setup wp auction plugin
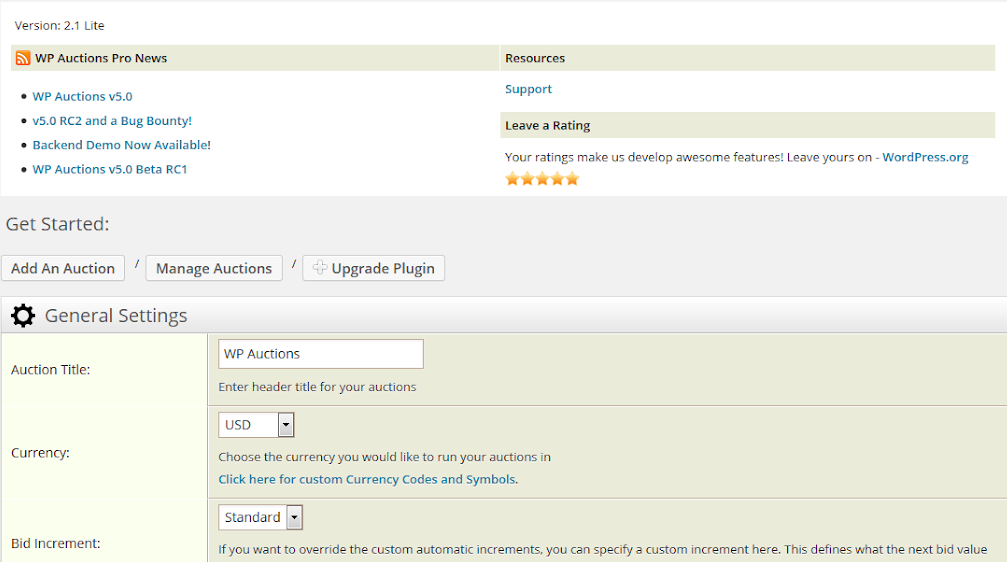
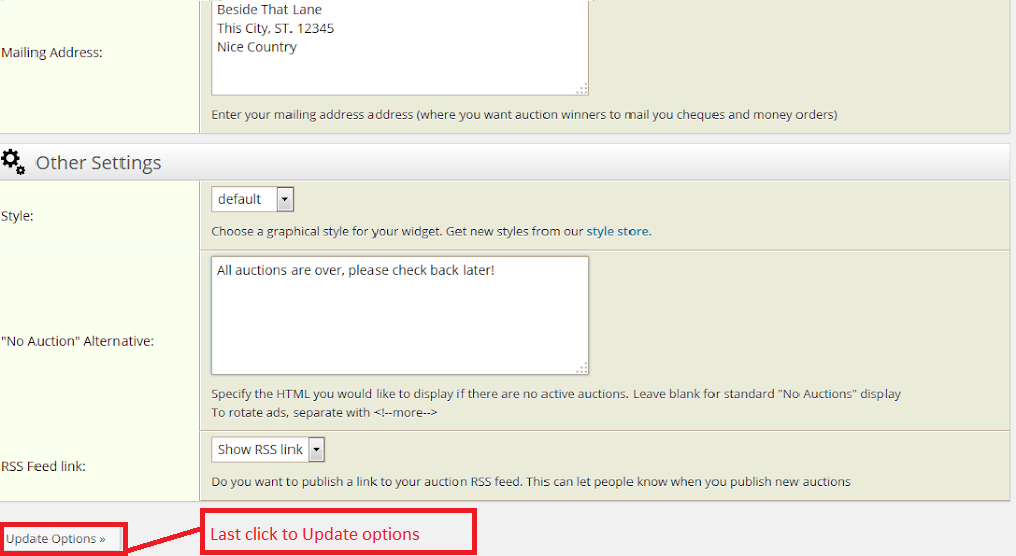
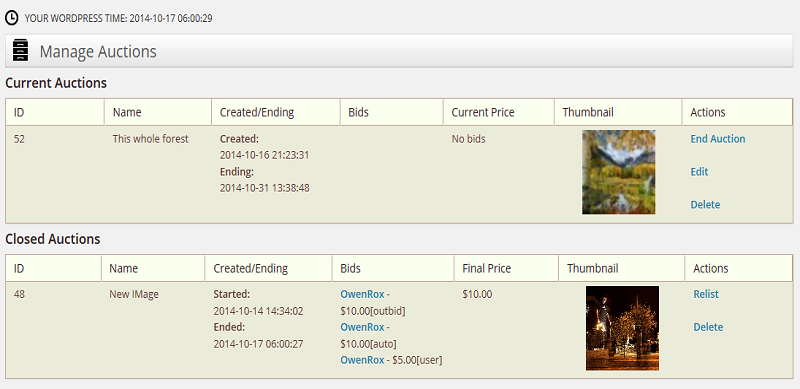
Please fill all the details and check screenshot step by step
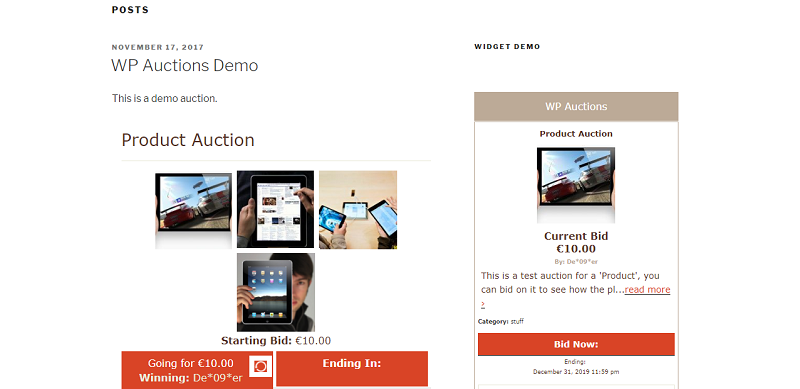
And then you can see in front-end:-
Professional Auction Plugin
This plugin provides the functionality to create a better auction site with following features…
Auction Feed Page
Auction Detail Page
Front End User Dashboard
Auction Categories
Professional Auction Plugin Installation
To install the plugin you need to follow some of the following steps:
- In the left of your dashboard under the plugin, tab click on add new.
- Then click on Upload File
- Choose your purchased file from local directory
- Then click on install.

You need to open the first selected link and you can download it from the website.
- Then login into your website.
- Visit to the Plugins page and there click on Add New.
- Choose Upload Plugin to display the Plugin upload field.
- Open Choose File from local file directory.
- Choose the Plugin zip archive to upload and install.
- Click Install Now to install the WordPress Plugin.
- The installation screen will list the installation as successful or note any problems during the install.
- If it’s done successfully then click Activate Plugin to activate it, or Return to Plugin Installer for new installation.
How You Can Setup Professional Auction Plugin
After install this plugin you will see one option Professional Auction and please setup which you have a requirement as you can see also in back-end:-
Activation:
Now click to install button and last click to activate the button.
Then last click to activate button and show your plugin on website dashboard Ultimate Auction Pro” tab in the left of your dashboard.
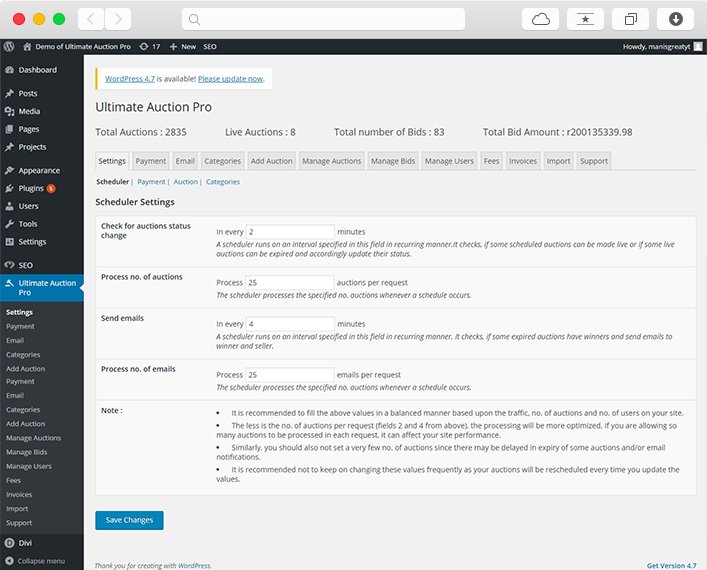
Setup: After install and activate this plugin you will get many options to setup auctions on your website. Like payment option , manage your users, setup the type of your auction, manage the bids according to your requirements.
Now the time to check every option and manage their according to your need.
I hope this will help you to install and activate this plugin on your website.
Ultimate WordPress Auction Plugin
Ultimate WordPress Auction plugin is easy and quick way to setup auctions on your wordpress website.
Ultimate WordPress Auction Plugin Installation
Click to Plugins–>Add new–>Search this Plugin.
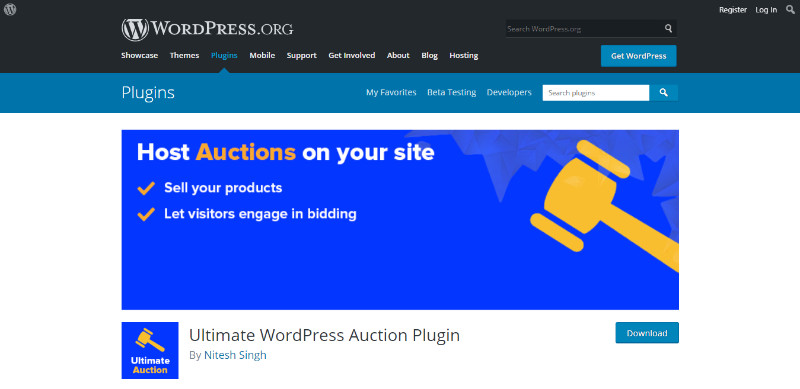
You need to open the first selected link and you can download it from the website.
- Then login into your website.
- Visit to the Plugins page and there click on Add New.
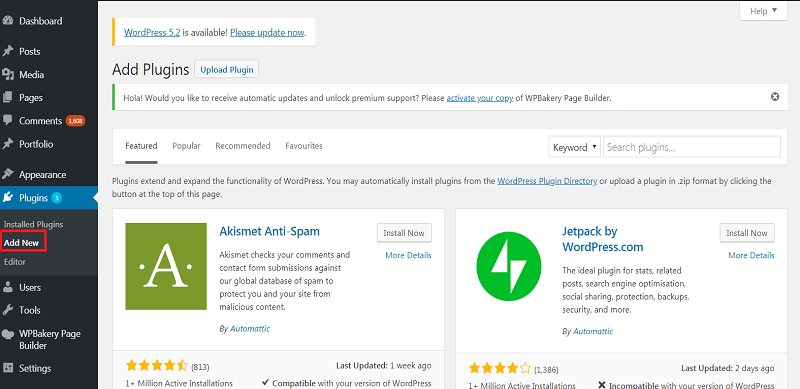
- Choose Upload Plugin to display the Plugin upload field.
- Open Choose File from local file directory.
- Choose the Plugin zip archive to upload and install.
- Click Install Now to install the WordPress Plugin.
- The installation screen will list the installation as successful or note any problems during the install.
- If it’s done successfully then click Activate Plugin to activate it, or Return to Plugin Installer for new installation.
How You Can Setup Ultimate WordPress Auction Plugin
Visit the settings tab of the plugin and enter –>payment settings and general settings.
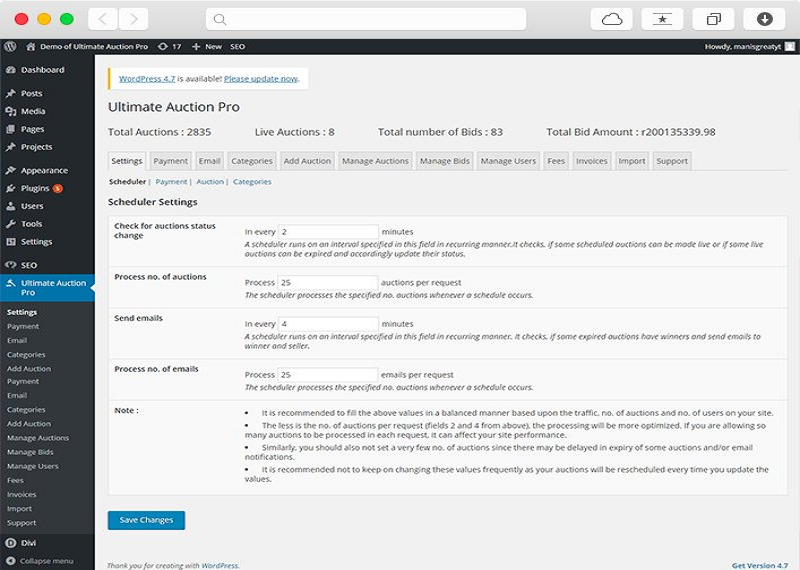
Auction Cron Scheduler:
Cron to check auction status
Control Cron schedule
Cron to send payment emails
Control email frequency
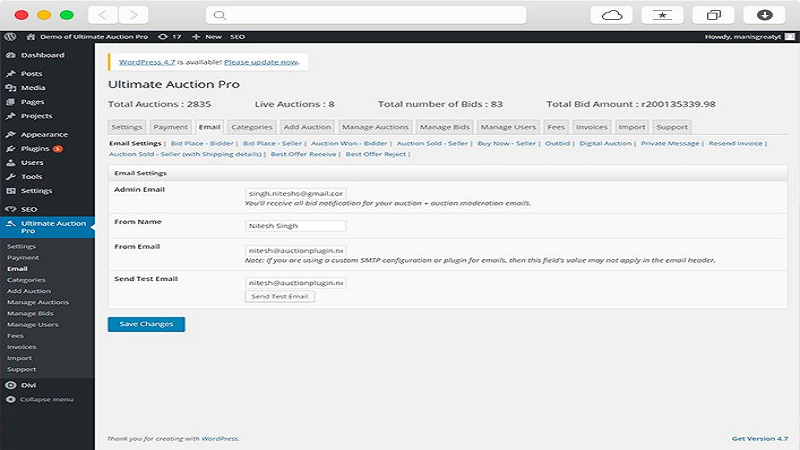
Customized Emails
Sample Test Email functionality
Set From Name and Email
Multiple Email Alerts
Configure Content of each email
More Admin Features
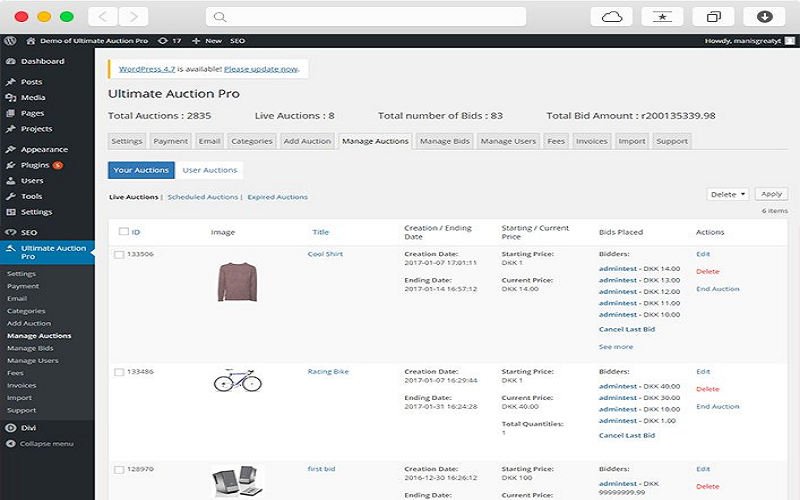
Track Bids
Allow user roles to add auctions
Set different
Progress Bar
Countdown Timer
Google Analytics Support
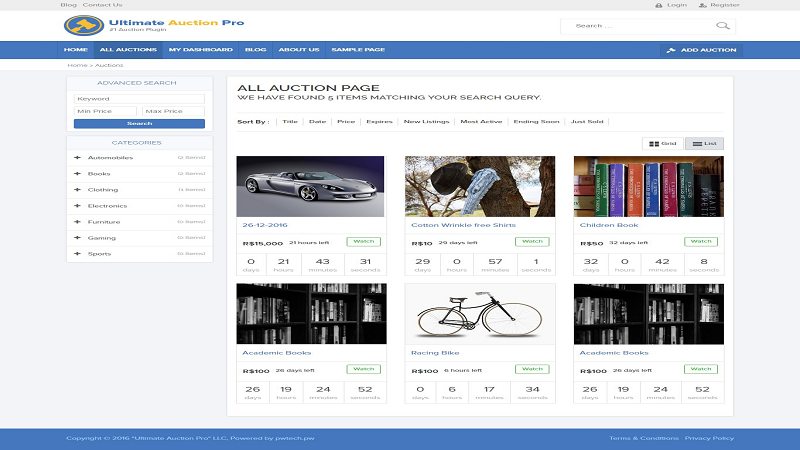
Custom FaviconAnd Enter this text Shortcode [wdm_auction_listing] new page and publish it.
Now show your output:
WordPress Auction Plugin
Popular Features on wordpress action plugin:
- Assign an auction to a Post/Page
- Upload an extra image
- Added Shipping price
- Custom contact field. Request phone numbers, addresses etc…
- Show auctions in a List or Graphic format.
- Allow only registered users to bid.
- Host as many auctions as you like.
- Upload an image for your auction.
- Use PayPal to accept payments.
- Set a specific end date and time, down to the second.
- Choice of 5 display styles.
- Sleek AJAX popup to show your auctions.
- You can use very easy your backend admin area to manage your auctions.
WordPress Auction Plugin Installation
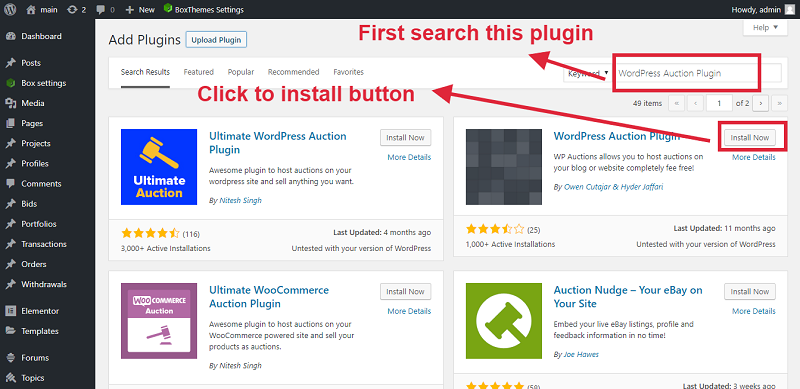
- Click to Plugins–>Add new
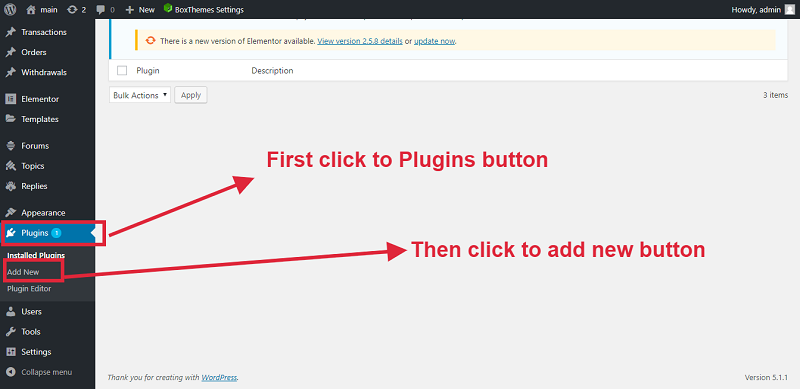
Now search this plugin and click to install button
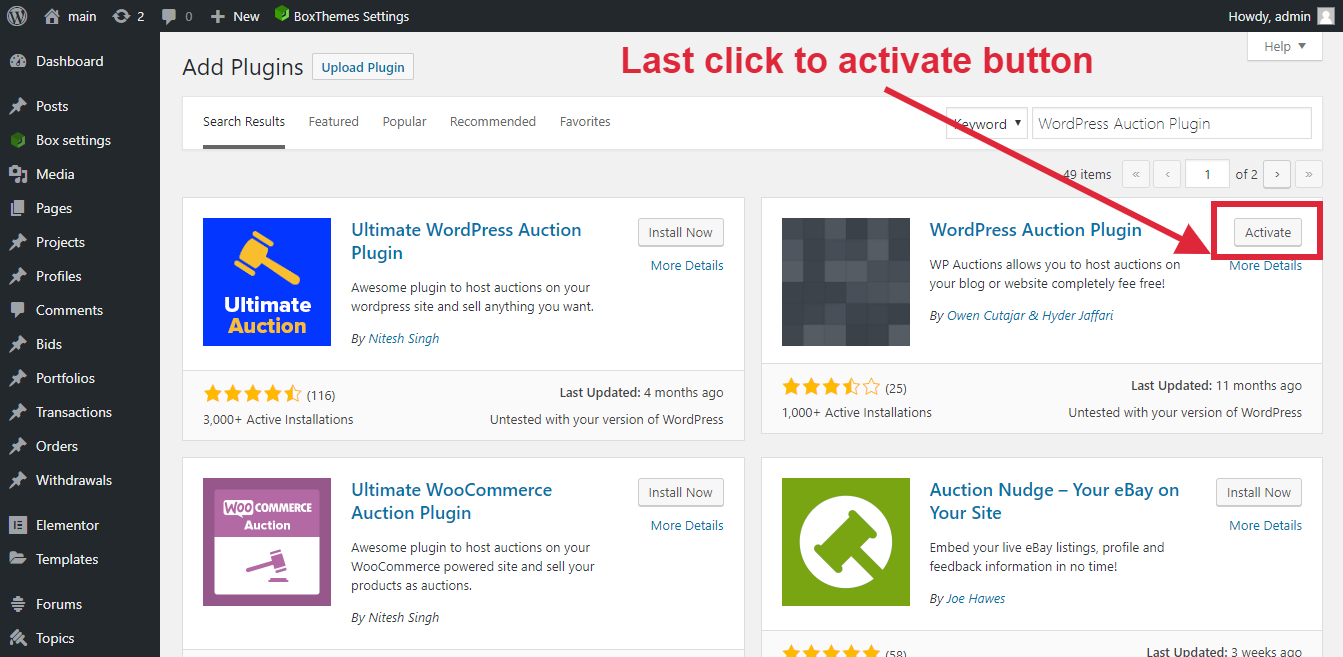
Now Click to Active button
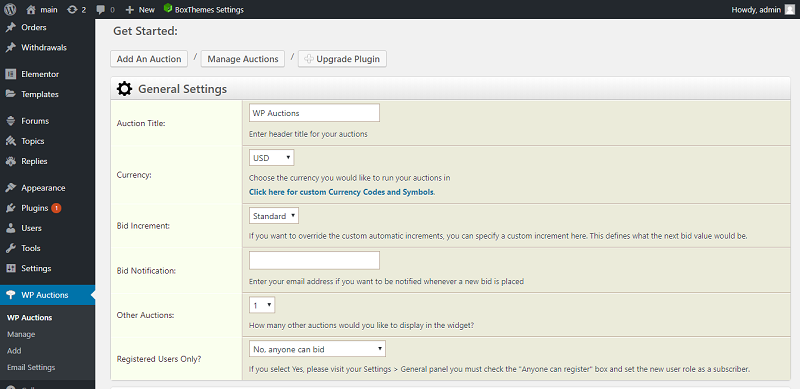
Please Set up these plugin from the WP Auctions menu in your website backend.
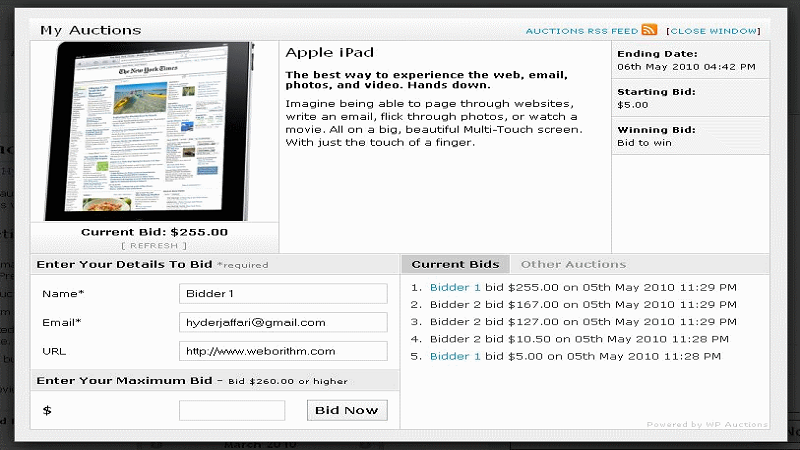
Now Show Your Front End
Auction Software Solution
WPAuctionSoftware plugin is a fully functional Auction Website.The plugin contains everything that is needed to enable you or your visitors to start listing items for sale on your website on an auction basis, including managing the bidding process, and collecting payments.
Auction Software Solution Plugin Installation
- Open website dashboard
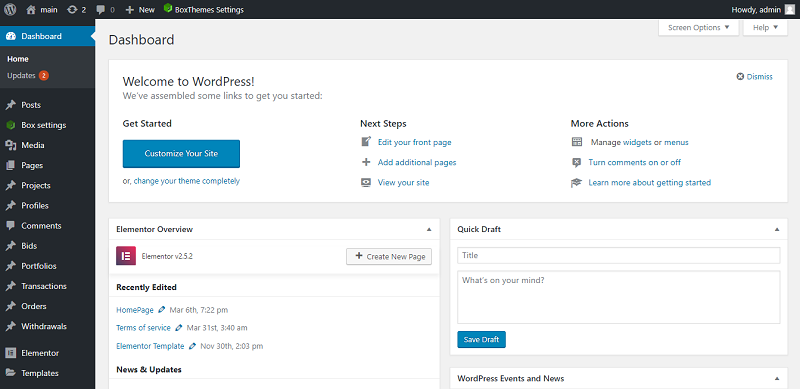
- Click to Plugins–>Add new
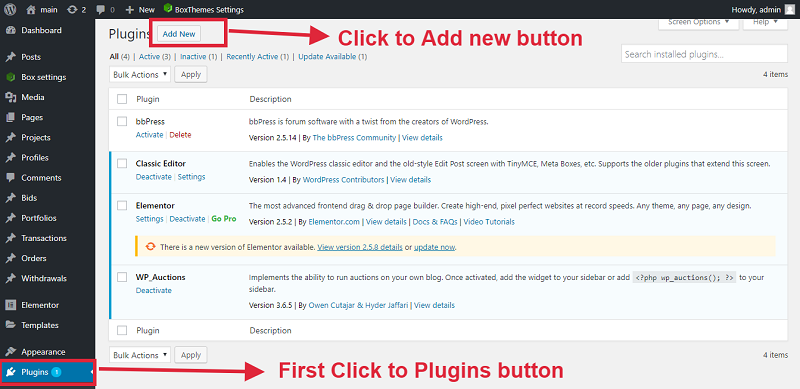
Search this Plugin and click to install now button and click to active button
Upload Plugin and click to install now button then activate button
Managing Your Auction website When you activate the plugin, a page named “Auction” is created which contains the shortcode [mam-auction].
This page will display auctions created by your account and other settings and setup all setting step by step.
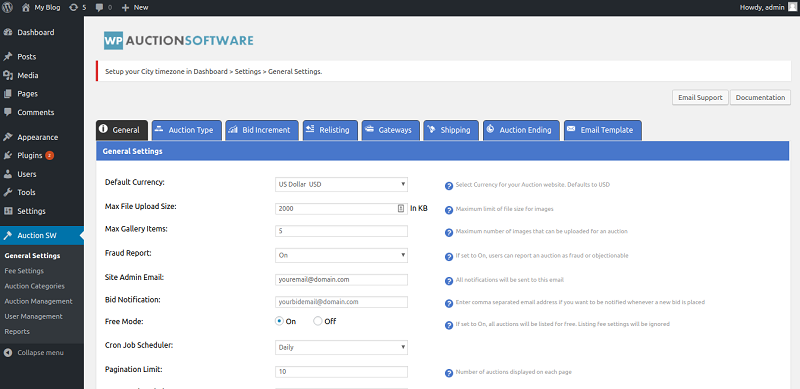
1)Bid Increment Choose the Default Increments for different price ranges here. For e.g. You may want to have the next bid at $10 more than the previous one, if the price range of the auction has reached above $10 and below $100
2)Relisting Auctions Use this setting to limit the maximum number of times that an auction can be re-listed. Set to 0 for unlimited.
3)Gateways You can choose the payment gateways to enable for Auction Listing (Paypal and Authorize.net included by Default). Stripe is available as an Add-On.
4)Shipping For Physical Products, you can enable Shipping Methods here
5)Auction Ending Set Default Value for Auction Ending (If not successfully bid before the end date). You can also setup Anti-Sniping minutes (Prevent Automated Bids by Bots)
6)Email Templates Email Templates for various notifications can be modified in this section and setup all direction step by step
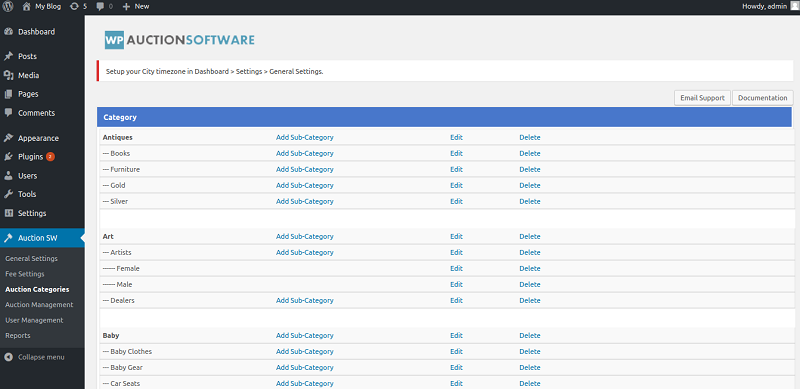
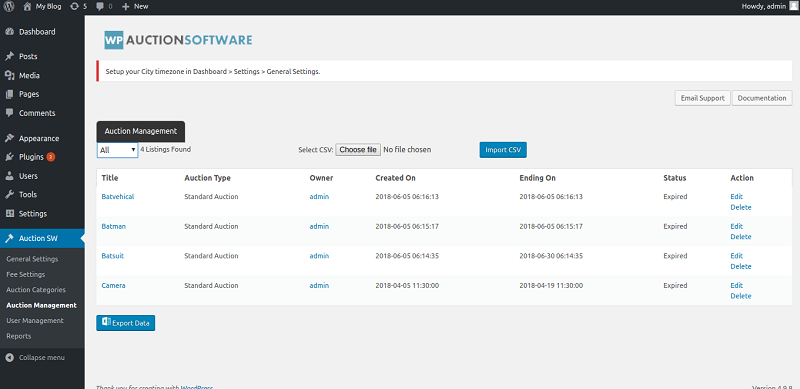
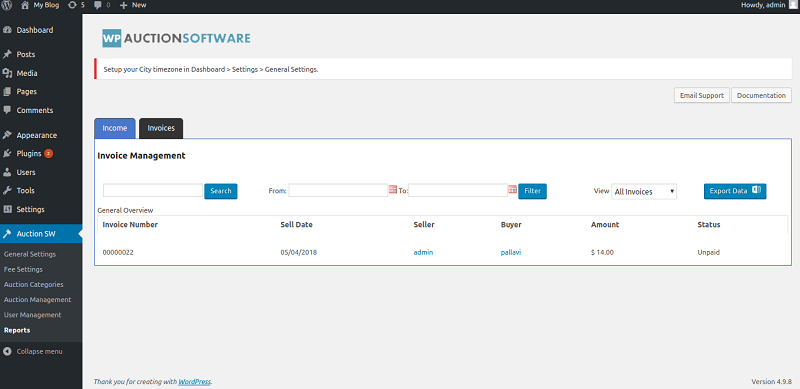
auctions_per_page : The number of auctions that you want to display on a single page.Here, the shortcode is added on a page named Star with auction type as active and number of auctions per page as 4.
Now use this short-code :
[listactions auctiontype=active auctions_per_page=4]
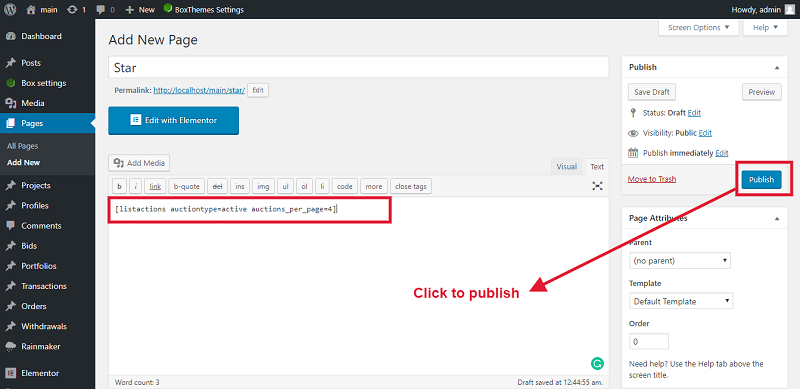
And check you result :
