Top Free WordPress Live Chat Plugins Installation with Set Up
Last updated on September 5th, 2023 at 04:39 am
WP Live Chat Support
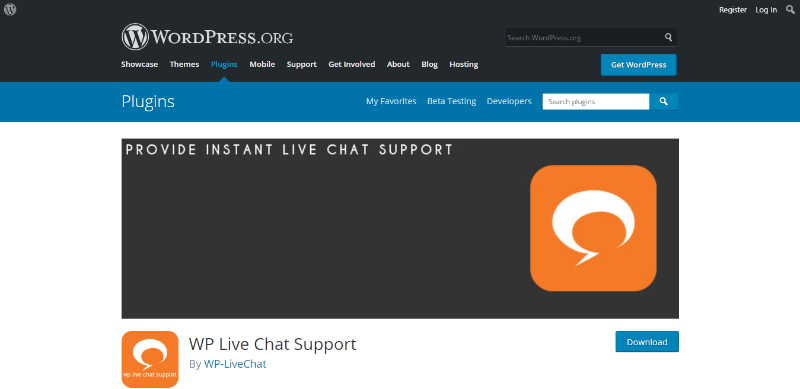
Wp Live Chat Support is a free plugin commonly used for adding live chat on your site to better understand visitors and increase your conversion rates.
How to install WP Live Chat Support
- Login into your dashboard
- Under the “Plugins” tab Click on “Add new” and search for the plugin name
- Click “Install now” button to install it on your site
- Click “Activate” to finish the installation.
How to setup WP Live Chat Support plugin
- Go back to the dashboard.
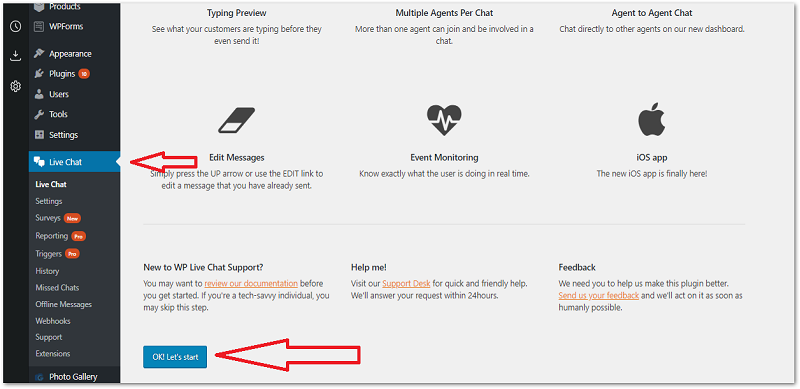
- Click on “Live Chat” on the left side menu of the dashboard.
- Click “Ok! Let’s start”
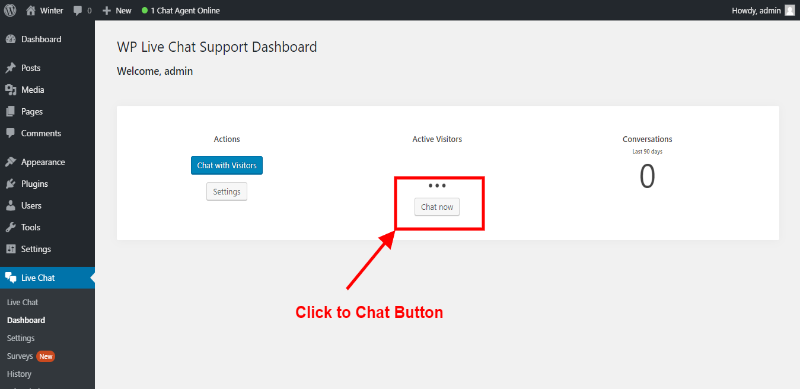
- Chatbox widget will automatically appear on the lower right side of your site.
- Once a visitor enters the chat just click on “Accept Chat” to start chatting.
Provide Support Live Chat
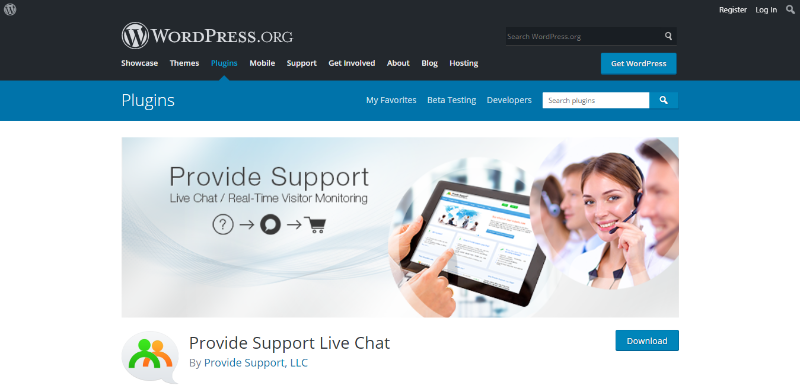
Provide Support Live Chat is paid powerful tool for adding chat functionality on your site, it can also monitor and navigate visitors on your site.
How to install Provide Support Live Chat
- Open your WP dashboard
- Navigate into “Plugins” tab and then Click on “Add new” button
- Search for the plugin name on the search bar
- Click “Install Now” button to install it on your site
- Click “Activate”
How to setup Provide Support Live Chat plugin
- Go back to the dashboard.
- Click on ”Provide Support Live Chat” on the left side menu of the dashboard.
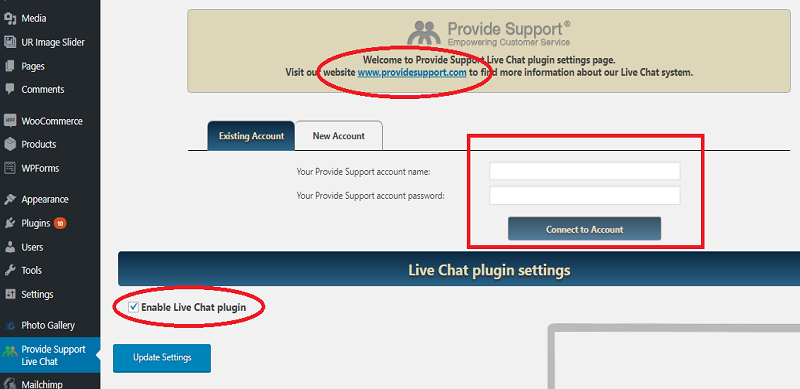
- Click their website url provided on the top to make an account.
- Login the account registered on their site and click on “Connect to Account”
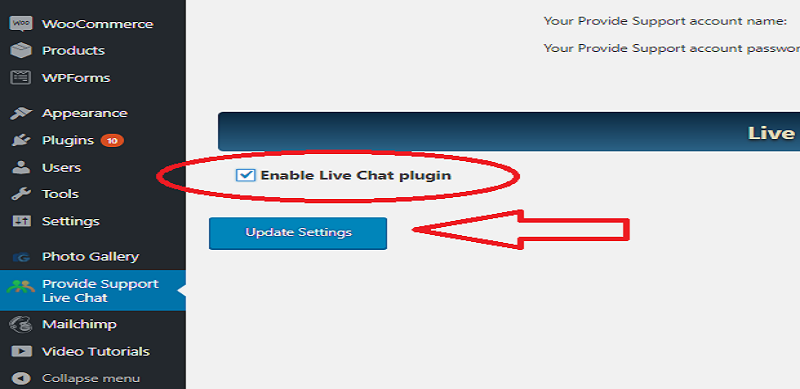
- Don’t forget to check the “Enable Live Chat plugin” checkbox under live chat plugin settings.
- Click on update settings and your chat box is ready to use.
Zendesk Support for WordPress
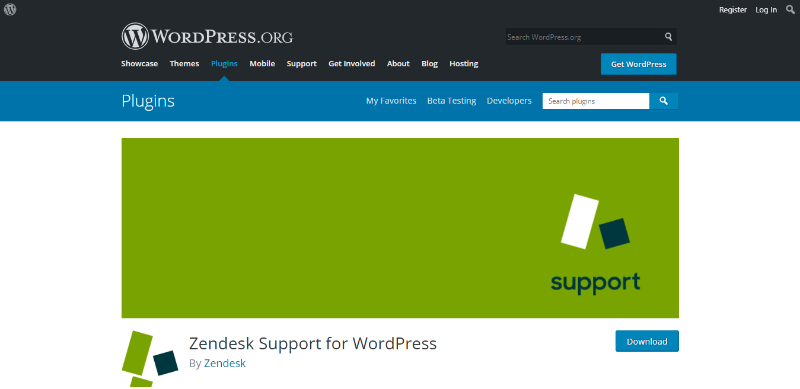
Zendesk Support For WordPress is another paid plugin that is mainly use for support features. You can add live chat, contact us form widget and many more on your site.
How to install Zendesk Support for WordPress
- Login into your site dashboard.
- Go to “Plugins” tab on the left side menu then click on “Add new”
- Search for the plugin name on the search bar.
- There you click on the “Install Now” button and wait for the installation process to be complete.
- Click “Activate” to activate the plugin.
How to setup Zendesk Support for WordPress plugin
- First you need to register an account on their site https://www.zendesk.com/register/ to get your Zendesk subdomain.
- Go back to the Dashboard and click “Zendesk” on the left side menu.
- There submit your Zendesk Subdomain and then click on the “Save Changes”
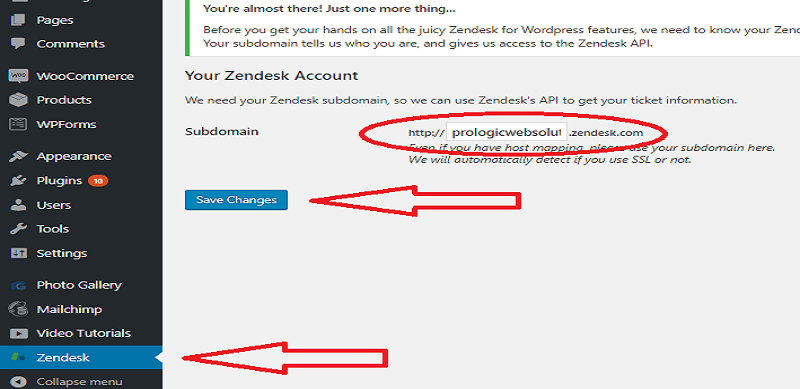
- You will be redirected into zendesk’s plugin settings.
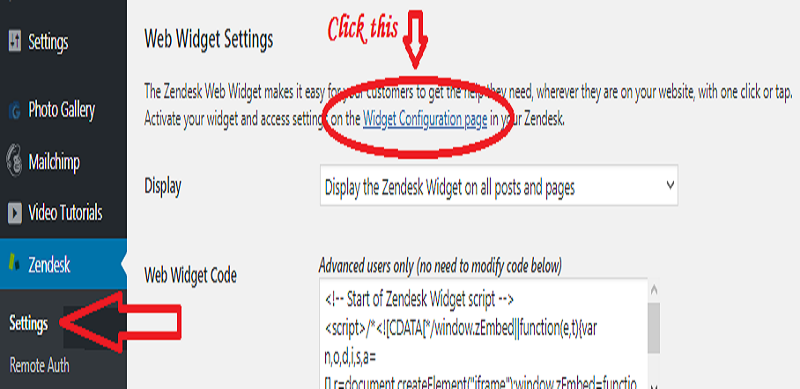
- Click “Widget Configuration Page” under Web Widget Settings to enter your Zendesk account admin page.
- On Zendesk account admin page enable the “Chat” using the slide switch and click on “Save” button below
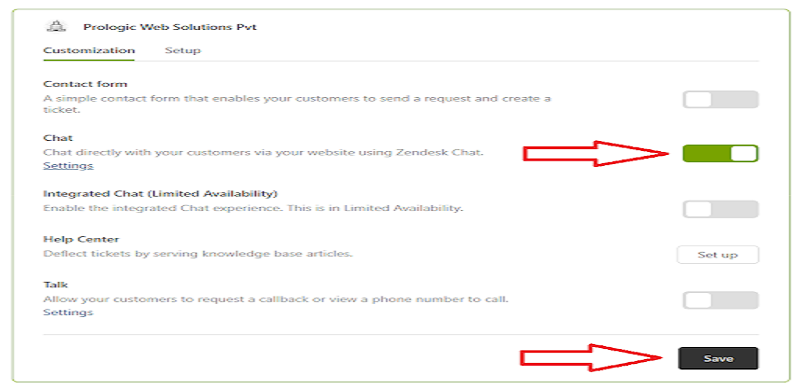
- There click on the “Setup” Tab button and copy the widget code.
- To add the chat widget on your site you need to go back to the WP dashboard
- Click “Editor” under “Appearance” tab on the dashboard left side menu.
- On Editor page click on “Theme Header” located on the right side of the page.
- On Editor page click on “Theme Header” located on the right side of the page.
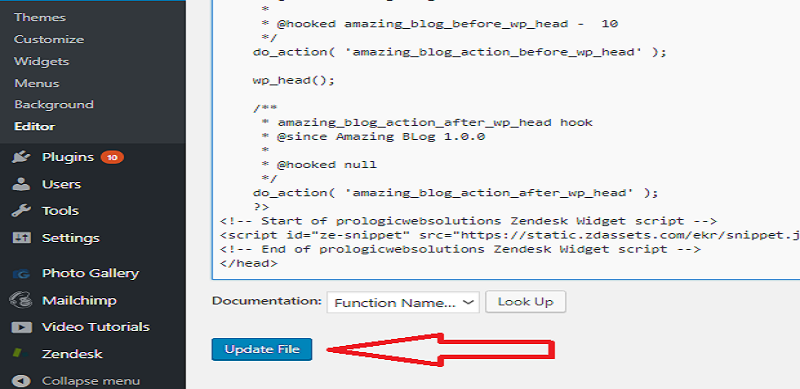
- On theme header codes, paste the widget code that you copied on step #7 before the </head> tag as shown on the screenshot below
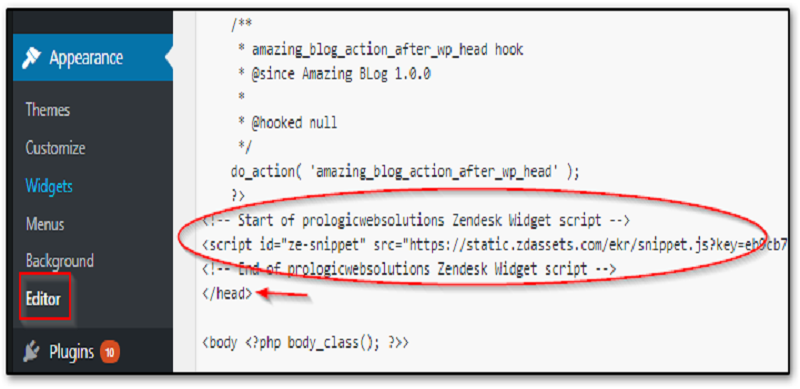
- Click “Update File” and this will add the chat button/widget on your site.
Casengo Live Chat Support
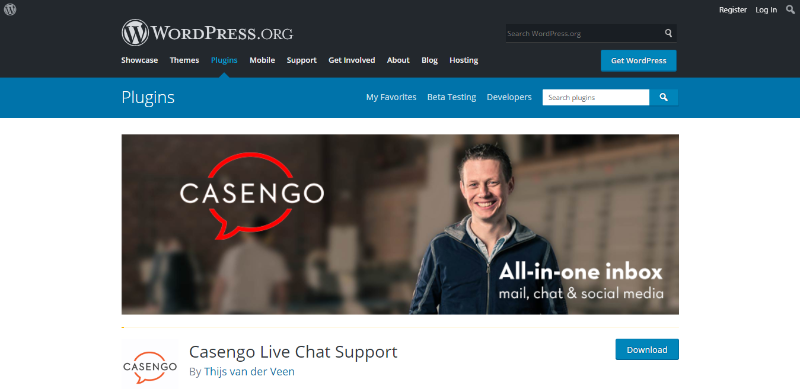
Casengo Live Chat Support is a paid plugin that allows you to add live chat widget on your site quickly and easily.
How to install Casengo Live Chat Support
- Go to your Dashboard
- On the left side menu of the dashboard, located under “Plugins” tab Click “Add New”
- Write “Casengo Live Chat Support” on the search bar, it will automatically search for the plugin.
- Then there click on the “Install Now” button and wait for the installation to be complete.
- Click “Activate” to activate the plugin.
How to setup Casengo Live Chat Support Plugin
- First you need to register an account on their site https://login.casengo.com/register/ to get your Casengo subdomain.
- Go back to the Dashboard and click “Casengo (Chat)” on the left side menu.
- Enter your Casengo Subdomain.
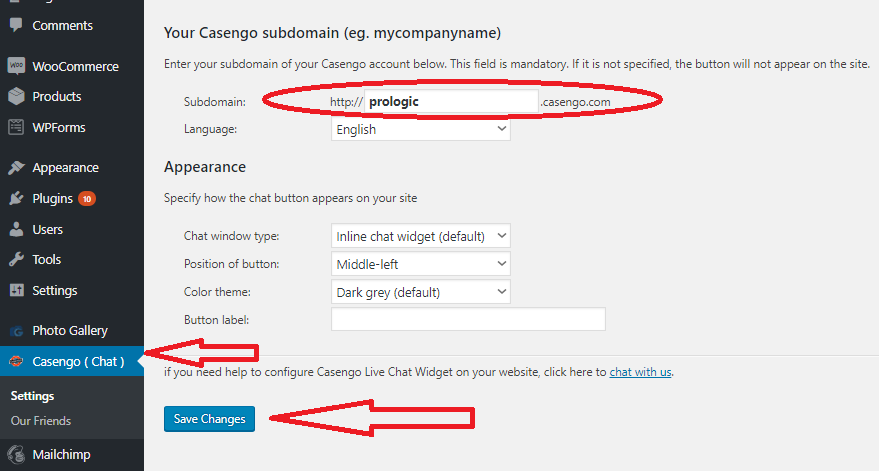
- You can specify the chat button appearance by selecting options on the dropdown menus
- Click “Save Changes” and the chat button will be on your site.


