What Is The Facebook Pixel?
Last updated on October 13th, 2021 at 11:31 am
Facebook pixel can be defined as a type of way which can be used to do marketing for user wordpress websites and also guide all visitors and customers to the same wordpress website. This will directly increase the rate of conversions. In other words, we can say that it is a type of small code that provides the ability to do all the things that are present below such as.
- Track conversions
- Encourage more sales.
- All adds visits reach the correct people
- Help to boost a post.
Now let’s discuss in short them.
- Track Conversions- help to provide a direct result with the help of Facebook ads.
- Encourage more sales:- retarget all visitors and help to convert visitors into customers With the help of this conversion users can directly increase their sales.
- All adds reach to correct people:- with the help of character getting visitors after that user will provide pure formation of Leaves and all advertisement reach to the correct people or the required people.
- Help to boost the post:- with the help of this thing users can make their all Facebook and as much as efficient it according to their requirements.
In this case, now we should learn something about “Standard Events”, “Custom events”, and “Custom audience”.
Standard Events
When Any type of user visits your WordPress website and clicks on your website then an event function is called. with the help of Facebook pixel, we can capture every single event that has been called by any visitor or a customer. for that user just start login in some kind of information which are required for the format of Facebook pixel to capture each event. This standard event is that type of event in which a complete Facebook team defines these events. it contains or includes add to cart, payment info, complete the registration process, lead generation process, purchase, and subscribe. Users can have a look at how these all can be used in the terms of marketing.
Note:- the old standard event is released from some kind of advertisement or organic search.
Custom Events:- According to this event Facebook never includes into the standard event list that type of event falls under the Custom event list. These events may also be known as specific usable events. These events are to be used according to the user requirement. There is some specific parameter present in this event.
Custom Audience:- Those users are using Facebook pixel they can create their separate groups according to the user’s requirement with the help of the custom audience. this type of movement is to be sent or make it as public our Facebook platform 16 that those people required can match their pattern with these kinds of groups with the help of the custom audience.
How to install Facebook Pixel?
This can be installed with two different methods. These users can visit manually or it can be done with the help of the WordPress plugin. According to our expert research, it is proved that users quicker install Facebook pixel into the WordPress plugin. Let’s move ahead step by step.
How to Create Pixel?
Before this user must have a Facebook account then we should move ahead. Now we are assuming that we are having a Facebook account.
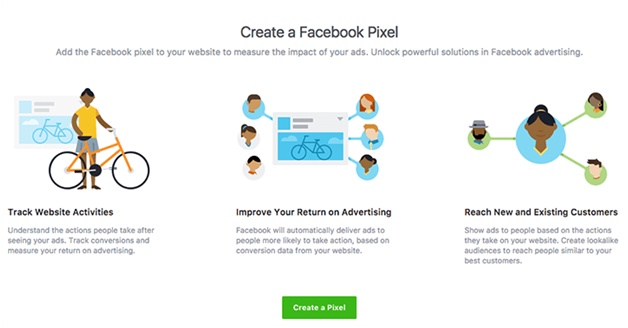
Now user needs to create the pixels. However, the user needs to follow all the links given below.
- User need to visit the Facebook event manager after that user need to click on the “hamburger” icon (≡) and then user need will see a lot of option over there after that user needs to click on the “Pixels” options.
- Now in front of the user pixels tab appears. After that the user can create pixels in this tab.
- Now user needs to create a website url and able to click on the create “option”.
Now the new ID has been generated. The same ID is required in the further process to connect Facebook pixels.
In the next step, the user needs to install a WordPress plugin by following all the steps which are given below.
Now user needs to install a Facebook plugin named “Pixel Caffeine”.
Basic steps to install and activate WordPress plugin is
- First of all, the user needs to visit the wordpress admin panel with the help of entering the correct credentials which are required. details that are required for login into the wordpress admin panel are username or Email Id and password.
- After successfully logged in to the wordpress admin panel, users need to click on the “Plugin” option.
- Now the supporter’s menu appears in front of the user but with lots of options but the user needs to click on the “ Add New Plugin” option. Check out the image given below.
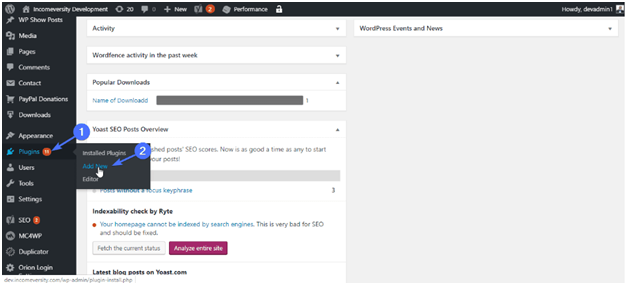
- A new tab appears in front of the user now the user needs to add a Keyword in the search box panel which appears on the right side of the page.
How to install and activate the Pixel Caffeine plugin in the wordpress directory?
- The user needs to type the “Pixel Caffeine” Keyword in the search box.
- After that user needs to click on the first option from the complete list.
- Now the user needs to click on install and after successfully installing complete the user needs to click on the Activate button. Check out the image given below.
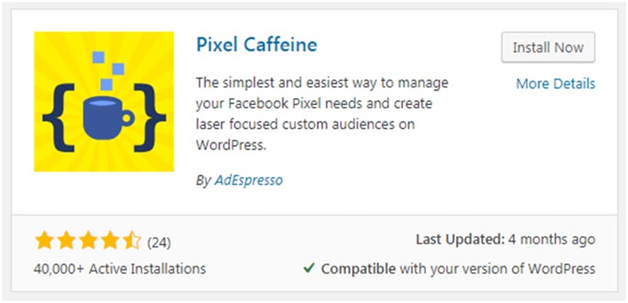
Now after activating and installing the user successfully move ahead with the next step.
- Now user needs to enter the Pixel Caffeine setting option.
- Then the user needs to enter the similar id that has been placed over there above.
- After that user needs to click on the Facebook connect options.
- Now user needs to scroll the complete page downwards and the user will see the “save” option. The user needs to click on that options.
If all things are working according to the plans then the user needs to take a step ahead.
Create Custom Audiences- Now users need to create custom audiences for that users need to choose the “Custom Audience” section. Check out the image given below.
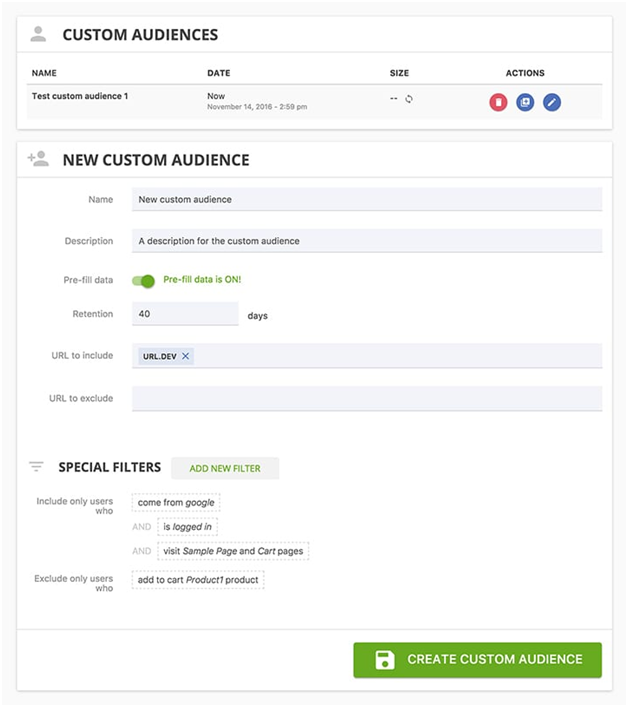
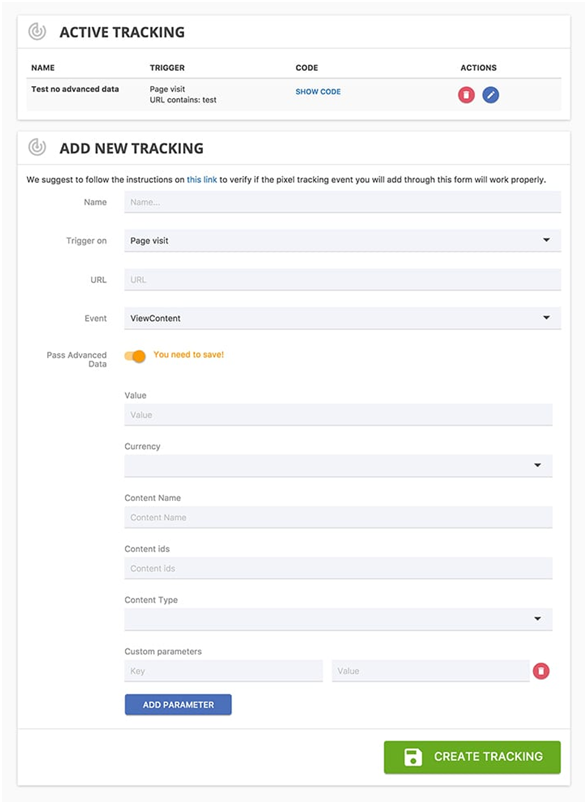
- Add the standard or custom events:- We can also say that custom “Conversion/Events” sections. Check out the image given below.
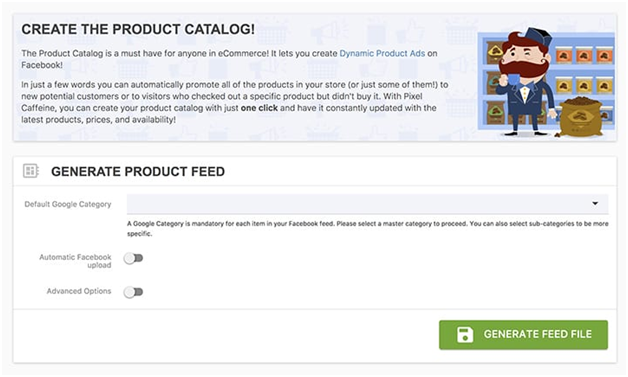
- Now it’s time to create a product catalog, This catalog provides help if you are maintaining an e-store. Check out the image to match your accuracy.
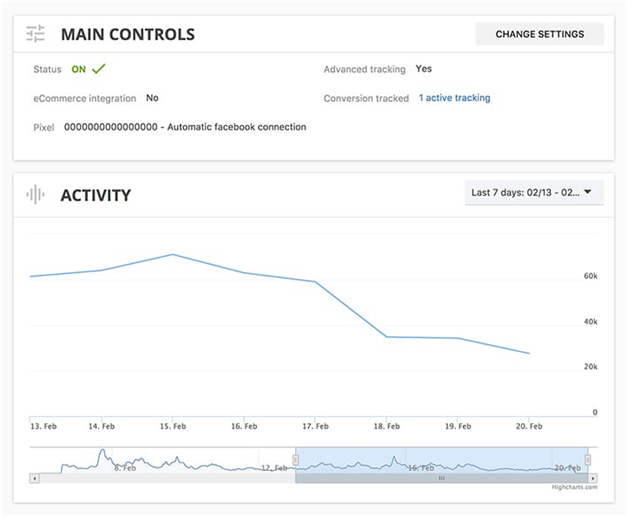
- Now User can check complete activity into the pixel caffeine plugin so that users can check out the dashboard of their withuser activity on their e-store.
After that user can successfully add Facebook pixel with the help of the wordpress plugin. If the user still faces any kind of issue then the user needs to ask their own query with our technical support.


