WordPress favicon
Last updated on June 9th, 2023 at 07:11 am
Wordpress favicon is a type of image which is present on the website title in the browser. In other words, we can say that it is a type of site icon. This is used to left a good and attractive impression on the users. It will directly affect your business to increase your brand value. In this complete article, we are going to show so all users how to add wordpress favicon in detail so read this complete article carefully.
What is the reason behind adding a wordpress favicon (icon) on your wordpress website?
As we discussed in the above paragraph that it is a type of website identity or a website icon to create a brand value. Users can follow the image given below it will help to understand in a better way.

Many users having a habit to open a lot of tab in a single browser window. Then it directly hides your tab title the only thing which is visible is the site icon.

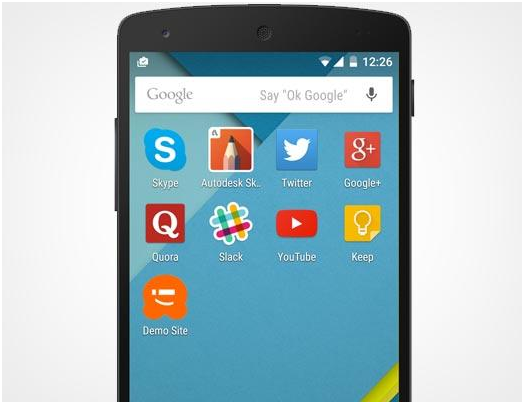
If users add their website to their mobile home screen then the favicon icon is used as a logo on the home screen of the mobile. Check out the image which is given below.
How to create/change wordpress favicons?
Favicon is a type of icon or a brand logo to create a website’s unique identification. It is to be created through lots of editing tools such as Photoshop, illustrator, and many more. There is a particular default size is to be there for WordPress favicons. The size is present in pixels. Juan the default size is 512 pixels on both sides such as width and height. Users must remember this point that the website icon image should be in a square or a rectangle. WordPress favicons image should be cropped by WordPress at the time when the users add the image. After doing a lot of research our experts suggest that users must choose the Adobe Photoshop tool to create or design their site icon. There are various types of editing tools present in today’s era but Photoshop users can add a site icon ratio that is 512×512 pixels can be maintained in a proper proportion. WordPress only accept favicons in PNG, JPG, or GIF format. There are main three ways to create a website icon such as.
- Modifying your existing site logo
- Designer to be hired
- User can do their own
User can modify the existing site logo
this is the simplest method and fastest route to creating wordpress favicons for the existing website. Users can choose the site icon from the WordPress website logo. If the logo is fitted into wordpress favicons then the user does not require to crop or edit their website logo. It can be used as it is else it doesn’t happen then users must be required to add or modify their existing website logo.
Hiring a qualified designer
If the user is not satisfied with the above method then the user may pay a certain amount to hire a qualified designer to design their WordPress favicon. It depends on the user how much amount is to be spent to hire a qualified designer. After that user will get a professional WordPress favicon for the wordpress website.
User can do their own
If any user having skills of using photo editing tool then the user can use their skill and ability to convert website logo into WordPress favicons. Apart from that users can also use online tools that are Especially created or design by the developers these are Faviconer. Understood user having lots of options such as drop custom icon and upload an image. After that complete work can be done by the tool.
What is the perfect format for wordpress favicon?
If we go in past days and search out which format does what place favicon uploaded then it shows that ICO file format had been uploaded. The ICO file format makes it possible to adjust all types of browsers. However now wordpress accept almost all type of images file format to add website icon such JPG PNG gif and ICO formats.
Above we discuss which type of format is accepted by WordPress now let’s have a look at the size of the icon. This is a default size the user must create an image 512px for both sides such as width and height. With the help of this size, the user will get a perfectly square image, and the user no need to crop the image it will automatically adjust and don’t wordpress the favicon area.
How to upload a favicon on a wordpress website?
First of all, users need to make a proper website icon with a proper size which is given above. After that, there are several ways to upload the WordPress favicon. If any user want to upload WordPress favicon manually
Upload wordpress favicon to an older version of WordPress (4.2 or below).
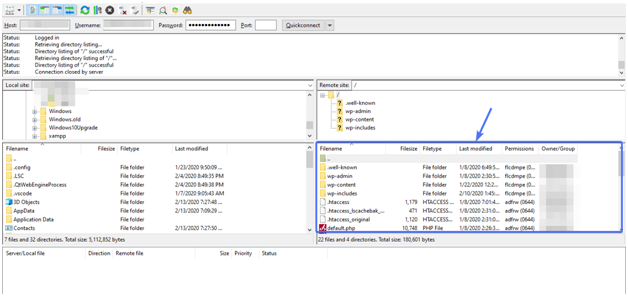
- First of all, the user must go to the root directory of the file.
- Then the user must search out the public HTML folder which is present in the root directory. This folder contains all WP files. Image is given below
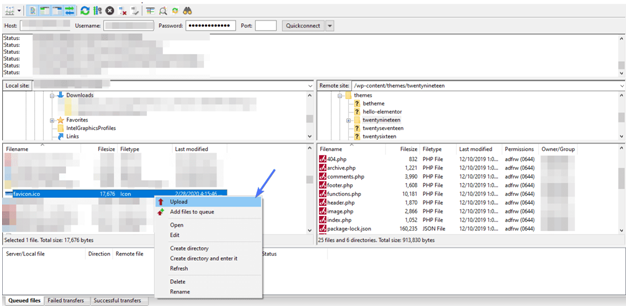
- After uploading the image user must apply the code given below into the header.PHP file.
- This code will be placed before the head tag.
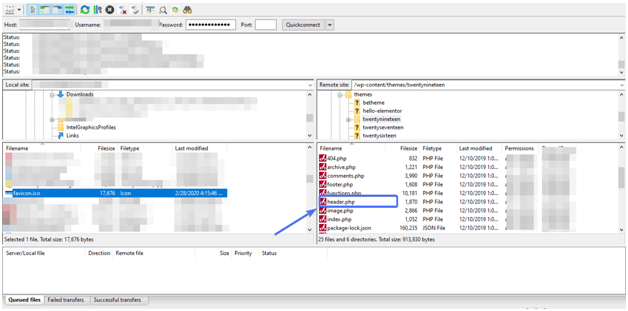
Users can get the wordpress favicon directly with the help of a file transfer protocol. In that user must require to paste check code into header.PHP file
<link rel=”icon” href=”https://www.example.com/favicon.png” type=”image/x-icon” />
<link rel=”shortcut icon” href=”https://www.example.com/favicon.png” type=”image/x-icon” />
Here a user must replace example.com with your website name or website URL address.
If the user does not fine their header.PHP file into FTP the user no need to worry about that. User must update their wordpress version. After that user may go for the plugin option.
Uploading favicon with the help of WordPress customizer
There is another method user can upload the favicon to a wordpress website by direct login into the admin panel of WordPress. This is the easiest method that is available inside the wordpress without writing a single line of code. But users are required to update their WordPress above version 4.3.
- First of all, users need to login into their wordpress admin panel by entering the proper detail Which is required to log in.
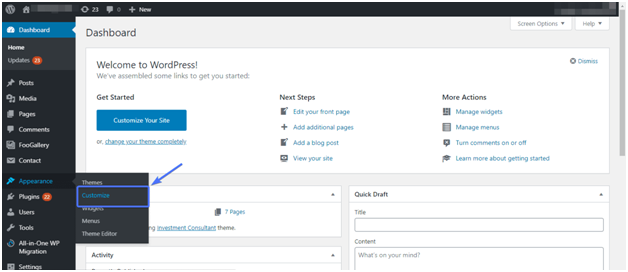
- After that user click on the Appearance tab which is present on the left side of the screen.
- Then A sub-context menu appears in the front user where the user needs to click on the customize option. Check out the image which is given below.
- On the left side of the screen, the user can see the select site icon. On that button, the user needs to click and upload the site icon user wants to.
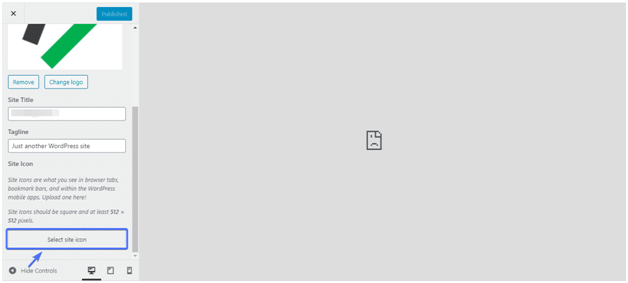
- After uploading files successfully users click on the publish button. Then finally wordpress favicon icon has been published. Chat Now


